
Halloween food is even more fun when it comes with a playful spooky twist. These 10 Ghost Recipes for a Spooky Halloween Party bring together sweet treats, savory dishes, and creative snacks that look festive without requiring complicated techniques.
From cheerful ghost bananas and cheesy pizzas to decorated cupcakes, brownies, and comforting dinners, there is something for every table. Each idea is simple to customize, making these recipes perfect for parties, family celebrations, or a memorable Halloween night at home.
1. Chocolate Chip Ghost Bananas
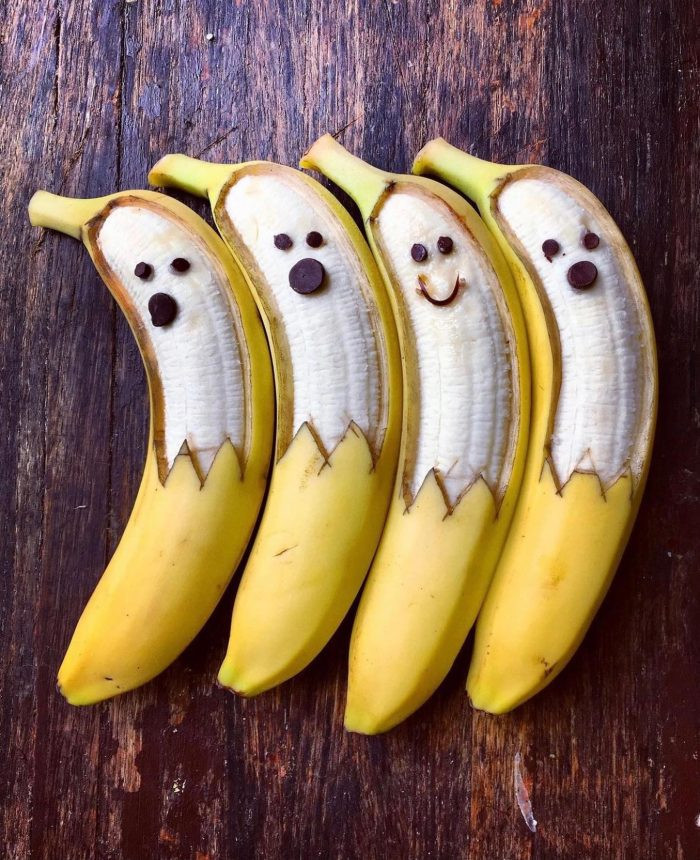
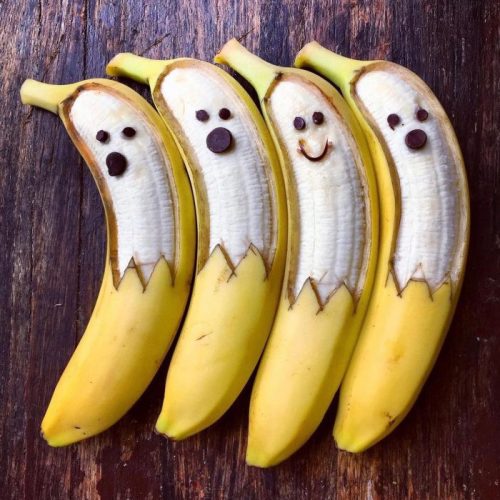
These Chocolate Chip Ghost Bananas turn an everyday fruit into a playful Halloween snack with almost no preparation. Partially peeling each banana creates a natural ghostly white body, while chocolate chips form expressive eyes and mouths.
They are sweet, creamy, naturally portable, and easy enough for children to help decorate. Serve them at a Halloween breakfast, after-school party, or alongside richer seasonal desserts for a lighter option. Each ghost can have a different expression, making the finished platter especially fun.
Chocolate Chip Ghost Bananas

Ingredients
- 4 ripe but firm bananas
- 12-16 mini semisweet chocolate chips
- 4 regular semisweet chocolate chips
- 1 tsp lemon juice, optional
- 1 tsp water, optional
Instructions
- Choose firm yellow bananas without too many brown spots so they hold their shape.
- Starting near the stem, carefully cut or peel away the front portion of each banana skin, leaving the lower peel attached.
- Trim the exposed edge of the peel into small irregular points to resemble the ragged bottom of a ghost costume.
- If preparing them ahead, combine lemon juice and water and lightly brush the exposed banana to slow browning.
- Press two mini chocolate chips into each banana to create the ghost's eyes.
- Add a larger chocolate chip beneath the eyes for an open mouth. Create different expressions by changing the placement or shape of the chocolate.
- Arrange the ghost bananas together on a dark wooden board or Halloween platter and serve shortly after assembling.
2. Jack-O’-Lantern Cheese Quesadillas
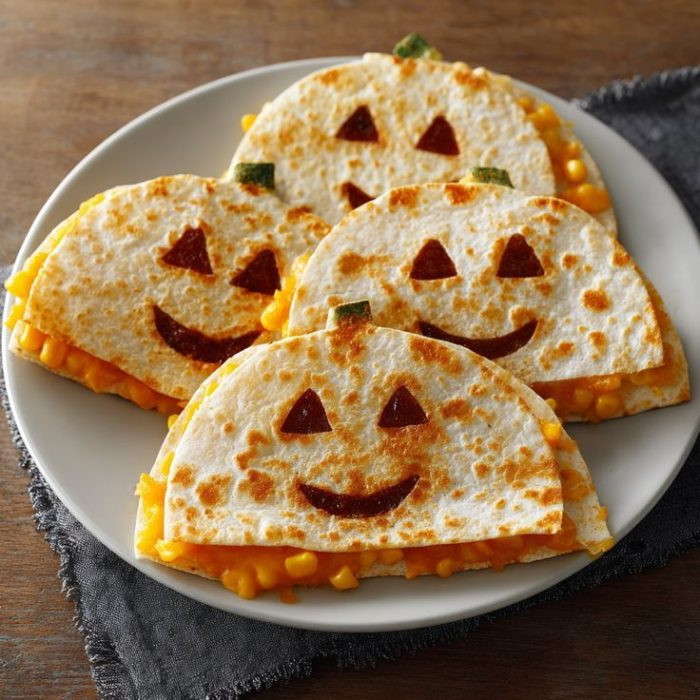
These cheerful Jack-O’-Lantern Cheese Quesadillas bring Halloween character to an easy savory meal. Flour tortillas are folded around a gooey combination of cheddar, Monterey Jack, and sweet corn, then toasted until lightly crisp and golden.
Simple cutout eyes and smiles transform the tortillas into miniature pumpkins, while a small green pepper piece creates the stem. They work beautifully for a Halloween lunch, party platter, or quick October dinner. Add shredded chicken, beans, or finely chopped vegetables when you want something more substantial.
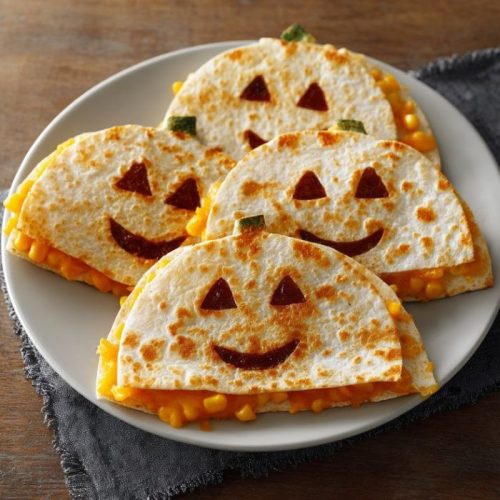
Jack-O'-Lantern Cheese Quesadillas
Ingredients
- 4 medium flour tortillas
- 1 cup shredded sharp cheddar cheese
- ½ cup shredded Monterey Jack cheese
- ½ cup cooked corn kernels
- 2 tbsp finely diced red bell pepper, optional
- 1 small green bell pepper
- 1 tbsp butter or neutral oil
- 2 tbsp tomato paste or thick salsa, for facial details
- Sour cream or salsa, for serving
Instructions
- Combine cheddar, Monterey Jack, corn, and diced bell pepper in a bowl.
- Fold each tortilla in half and lightly mark where the pumpkin face will appear.
- Carefully cut small triangular eyes and a curved jack-o'-lantern mouth into the upper half of each tortilla. Alternatively, use small pieces of tomato paste or roasted pepper to form the facial features after cooking.
- Open each tortilla and spread the cheese mixture evenly over one half, keeping a small border around the edge.
- Fold closed and cook in a lightly buttered skillet over medium-low heat for 2–3 minutes per side, until golden and the cheese has completely melted.
- Cut tiny rectangles from the green bell pepper and tuck one into the top of each quesadilla as a pumpkin stem.
- Serve immediately with salsa, guacamole, or sour cream.
3. Mashed Potato Ghost Cottage Pie
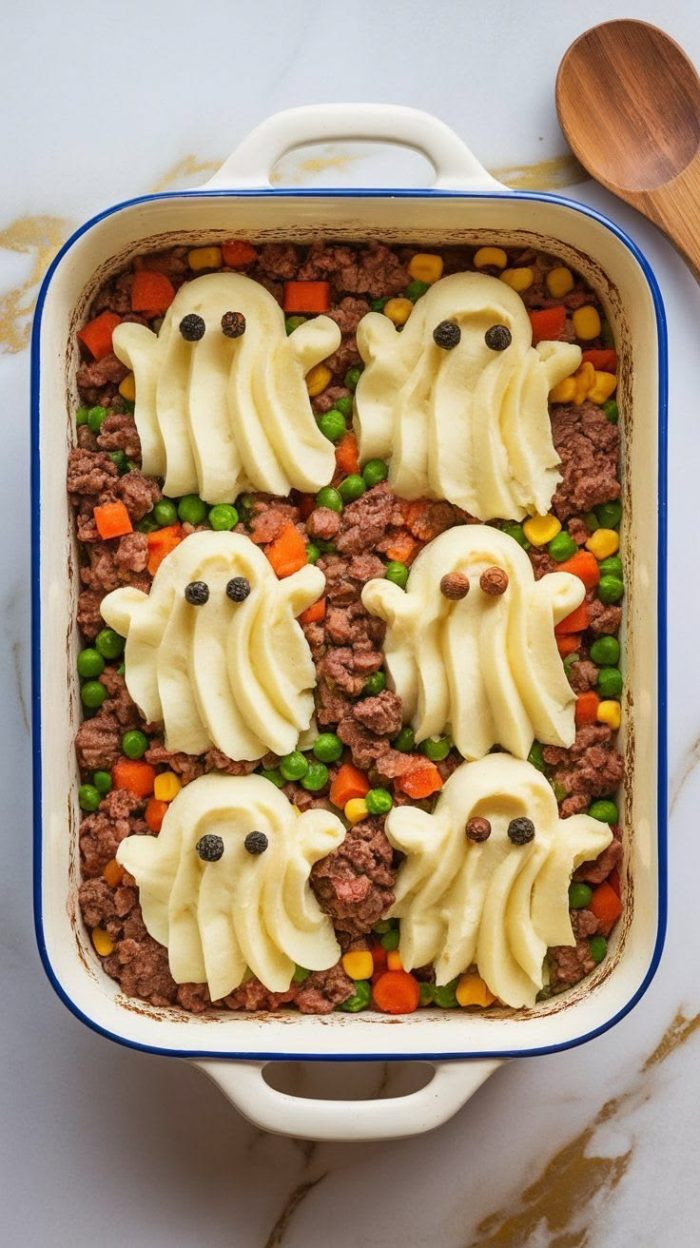
Mashed Potato Ghost Cottage Pie transforms comforting meat-and-vegetable casserole into a memorable Halloween dinner. A savory base of seasoned ground beef, carrots, peas, and corn is covered with individual mashed-potato ghosts instead of the traditional continuous potato topping.
Piping the potatoes creates flowing ghost shapes, while peppercorn or olive eyes give each one a little personality. Beneath the playful decoration is a hearty, familiar meal with creamy potatoes and rich gravy. It is especially suitable for a cool October evening when you want Halloween food that still feels like a proper dinner.
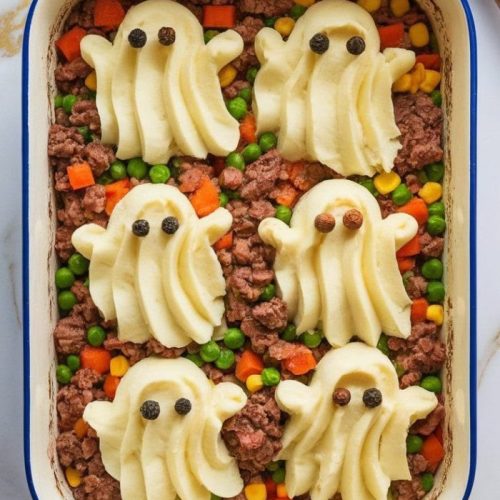
Mashed Potato Ghost Cottage Pie
Ingredients
- 1 lb (450 g) ground beef
- 1 small onion, diced
- 1 large carrot, diced
- ¾ cup frozen peas
- ½ cup corn
- 2 cloves garlic, minced
- 1 tbsp tomato paste
- 1 tbsp Worcestershire sauce
- ¾ cup beef broth
- 1 tsp dried thyme
- ½ tsp salt
- ¼ tsp black pepper
Instructions
- Peel and cube the potatoes. Boil in salted water for 15–20 minutes until very tender, then drain thoroughly.
- Mash with butter, warm milk, and salt until completely smooth. The mixture should be creamy but firm enough to hold a piped shape.
- Brown the ground beef with onion and carrot in a skillet. Add garlic and cook for another minute.
- Stir in tomato paste, Worcestershire sauce, broth, thyme, peas, and corn. Simmer for 5–8 minutes until the liquid reduces slightly.
- Transfer the beef mixture to a baking dish. Place the mashed potatoes in a large piping bag fitted with a wide round or star tip.
- Pipe six generous ghost shapes over the filling, moving the piping bag slightly from side to side near the bottom to create flowing "sheets." Add tiny olive pieces for eyes. If using whole peppercorns decoratively, remove them before eating.
- Bake at 400°F (200°C) for 20–25 minutes, until the filling bubbles and the potato edges begin turning lightly golden. Serve warm.
4. White Chocolate Ghost Brownies
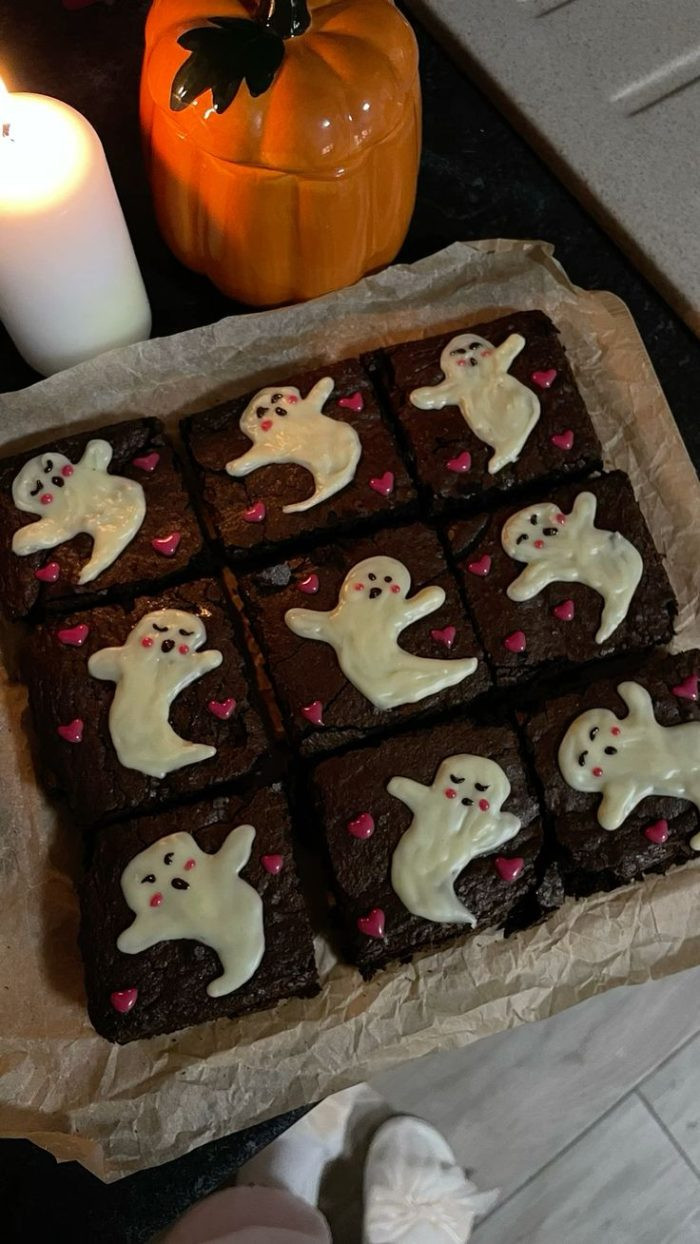
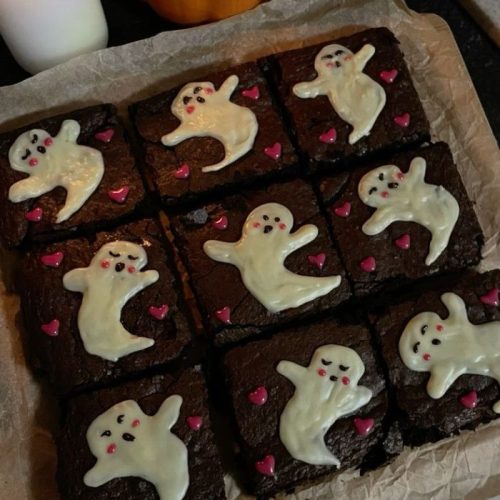
These White Chocolate Ghost Brownies combine intensely fudgy chocolate squares with whimsical little ghosts for an easy Halloween dessert. A dark brownie base provides dramatic contrast against white chocolate ghost decorations, while tiny dark chocolate features and pink sprinkles give each spirit its own expression.
The decoration does not need to look perfectly uniform. In fact, slightly different ghost shapes make the tray more charming. Prepare the brownies ahead, then decorate once completely cooled for a festive treat suited to Halloween parties, dessert tables, bake sales, or October movie nights.
White Chocolate Ghost Brownies
Ingredients
For the brownies
- ½ cup (115 g) unsalted butter
- 6 oz (170 g) dark chocolate, chopped
- ¾ cup granulated sugar
- ½ cup brown sugar
- 2 large eggs
- 1 tsp vanilla extract
- ¾ cup all-purpose flour
- ¼ cup unsweetened cocoa powder
- ½ tsp salt
For decorating
- 6 oz (170 g) white chocolate or white candy melts
- 2 tbsp dark chocolate, melted
- Pink or red decorating sprinkles, optional
Instructions
- Heat the oven to 350°F (175°C) and line an 8-inch square baking pan with parchment paper.
- Melt the butter and dark chocolate together. Allow the mixture to cool briefly, then whisk in both sugars, eggs, and vanilla.
- Fold in flour, cocoa powder, and salt just until combined. Pour into the prepared pan and smooth the surface.
- Bake for 22–28 minutes, or until the edges are set and the center remains slightly fudgy. Cool completely before cutting into squares.
- Melt the white chocolate gently. Spoon a small mound onto each brownie and drag portions outward with the back of a teaspoon to create irregular ghost bodies and arms.
- Let the white chocolate partially set, then pipe tiny dark chocolate eyes and mouths onto each ghost. Add tiny pink decorations if desired.
5. Spooky Ghost Fried Eggs
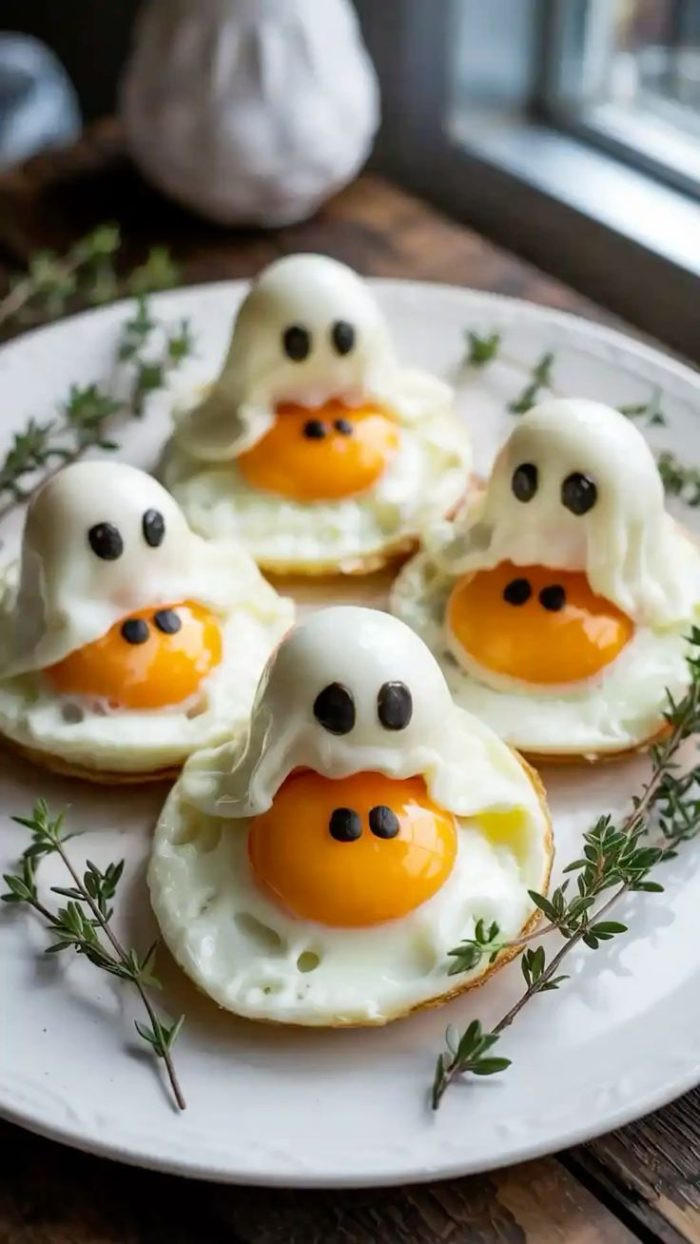
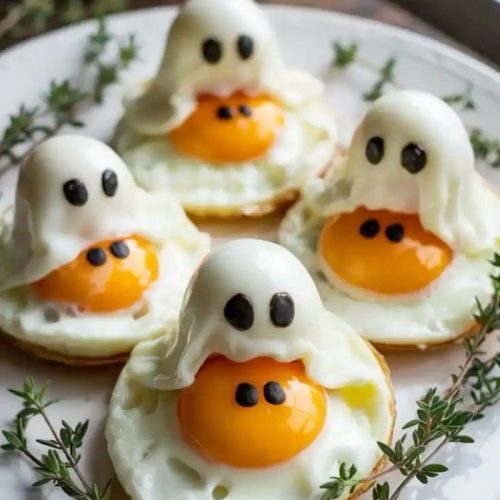
These Spooky Ghost Fried Eggs prove Halloween breakfast can be festive without requiring complicated ingredients. Each egg is cooked so the white spreads into an irregular ghostly silhouette while the bright yolk remains visible below, almost like the spirit is floating above it.
Small black olive pieces create expressive eyes on both the ghost and yolk. The result is savory, simple, and surprisingly striking on a plate. Serve the eggs with toast, roasted potatoes, avocado, or breakfast sausage for a complete Halloween morning meal.
Spooky Ghost Fried Eggs
Ingredients
- 4 large eggs
- 1 tsp butter or olive oil
- 4 pitted black olives
- Salt, to taste
- Freshly ground black pepper, to taste
- 4 slices toasted bread, optional
- Fresh thyme or parsley, for serving
Instructions
- Separate each egg carefully, keeping every yolk intact and placing the whites in individual small bowls.
- Heat a nonstick skillet over medium-low heat and lightly coat it with butter or olive oil.
- Pour one egg white into the skillet. Use a silicone spatula to gently encourage the upper portion into a rounded ghost head while creating two small flowing "arms" along the sides.
- Carefully position the reserved yolk toward the lower center of the egg white. Repeat with the remaining eggs, working in batches if necessary.
- Cover the skillet and cook over low heat until the whites are completely set while the yolks remain soft, about 3–5 minutes.
- Cut tiny oval pieces from the black olives. Place two on the white portion for the ghost's eyes and, if desired, two tiny pieces on each yolk for an extra playful face.
6. Cheesy Ghost Meatball Spaghetti
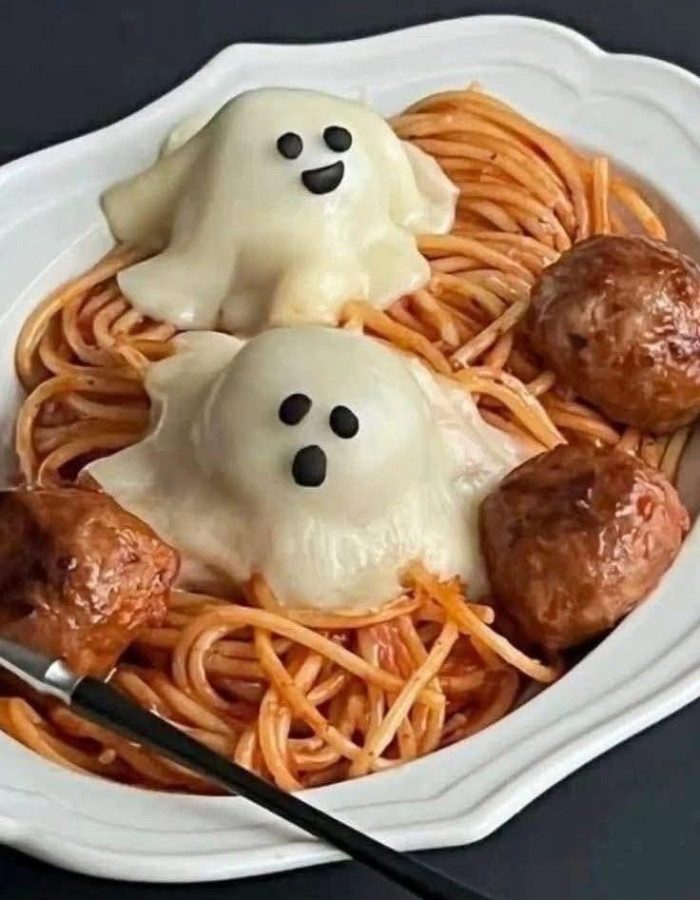
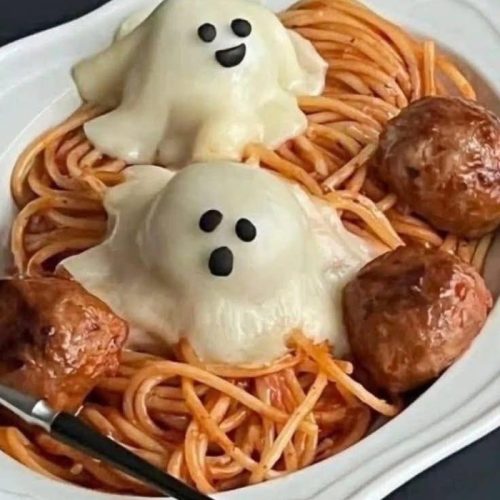
Cheesy Ghost Meatball Spaghetti turns a familiar pasta dinner into a playful Halloween centerpiece. Spaghetti coated in rich tomato sauce is surrounded by juicy Italian-style meatballs, while melted mozzarella forms soft ghost shapes that appear to float over the noodles.
Tiny black olive pieces create expressive faces, giving each spirit its own personality. Despite the spooky presentation, the flavors remain comforting and familiar: savory beef, aromatic herbs, tangy tomato, stretchy cheese, and tender pasta. It is an easy way to make Halloween dinner memorable without relying on sweets.
Cheesy Ghost Meatball Spaghetti
Ingredients
- 12 oz (340 g) spaghetti
- 1 lb (450 g) ground beef
- ⅓ cup breadcrumbs
- 1 large egg
- ¼ cup grated Parmesan
- 2 cloves garlic, minced
- 1 tsp Italian seasoning
- ½ tsp salt
- ¼ tsp black pepper
- 2 tbsp olive oil
- 3 cups marinara sauce
- 6 slices mozzarella or provolone cheese
- 4-5 black olives
- Fresh basil or parsley, optional
Instructions
- Combine ground beef, breadcrumbs, egg, Parmesan, garlic, Italian seasoning, salt, and pepper. Shape into 12 small meatballs.
- Heat olive oil in a skillet and brown the meatballs on all sides. Add marinara sauce, cover, and simmer for 12–15 minutes until cooked through.
- Meanwhile, boil the spaghetti in salted water according to package directions. Drain and toss with enough marinara to coat thoroughly.
- Cut mozzarella slices into rounded ghost shapes, leaving irregular flowing edges near the bottom.
- Arrange spaghetti and meatballs on serving plates. Place the cheese ghosts over several hot meatballs or small mounds of pasta.
- Allow the heat to soften the cheese slightly, then add tiny black olive pieces for eyes and different mouth expressions.
7. Mozzarella Ghost Halloween Pizza
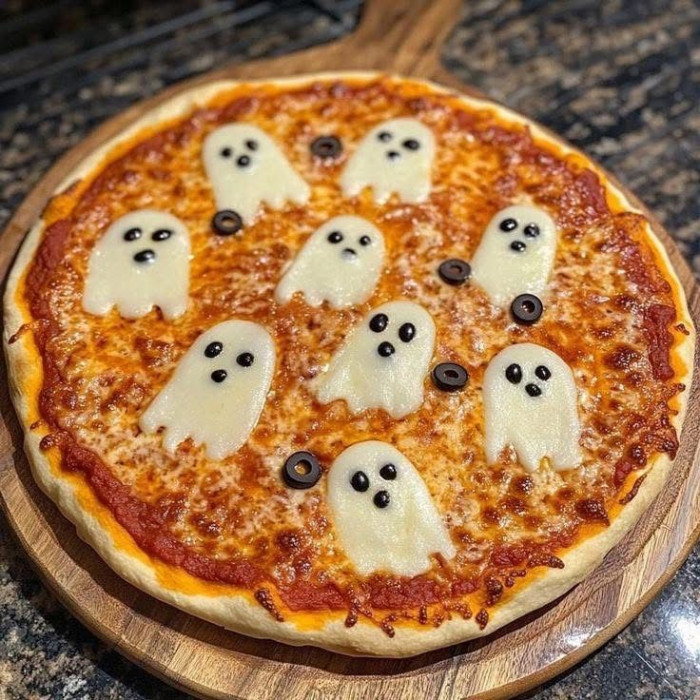
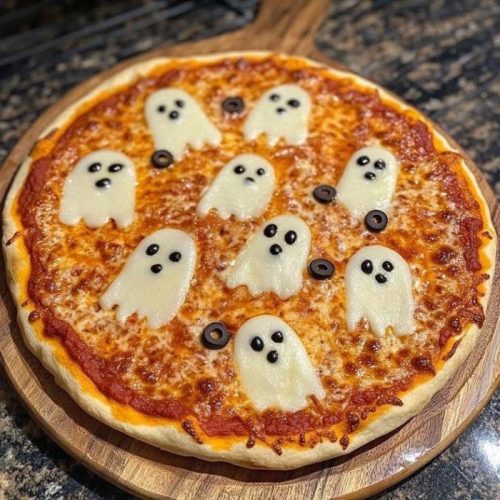
This Mozzarella Ghost Halloween Pizza transforms classic cheese pizza into an easy spooky-season dinner. A crisp golden crust is covered with vibrant tomato sauce and bubbling cheese, then topped with larger mozzarella ghosts whose irregular edges make them look as though they are drifting across the surface.
Black olives provide expressive eyes and mouths while scattered olive rings add extra contrast. The design looks impressive but requires little specialized decorating skill, making this pizza especially useful for Halloween parties, movie nights, or a family cooking activity.
Mozzarella Ghost Halloween Pizza
Ingredients
- 1 lb (450 g) pizza dough
- ¾ cup pizza sauce
- 1½ cups shredded mozzarella
- 6-8 oz (170–225 g) fresh mozzarella
- ⅓ cup sliced black olives
- 1 tbsp olive oil
- 2 tbsp grated Parmesan, optional
- ½ tsp dried oregano
- Flour or cornmeal, for shaping
Instructions
- Heat the oven to 475°F (245°C) with a pizza stone or baking sheet inside if available.
- Stretch the dough into a 12-inch round on a lightly floured surface. Brush the outer edge lightly with olive oil.
- Spread pizza sauce across the dough, leaving a narrow crust, then scatter shredded mozzarella and oregano over the top.
- Bake for about 7–8 minutes, until the crust begins to set but the pizza is not fully browned.
- Cut fresh mozzarella into small ghost silhouettes with rounded heads and wavy lower edges. Arrange them across the partially baked pizza.
- Add tiny black olive pieces for eyes and mouths, then scatter a few olive rings between the ghosts.
- Return to the oven for 4–6 minutes, just until the mozzarella softens and the crust turns golden. Slice and serve hot.
8. Spooky Jam-Filled Witch Hand Pies
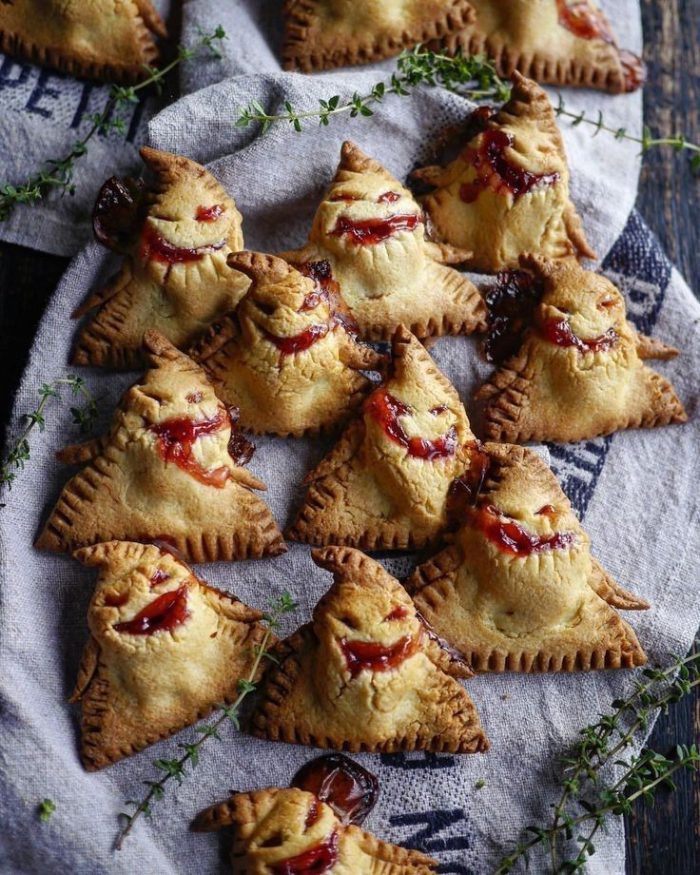
These Spooky Jam-Filled Witch Hand Pies bring a darker, rustic character to a Halloween dessert table. Buttery pastry is shaped into crooked little witches with pointed hats and irregular bodies, then filled with deep red berry jam that bubbles through carved smiles as they bake.
The deliberately imperfect shapes make each pastry look wonderfully mischievous. Beneath the dramatic appearance is a simple combination of crisp golden pastry and sweet-tart fruit filling. Serve them slightly warm for Halloween parties, autumn gatherings, or alongside hot cider on a chilly October evening.
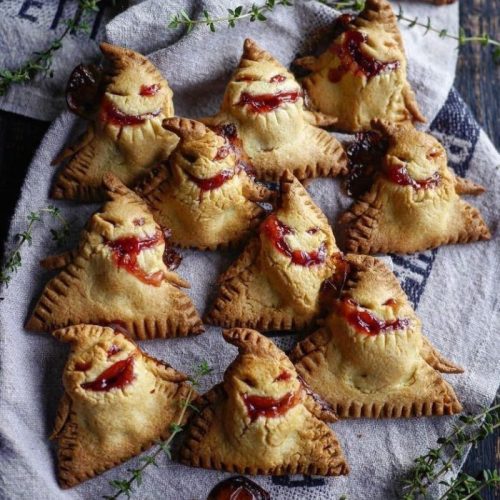
Spooky Jam-Filled Witch Hand Pies
Ingredients
- 2 refrigerated pie crusts or 1 batch homemade pie dough
- ½ cup raspberry, strawberry, or cherry preserves
- 2 tsp cornstarch
- ½ tsp lemon zest
- 1 egg
- 1 tbsp water
- 1 tbsp coarse sugar, optional
- 1 tsp cinnamon, optional
Instructions
- Heat the oven to 375°F (190°C) and line a large baking sheet with parchment paper.
- Mix the preserves with cornstarch and lemon zest. This slightly thickens the filling and helps prevent excessive leaking.
- Roll out the pastry and cut pairs of quirky witch shapes with triangular bodies, pointed hats, and small protruding arms.
- Spoon about 1 teaspoon of jam into the center of half the shapes, keeping the filling away from the edges.
- Cover with matching pastry pieces. Crimp the perimeter firmly with a fork, then carefully cut crooked eyes and smiling mouths into the upper pastry.
- Whisk the egg with water and brush over each pie. Sprinkle lightly with coarse sugar or cinnamon if desired.
- Bake for 18–24 minutes until deeply golden and crisp, allowing a little red filling to bubble naturally through the facial openings. Cool for 10 minutes before serving.
9. Vanilla Meringue Ghost Cupcakes
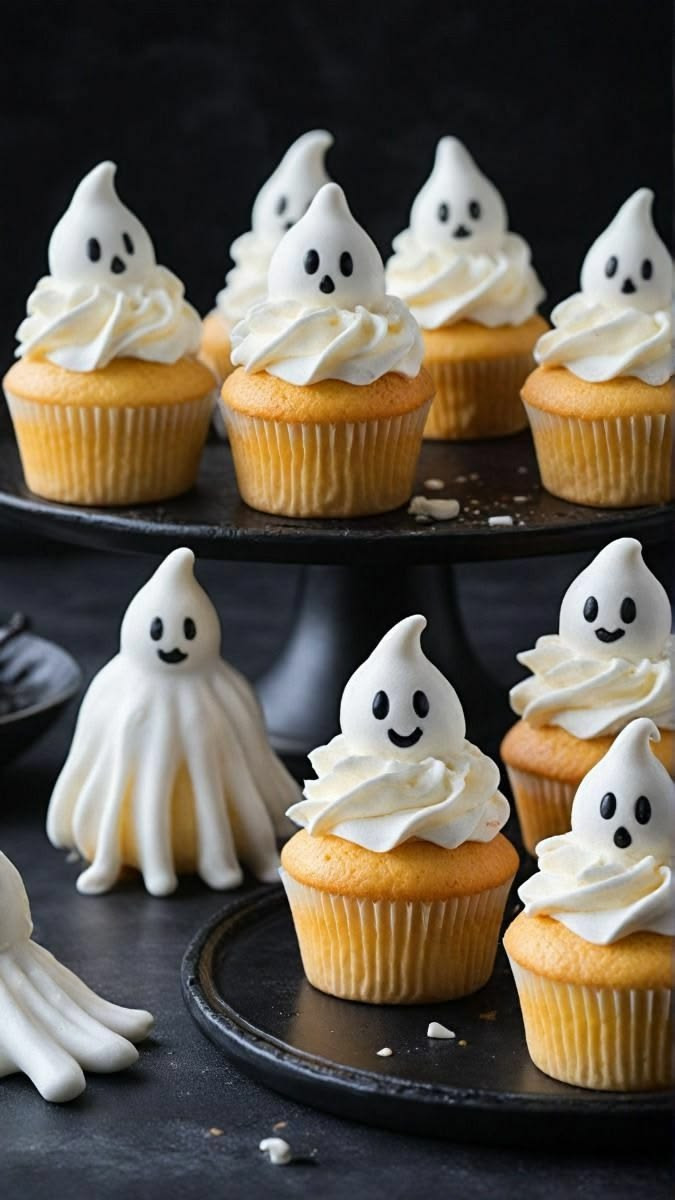
Vanilla Meringue Ghost Cupcakes combine soft golden cake, billowy vanilla frosting, and crisp little ghost decorations for an elegant Halloween treat. Instead of relying on brightly colored icing, the design uses an almost entirely ivory palette, making the dark ghost faces particularly expressive.
Light meringue toppers add a delicate crunch before melting into the creamy frosting beneath. These cupcakes fit equally well on a children’s Halloween table or a more sophisticated autumn dessert display. Preparing the meringues ahead also makes final assembly remarkably simple.
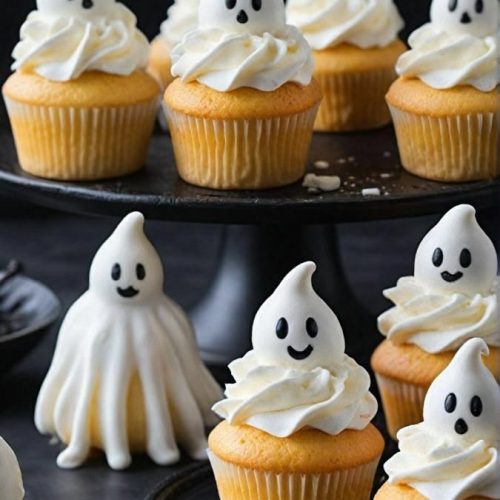
Vanilla Meringue Ghost Cupcakes
Ingredients
For the cupcakes
- 1½ cups all-purpose flour
- 1½ tsp baking powder
- ¼ tsp salt
- ½ cup unsalted butter, softened
- ¾ cup granulated sugar
- 2 large eggs
- 2 tsp vanilla extract
- ½ cup whole milk
For the ghost meringues
- 2 large egg whites
- ½ cup superfine sugar
- ¼ tsp cream of tartar
- ½ tsp vanilla
For decorating
- 1½ cups vanilla buttercream or whipped frosting
- 2 tbsp melted dark chocolate
Instructions
- Heat the oven to 350°F (175°C). Line a 12-cup muffin pan and prepare a second baking sheet with parchment.
- Beat butter and sugar until fluffy. Add eggs and vanilla, then alternate the flour mixture with milk until a smooth batter forms.
- Divide among the liners and bake for 17–20 minutes. Transfer to a rack and cool completely.
- For the ghosts, beat egg whites with cream of tartar until foamy. Gradually add sugar and continue beating until glossy, stiff peaks develop.
- Pipe tall ghost shapes onto parchment. Bake at 225°F (110°C) for about 60–75 minutes, then switch off the oven and let them cool inside.
- Pipe generous vanilla frosting swirls onto the cupcakes. Use melted dark chocolate to make tiny eyes and mouths on the cooled meringues.
- Nestle one ghost into each frosting swirl immediately before serving to preserve the meringues' crisp texture.
10. Floral Frosted Ghost Sugar Cookies
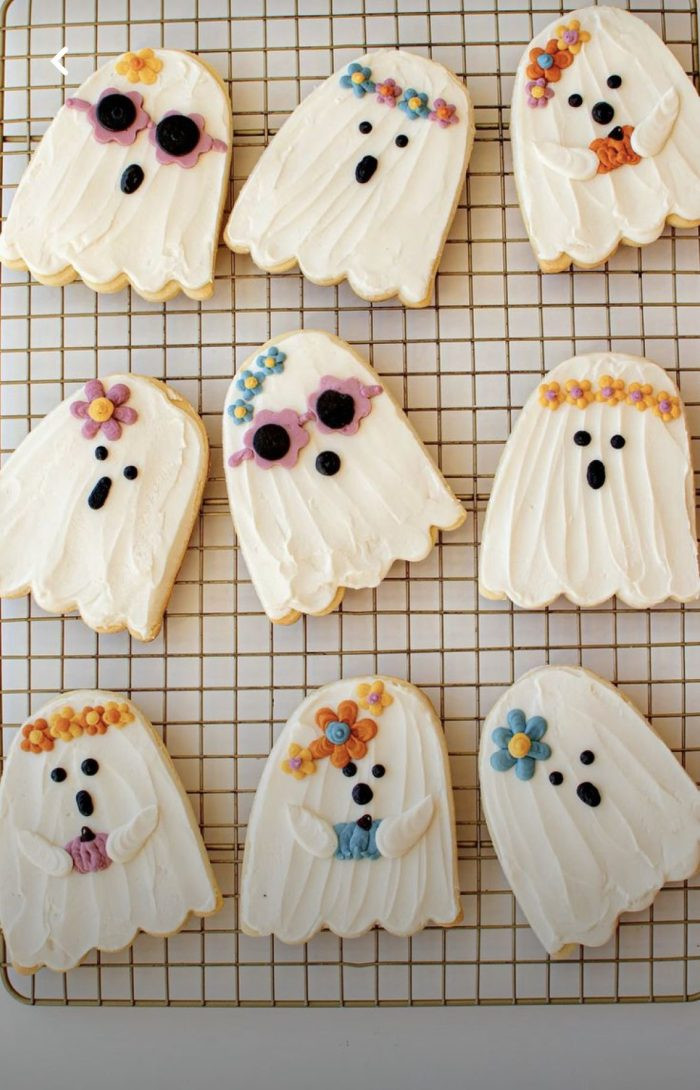
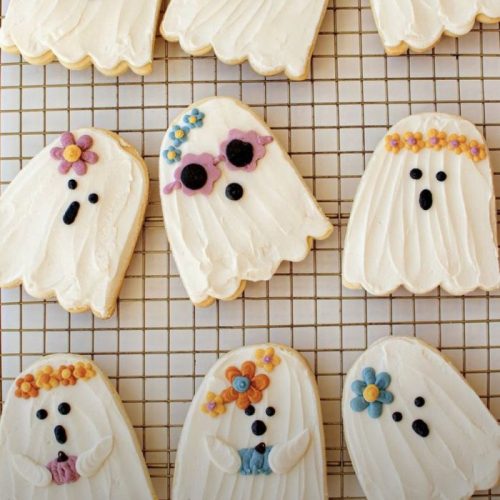
These Floral Frosted Ghost Sugar Cookies offer a softer, unexpectedly charming interpretation of Halloween baking. Buttery vanilla cookies are cut into flowing ghost silhouettes and covered with smooth ivory buttercream. Dark candy or icing creates simple surprised faces, while tiny piped flowers in muted orange, blue, pink, lavender, and yellow give every ghost a different personality.
Some can wear flower crowns, others glasses, and a few can hold tiny frosting bouquets. The whimsical decorations make these cookies especially attractive for Halloween tea parties, autumn gift boxes, classroom celebrations, and Pinterest-worthy dessert boards.
Floral Frosted Ghost Sugar Cookies
Ingredients
For the cookies
- 2¾ cups all-purpose flour
- ½ tsp baking powder
- ½ tsp salt
- 1 cup unsalted butter, softened
- ¾ cup granulated sugar
- 1 large egg
- 2 tsp vanilla extract
- ½ tsp almond extract, optional
For decorating
- 2 cups vanilla buttercream or thick royal icing
- Black decorating icing
- Orange food coloring
- Blue food coloring
- Pink or lavender food coloring
- Yellow food coloring
- Small round and flower piping tips
Instructions
- Whisk flour, baking powder, and salt. Separately beat butter and sugar until creamy, then mix in the egg and extracts.
- Gradually incorporate the dry ingredients. Chill the dough for 30–45 minutes so the ghost shapes remain defined during baking.
- Roll the dough about ¼ inch thick and cut rounded ghost silhouettes with gently scalloped or flowing bottoms.
- Bake at 350°F (175°C) for 9–11 minutes, keeping the centers pale and allowing only the edges to turn lightly golden. Cool completely.
- Spread or pipe a generous layer of ivory frosting over every cookie, creating subtle vertical lines to suggest flowing ghost fabric.
- Add black icing eyes and mouths. Decorate individual ghosts with tiny buttercream flower crowns, colorful blossoms, miniature bouquets, or flower-shaped glasses.
- Allow the decorations to set before arranging the cookies on a cooling rack or Halloween dessert platter.