Banana pudding always makes me think of Sundays in our busy kitchen, that warm chaos of a full house—kids laughing, the dog begging under the table, and something always bubbling on the stove.
One weekend, while flipping through my old recipe binder (you know, the one with smudges and stuck-together pages), I came across a faded index card titled “Mama’s Banana Pudding.” It had her handwriting, slightly crooked, with little notes like “Don’t skimp on the vanilla wafers!” and “Use very ripe bananas, trust me!”
That was all the push I needed. I had everything on hand, including those slightly too-ripe bananas sitting on the counter that no one wanted to eat. This version isn’t fancy or overly modern, it’s old-school comfort with a few little updates I’ve found work best after making it a dozen times.
When I served it that evening after dinner, it was silent. Not a word, just spoons scraping the bottom of the dish. My husband looked up first and said, “This tastes like something my mom made, but better.” That was it. I knew this one was a keeper.
Now, I make it for birthdays, BBQs, and anytime the kids have friends over. It’s one of those desserts that disappears fast, and it never feels heavy or too sweet. Just creamy, fluffy, and full of banana flavor.

Short Description
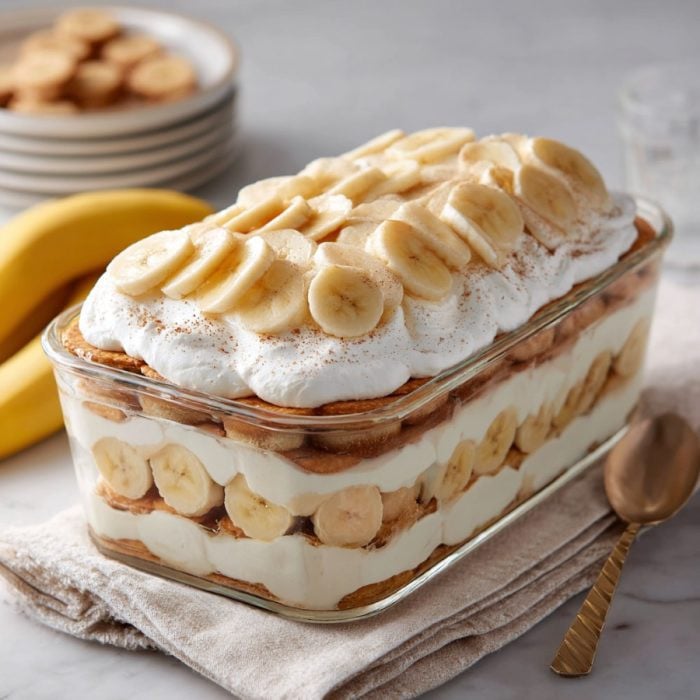
A classic Southern dessert layered with creamy vanilla pudding, sweet bananas, rich cream cheese, and fluffy whipped topping, all nestled between buttery vanilla wafers.
Key Ingredients
- 2 (3.4 oz) packages vanilla pudding mix (instant)
- 4 cups cold milk
- 1 (14 oz) can sweetened condensed milk
- 1 (8 oz) container whipped cream (or 3 cups homemade whipped cream)
- 8 oz cream cheese, softened
- 1 tsp vanilla extract
- 5–6 ripe bananas, sliced
- 1 (12 oz) box vanilla wafers
Tools Needed
- Electric hand mixer or stand mixer
- Mixing bowls (at least 2)
- Whisk
- Rubber spatula
- 9×13-inch glass baking dish
- Sharp knife and cutting board
Cooking Instructions
Step 1: Make the Vanilla Pudding
In a large bowl, whisk the pudding mix and cold milk until smooth. Let it sit for about 5 minutes to thicken. It should be creamy and hold its shape.
Step 2: Beat the Cream Cheese
In another bowl, beat the softened cream cheese until smooth and fluffy. This step is important, lumps in the cream cheese can make your pudding grainy.
Step 3: Add Sweetened Condensed Milk and Vanilla
Pour in the sweetened condensed milk and vanilla extract. Mix until everything is fully incorporated and silky.
Step 4: Fold in Whipped Cream
Using a rubber spatula, gently fold the whipped cream into the cream cheese mixture. Take your time, the goal is a light and airy filling.
Step 5: Combine with the Pudding
Carefully fold the thickened pudding into the cream mixture. Stir just until no streaks remain.
Step 6: Assemble the Layers
In a 9×13-inch dish, begin with a layer of vanilla wafers on the bottom. Follow with a layer of sliced bananas, then spread a generous layer of the pudding mixture on top.
Step 7: Repeat & Finish
Repeat the layers until all ingredients are used, finishing with pudding on top. Arrange a few extra wafers or banana slices for decoration if you’d like.
Step 8: Chill and Set
Cover the dish with plastic wrap and refrigerate for at least 4 hours, preferably overnight. The longer it chills, the more the flavors come together.
Why You’ll Love This Recipe
Creamy Dreamy Texture: The blend of whipped cream, pudding, and cream cheese gives this dessert a luxurious, cloud-like feel.
No Baking Required: It’s completely no-bake — perfect for hot days or when you want something fuss-free.
Crowd-Pleaser: It feeds a crowd, making it ideal for potlucks, family dinners, or special gatherings.
Make-Ahead Friendly: Prepare it a day in advance for stress-free hosting.
Nostalgic and Comforting: Tastes like something your grandma used to make — only creamier.
Mistakes to Avoid & Solutions
Using warm cream cheese: This leads to a lumpy filling.
Tip: Let it come to room temperature before mixing.
Overmixing the whipped cream: This can deflate it and make the pudding dense.
Tip: Fold gently, don’t stir aggressively.
Bananas turning brown: Exposure to air causes this.
Tip: Slice bananas right before layering and fully cover with pudding to prevent oxidation.
Not chilling long enough: It won’t set properly.
Tip: Give it at least 4 hours, overnight is best.
Using overly ripe bananas: They turn mushy and too sweet.
Tip: Choose ripe but firm bananas for the best texture.
Serving and Pairing Suggestions
Serve chilled in glass dessert cups for individual portions.
Add a light dusting of cinnamon or crushed wafer crumbs on top for extra texture.
Pairs well with fresh mint tea, iced coffee, or a glass of cold milk.
Ideal after a Southern-style dinner with fried chicken, greens, or barbecue.
Dress it up with a dollop of whipped cream and a mint leaf for potlucks or holidays.
Storage and Reheating Tips
Refrigerate leftovers: Store in an airtight container in the fridge for up to 4 days.
Avoid freezing: The texture of bananas and pudding won’t hold up well when thawed.
Prevent sogginess: Add an extra layer of wafers right before serving if it’s been sitting a while.
Revive leftovers: Stir gently and add a fresh banana slice or dollop of whipped cream before serving again.
FAQs
1. Can I use homemade pudding instead of instant?
Yes! Just be sure it’s fully cooled and thickened before folding it in, or the texture will suffer.
2. What’s the best substitute for whipped topping?
Homemade whipped cream works beautifully, just whip 1 ½ cups heavy cream with 2 tablespoons sugar until soft peaks form.
3. Can I make this recipe dairy-free?
You can try using dairy-free pudding, almond milk, vegan cream cheese, and coconut whipped topping. Flavor may vary slightly but still delicious.
4. How can I prevent the bananas from browning too fast?
Lightly coat the banana slices in lemon juice or pineapple juice before layering. Just don’t overdo it – a light brush is enough.
5. Can I make this in individual cups?
Absolutely. Layer the ingredients in mason jars or dessert glasses for portioned servings. Great for parties or meal prepping dessert.
Tips & Tricks
Chill your mixing bowl before whipping cream, it makes it fluff faster and hold better.
Want extra banana flavor? Mash half a banana and mix it into the pudding layer.
Use a piping bag to layer pudding neatly for individual servings.
Let kids help layer the dessert, it’s fun, easy, and hard to mess up.
Garnish with crushed Nilla wafers or a swirl of caramel sauce for a little twist.
Recipe Variations
1. Chocolate Banana Pudding
Use chocolate pudding mix instead of vanilla.
Add mini chocolate chips between layers.
Garnish with shaved dark chocolate.
2. Peanut Butter Banana Pudding
Swirl ½ cup creamy peanut butter into the cream cheese mixture.
Add crushed peanut butter cookies instead of vanilla wafers.
Top with chopped peanuts or a drizzle of peanut butter sauce.
3. Tropical Banana Pudding
Add a layer of crushed pineapple (drained well) with the bananas.
Swap vanilla wafers for coconut cookies.
Garnish with toasted coconut flakes.
4. Boozy Banana Pudding
Mix 2 tablespoons of banana liqueur or bourbon into the pudding mixture.
Keep away from the kids, of course!
Serve in fancy cocktail glasses with a whipped topping swirl.


