I made these Eyeball Truffles on a Saturday afternoon when the kids invited their two friends from next door for a “Halloween rehearsal party.” My kitchen looked like a candy factory had exploded—cookie crumbs on the counter, red gel icing streaked on the fridge door, and my husband sneaking chocolate chips whenever he passed by. I didn’t mind the chaos; it felt alive and festive, like the calm-before-the-spooky storm.
I’d been hunting for a no-bake Halloween treat that could be done in less than an hour of hands-on work. Most of the time I get home from the office too tired to roll out dough or babysit the oven, so anything quick yet show-stopping is a win in my book. These truffles checked every box: simple, budget-friendly, and impressive enough to earn gasps from the kids.
The moment I dipped the first cookie ball into the glossy white chocolate and pressed in the candy eye, my teenage son called out, “Mom, that’s both creepy and awesome!” My daughter chimed in that we should make a “family of eyeballs” for her friends. Even the neighbor’s little boy got in on decorating, carefully drawing “bloodshot” veins with the red gel icing. By the time the tray was full, the kitchen smelled faintly sweet and chocolatey, and the kids were impatient to taste-test.
Short Description
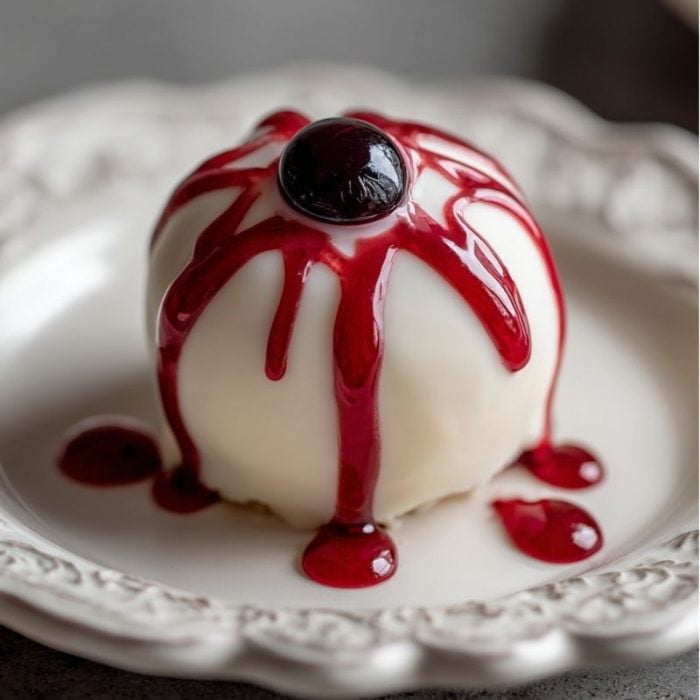
Eyeball Truffles are bite-sized no-bake treats made with crushed chocolate sandwich cookies, cream cheese, and a silky white chocolate coating. Finished with candy eyes and red gel icing, they’re spooky, creamy, and irresistibly fun for any Halloween spread.
Key Ingredients
- 1 package chocolate sandwich cookies, crushed
- 1 (8 oz) package cream cheese, softened
- 2 cups white chocolate chips, melted
- Candy eyes for decorating
- Red gel icing for bloodshot effect
Tools Needed
- Mixing bowl
- Rubber spatula or wooden spoon
- Baking sheet lined with parchment paper
- Microwave-safe bowl for melting chocolate
- Small fork or dipping tool
Cooking Instructions
Step 1: Mix the Base
In a large bowl, combine the crushed cookies with the softened cream cheese. Stir until you have a smooth, uniform mixture that holds together easily.
Step 2: Shape the Truffles
Roll the mixture into 1-inch balls and arrange them on a parchment-lined baking sheet. If the mixture feels too sticky, chill it for 15 minutes before rolling.
Step 3: Freeze the Balls
Place the tray in the freezer for 1 hour. This helps the truffles keep their shape when dipping into the melted chocolate.
Step 4: Dip in White Chocolate
Melt the white chocolate chips in a microwave-safe bowl in 20-second intervals, stirring between each until smooth and glossy. Dip each frozen truffle into the chocolate, letting any excess drip off, and return it to the baking sheet.
Step 5: Add the Eyeballs
While the chocolate coating is still soft, press a candy eye into the center of each truffle.
Step 6: Decorate
Use red gel icing to draw thin lines radiating from the eye to create a bloodshot effect.
Step 7: Set and Serve
Allow the truffles to set at room temperature for about 20 minutes until the coating firms up. Serve on a festive platter.
Why You’ll Love This Recipe
Creepy-Cute Presentation: Perfectly spooky yet adorable for Halloween parties.
No-Bake Convenience: No oven time required, so it’s ideal for busy evenings.
Kid-Friendly Fun: Children can help roll the balls or add the candy eyes.
Budget-Friendly: Uses just a handful of simple, affordable ingredients.
Irresistibly Creamy: The smooth cookie-and-cream cheese center melts in your mouth.
Mistakes to Avoid & Solutions
Not Chilling Long Enough: Warm truffles can fall apart in the chocolate. Always freeze for at least 1 hour.
Overheating the White Chocolate: It can scorch or seize. Melt in short intervals and stir often.
Thick Coating Drips: If the chocolate is too thick, add ½ teaspoon vegetable oil to thin it slightly.
Candy Eyes Sliding Off: Press them in while the chocolate is still wet; if it’s too firm, dab a little melted chocolate as “glue.”
Uneven Shapes: Roll the balls with slightly damp palms to get smooth, round truffles.
Serving and Pairing Suggestions
Arrange them on a black or orange Halloween platter with dry ice fog for a spooky presentation.
Pair with hot cocoa or spiced apple cider for a cozy fall treat.
Serve as part of a dessert table alongside caramel apples and popcorn balls.
Great as party favors: box them up in small treat bags tied with black ribbon.
Storage and Reheating Tips
Store leftovers in an airtight container in the refrigerator for up to 5 days.
For longer storage, freeze in a sealed container for up to 2 weeks. Thaw overnight in the fridge before serving.
These truffles don’t need reheating—just bring them to room temperature for best flavor and texture.
FAQs
1. Can I use dark chocolate instead of white chocolate?
Yes! The look won’t be as ghostly white, but dark chocolate makes for a richer taste.
2. What if I don’t have candy eyes?
You can use mini chocolate chips or small M&M’s for the pupils.
3. Can I make these ahead of time?
Absolutely. Make them a day or two in advance and store in the fridge until the party.
4. How do I prevent the chocolate from cracking?
Make sure the truffles aren’t rock-solid frozen when dipping—let them sit out for 5 minutes first.
5. Can I use low-fat cream cheese?
You can, but full-fat cream cheese gives a creamier texture that holds better.
Tips & Tricks
Crush the cookies in a food processor for a finer crumb that mixes easily.
Use a fork to dip truffles, letting excess chocolate drip back into the bowl.
Chill the dipped truffles in the fridge for 10 minutes if you’re in a rush to set them.
Add a drop of red food coloring to the white chocolate for a slightly eerie tint.
If you’re decorating with kids, set up a “truffle station” with napkins to minimize mess.
Recipe Variations
Mint Eyeballs: Swap regular chocolate sandwich cookies for mint-flavored ones and drizzle with green gel icing.
Peanut Butter Eyeballs: Replace half the cream cheese with creamy peanut butter for a nutty twist.
Vegan Eyeballs: Use dairy-free cream cheese, vegan white chocolate, and allergy-friendly candy eyes.
Spicy Choco-Eyeballs: Add a pinch of cayenne to the cookie mix for a subtle kick that surprises your taste buds.
Rainbow Pupils: Use colored candy melts instead of red gel icing to create multicolored veins for a fun kids’ party.
Final Thoughts
Making these Eyeball Truffles was one of those joyful kitchen moments when everyone pitched in, laughing and sneaking tastes of cookie dough. I loved watching the kids get creative with their “vein designs,” some neat and thin, others wild and squiggly. My husband admitted he thought they’d just be for show, but he couldn’t stop at one—the creamy chocolate center got him.
What I enjoy most about recipes like this is how approachable they feel after a long workweek. No fancy equipment, no waiting on the oven, just a few ingredients coming together to make something playful and delicious. I hope these truffles add a spark of fun to your Halloween gatherings, as they did for ours. It’s a treat worth repeating, especially when you want a little bit of spooky magic without extra stress.

Eyeball Truffles
Ingredients
- 1 package chocolate sandwich cookies crushed
- 1 8 oz package cream cheese, softened
- 2 cups white chocolate chips melted
- Candy eyes for decorating
- Red gel icing for bloodshot effect
Instructions
- Mix crushed cookies with softened cream cheese until smooth and uniform. Roll into 1-inch balls and place on a parchment-lined baking sheet; chill 15 minutes if sticky. Freeze for 1 hour to help them hold their shape.
- Melt white chocolate chips in 20-second microwave intervals until smooth. Dip each frozen ball in the chocolate, let excess drip off, and return to the sheet.
- Press a candy eye into the center while the coating is still soft, then draw thin red icing lines for a bloodshot look. Let set at room temperature for 20 minutes before serving.