On a quiet Friday night, my niece came over, her little hands clutching a flashlight and her eyes full of curiosity. “Can we make something that glows?” she asked, practically bouncing with excitement. I had just the thing in mind—something a little unexpected, a little magical, and a whole lot of fun: glow-in-the-dark bubbles. Not your average DIY project, but one that immediately turns an ordinary evening into something whimsical.
As someone who spends most of the time in the kitchen testing recipes and writing about cozy casseroles or rustic fruit tarts, I rarely venture into the world of edible science meets backyard play. But this? This was different. We put on gloves, grabbed an old highlighter from the junk drawer, and turned our kitchen into a lab. There was a delightful mess, some giggling over the inky fingers, and finally, the joy of watching glowing orbs float through the dark with the help of a blacklight.
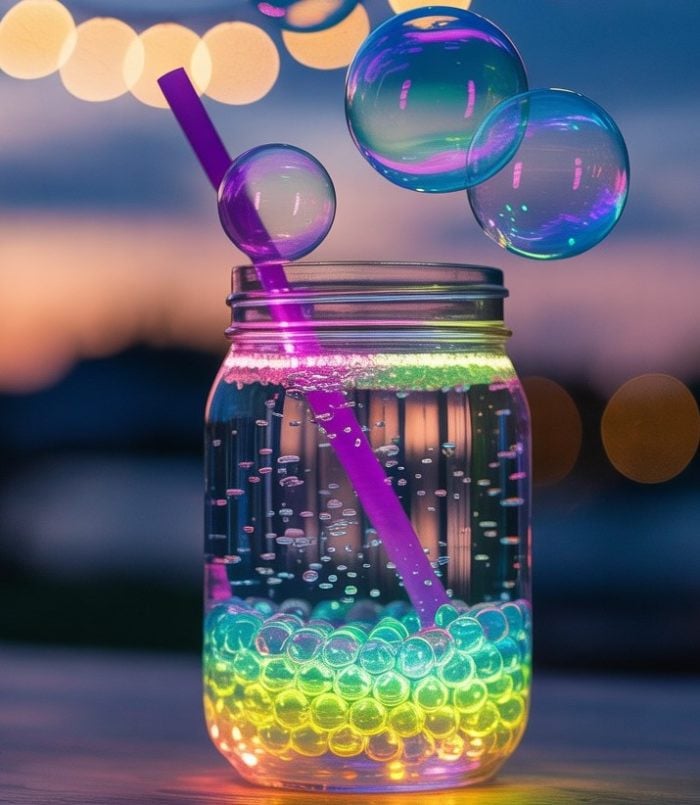
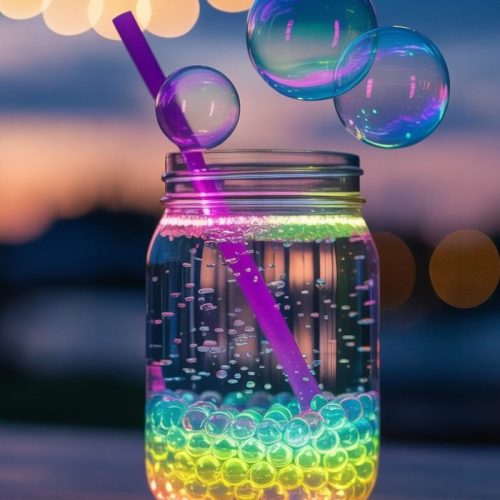
These bubbles don’t just shimmer—they glow, like tiny jellyfish suspended in the air. And the best part? You don’t need anything fancy—just a highlighter, a bit of soap, and your bubble-loving spirit. The experiment was simple, safe when done with care, and absolutely unforgettable. We ended up blowing bubbles on the porch for nearly an hour, hypnotized by the glow.
If you’re looking to light up your next evening in the most playful way, these glow-in-the-dark bubbles will do the trick. Let’s dive in!
Short Description
These glow-in-the-dark bubbles are a fun, hands-on DIY activity using simple ingredients like bubble solution and a yellow highlighter. Under UV blacklight, the bubbles glow beautifully, making them perfect for nighttime play or backyard parties.
Key Ingredients
- 1 cup bubble solution (store-bought or homemade)
- 1 yellow or green highlighter
- 1/4 cup warm water
- Optional: a small squirt of dish soap
- For Homemade Bubble Solution:
- 1 cup warm water
- 2 tbsp dish soap
- 1 tbsp corn syrup or sugar
Tools Needed
- UV blacklight
- Gloves
- Scissors
- Small bowl or cup
- Stirring stick or spoon
- Bubble wand, straw, or pipe cleaner wand
Cooking Instructions
Step 1: Extract the Glow
Put on gloves and carefully cut open the highlighter. Inside, you’ll find a soft felt ink tube. Gently remove it and soak it in 1/4 cup of warm water for 10 to 15 minutes.
The water should turn neon yellow or green, depending on your marker. Stir gently to help release more fluorescent ink. Dispose of the felt safely when done.
Step 2: Make the Glow Bubble Mix
Pour the highlighter-infused water into your bubble solution. If you’re using the homemade version, mix the water, dish soap, and corn syrup or sugar first.
Then stir in the glowing liquid gently. Optional: add a small squirt of dish soap to strengthen the bubbles. Don’t shake—it’ll create foam, not fun.
Step 3: Bubble Time!
Dip your wand or straw into the glowing solution and start blowing bubbles. Turn off the lights, shine a blacklight over the bubbles, and watch the magic happen!
They’ll glow as they float, especially in darker settings. For the best effect, do this outside at night or in a dark room with minimal ambient light.
Why You’ll Love This Recipe
– Creates a magical nighttime activity
– Inexpensive and easy to make at home
– Fun science-meets-art experience for all ages
– Great party trick for kids and grownups alike
– Encourages creative play without screens
– Can be customized or made from pantry basics
Mistakes to Avoid & Solutions
Using the wrong highlighter color
Yellow or green works best under UV light. Blue and pink usually won’t glow well.
Solution: Always test your highlighter with a blacklight first.
Not wearing gloves when handling ink
Highlighter ink stains skin and can be messy.
Solution: Use gloves and cover your work area.
Shaking the solution too much
This leads to foam instead of strong bubbles.
Solution: Stir gently with a spoon.
Using too much highlighter fluid
More ink doesn’t mean brighter glow—it can ruin the bubble formula.
Solution: Stick with the amount listed and test with your blacklight before adjusting.
Blowing bubbles in bright environments
The glow effect gets washed out in too much light.
Solution: Use in near-total darkness or under a UV blacklight for maximum glow.
Serving and Pairing Suggestions
Serve it up at parties: Glow-in-the-dark birthday or Halloween parties
Pair with other glowing treats: Try neon-colored drinks or glow stick décor
Make it a backyard event: Combine with glow-in-the-dark chalk or flashlight tag
Create a “glow station” with different bubble wands and a few UV flashlights
Entertain at campfires or sleepovers with this low-effort but high-impact trick
Storage and Reheating Tips
Storing leftovers: Keep the solution in a sealed jar or bottle at room temperature for up to 1 week.
Avoid light exposure: Store in a dark place to preserve glow intensity.
Reactivating glow: Shake the bottle lightly and stir before each use.
Check freshness: If the solution smells off or separates too much, make a fresh batch.
FAQs
1. How safe is the highlighter ink for kids?
Highlighters are non-toxic but not meant to be ingested or used without supervision. Wear gloves and don’t let kids handle the ink directly.
2. Can I use this bubble solution indoors?
Yes, just ensure it’s in a space where the bubbles won’t damage furniture, and use a UV light for the glow effect.
3. What’s the best way to enhance the glow?
A strong UV blacklight in a pitch-dark room will give the brightest result. Also, use fresh highlighter ink and avoid diluting too much.
4. Can I store the leftover glowing water for future use?
Yes, store it in a dark bottle or container, sealed tightly. Stir gently before reusing.
5. Do the bubbles themselves glow or just the solution?
Both! The film of the bubble reflects the glow, especially when the blacklight shines on it. The floating effect is what makes it magical.
Tips & Tricks
Use neon pipe cleaners twisted into fun wand shapes—they hold the solution better and look fun.
Freeze your bubble wand briefly for longer-lasting bubbles.
Use distilled water for clearer bubbles and better consistency.
Add a drop of glycerin instead of corn syrup for an even sturdier bubble.
Let the bubble solution rest for a few hours—it helps the ingredients bind for better bubbles.
Recipe Variations
1. Citrus Glow Bubbles
Swap corn syrup with 1 tbsp of lemon juice. It won’t glow differently, but adds a fresh scent. Use lemon-scented dish soap to complete the theme.
2. Lavender Night Bubbles
Add 1 drop of lavender essential oil and use purple food coloring for a scented twist. The solution itself won’t glow, but the scent adds a calming vibe.
3. Extra-Strong Party Bubbles
Add ½ tbsp of glycerin with the corn syrup for bubbles that last longer before popping—perfect for bubble art or slow-motion photography.
4. Rainbow Glow Bubbles
Divide the bubble solution into small jars and soak different highlighters (yellow, green, and orange) separately. Use each for a rainbow bubble station with multiple blacklights.
5. Edible Bubbles for Toddlers
Skip the highlighter. Use just sugar, water, and dish soap. These won’t glow but are safer for very young kids and can be a sensory-safe alternative.
Final Thoughts
Watching glowing bubbles drift through the night sky never fails to spark a sense of wonder—like catching stars in your backyard. I didn’t expect something so simple to become such a sweet core memory for my niece and me. We laughed, chased glowing orbs, and ended the night with glowing hands and glowing hearts.
It felt like childhood in a bottle—no screens, no pressure, just magic and giggles. It’s not a “recipe” in the traditional sense, but it’s definitely something worth sharing, especially for families, teachers, or anyone with a playful spirit.
Glow-In-The-Dark Bubbles
Ingredients
- 1 cup bubble solution store-bought or homemade
- 1 yellow or green highlighter
- ¼ cup warm water
- Optional: a small squirt of dish soap
For Homemade Bubble Solution:
- 1 cup warm water
- 2 tbsp dish soap
- 1 tbsp corn syrup or sugar
Instructions
- Wear gloves and cut open the highlighter. Take out the soft ink tube inside and place it in 1/4 cup of warm water. Let it soak for 10–15 minutes.
- The water will turn bright yellow or green. Give it a little stir to help release the glow. Throw away the tube when you're done.
- Pour the glowing water into your bubble solution. If you're making it from scratch, mix warm water, dish soap, and corn syrup or sugar first.
- Add the glowing liquid and stir gently. You can add a little more dish soap to make the bubbles stronger. Just don’t shake it—foamy bubbles won’t float well.
- Dip a wand or straw into the mix and blow bubbles. Turn off the lights and shine a blacklight to see the glow.