I went through a phase where takeout just wasn’t cutting it anymore. I’d had one too many limp, sauce-drenched sweet and sour chicken meals that felt more soggy than satisfying. So I challenged myself—what if I could recreate that same nostalgic flavor at home but with better texture, a cleaner ingredient list, and without the heavy grease? I still remember standing in my kitchen on a cloudy Saturday, hesitant but determined, chicken breast in one hand and a whisk in the other.
As the scent of caramelized vinegar and garlic started wafting through the kitchen, I knew I was onto something. My husband peeked in, drawn by the aroma, and after the first bite, he gave me that look—the one that silently says, “You nailed it.” That night, we didn’t miss the takeout menus, and since then, this baked sweet and sour chicken has earned a regular spot in our dinner rotation.
It’s a dish I now turn to on busy weeknights, family dinners, and even lazy Sundays when I crave something cozy but still vibrant. It has that irresistible balance—crispy, golden chicken baked to perfection, tossed in a glossy sauce that hits sweet, tangy, and savory notes all at once. And the best part? It’s baked, not fried, and made with ingredients I usually already have in the pantry.
If you’ve been burned by soggy, fast-food-style sweet and sour chicken in the past, let this recipe change your mind. It’s crispy where it counts, sticky in all the right places, and every bite feels like a hug from your favorite takeout place—only better.
Short Description
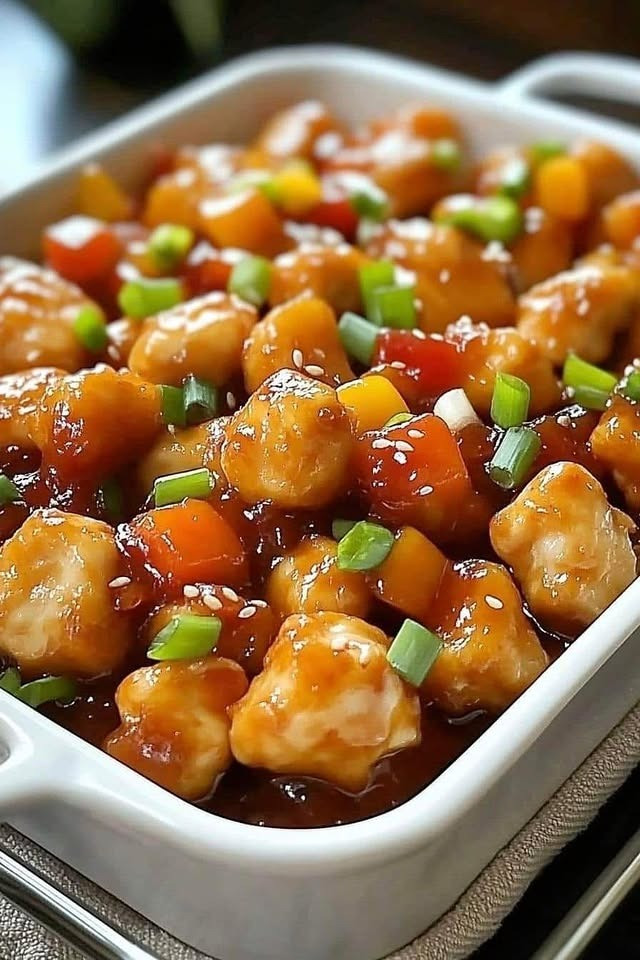
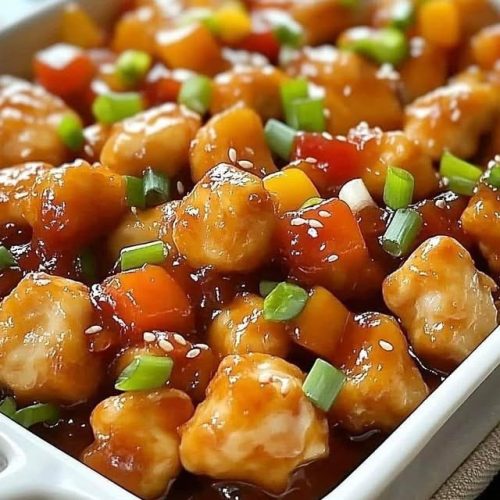
This healthier, baked sweet and sour chicken features crispy oven-browned chicken tossed in a homemade sauce that’s tangy, sweet, and absolutely addictive—perfect for weeknight dinners and meal prep.
Key Ingredients
For the Chicken:
- 4 boneless, skinless chicken breasts, cut into bite-sized pieces
- 1 cup cornstarch
- 2 large eggs, beaten
- Salt and pepper to taste
- 2 tbsp olive oil (for browning)
For the Sweet and Sour Sauce:
- 1/2 cup sugar
- 1/4 cup ketchup
- 1/4 cup apple cider vinegar
- 1/4 cup soy sauce
- 1 tbsp garlic powder
- 1 tbsp cornstarch mixed with 2 tbsp water (for thickening)
Tools Needed
- Large mixing bowls
- Whisk
- Tongs
- Baking sheet
- Large skillet or nonstick pan
- Oven (preheated to 350°F)
- Aluminum foil or parchment paper
Cooking Instructions
Step 1: Prep the Chicken
Preheat your oven to 350°F. Pat the chicken pieces dry with paper towels, then season them lightly with salt and pepper. This helps the coating stick better and enhances flavor.
Step 2: Coat the Chicken
Place cornstarch in a shallow bowl. In another bowl, beat the eggs. Dip each piece of chicken into the cornstarch first, then the egg, making sure each piece is fully coated.
Step 3: Brown the Chicken
Heat 2 tablespoons of olive oil in a large skillet over medium-high heat. Working in batches, sear the chicken for 2–3 minutes per side until lightly golden. Don’t overcrowd the pan—this helps get that perfect crisp. You’re not cooking it through yet, just crisping the coating.
Step 4: Transfer to Baking Dish
Place the browned chicken onto a parchment-lined baking sheet or into a baking dish. Spread them out evenly to avoid steaming.
Step 5: Make the Sauce
In a medium bowl, whisk together sugar, ketchup, vinegar, soy sauce, and garlic powder. Heat this mixture in a saucepan over medium heat. Once it starts bubbling, stir in the cornstarch slurry and continue whisking for 1–2 minutes until thickened and glossy.
Step 6: Bake the Chicken
Pour the thickened sauce evenly over the chicken. Gently toss or stir to coat all pieces. Bake uncovered at 350°F for 25–30 minutes, stirring once halfway through. The sauce should be bubbling and caramelized around the edges.
Step 7: Serve and Enjoy
Remove from the oven and let it rest for a few minutes. Serve hot over steamed rice or alongside stir-fried vegetables for a full meal.
Why You’ll Love This Recipe
– Baked, not fried—less greasy but still deliciously crispy
– Tangy-sweet sauce with pantry staples
– Kid-friendly and weeknight-approved
– Perfect for meal prepping ahead
– Easily customizable for different dietary needs
Mistakes to Avoid & Solutions
1. Overcrowding the skillet while browning
Solution: Brown the chicken in batches. Overcrowding traps steam and prevents crisping.
2. Using cold ingredients straight from the fridge
Solution: Let your chicken rest at room temp for about 15 minutes before coating. It helps the egg and starch bind better.
3. Undercooking or overbaking
Solution: Check the internal temp—it should hit 165°F. Don’t bake much longer than 30 minutes or the chicken may dry out.
4. Skipping the thickener in the sauce
Solution: Always mix the cornstarch with water before adding to the sauce to avoid lumps. Whisk continuously when adding.
5. Using too much oil when browning
Solution: Just 2 tablespoons will do. Too much oil leads to greasy coating and uneven browning.
Serving and Pairing Suggestions
– Serve over fluffy jasmine rice, cauliflower rice, or brown rice
– Pair with stir-fried bell peppers, pineapple chunks, or steamed broccoli
– Great as a main course for a casual family dinner or potluck
– Serve buffet-style with chopsticks and small plates for a fun dinner party
– Pair with iced green tea, sparkling water with lime, or a chilled white wine
Storage and Reheating Tips
Refrigeration: Store leftovers in an airtight container for up to 3 days
Freezing: Freeze in a sealed container (without rice) for up to 2 months
Reheating: Reheat in a 350°F oven for 10–12 minutes or until hot and bubbling. Microwave works too, but oven keeps it crisp
Avoid: Reheating at high heat too quickly—it can dry out the chicken and thicken the sauce too much
FAQs
1. Can I use chicken thighs instead of breasts?
Yes! Boneless, skinless thighs work beautifully and stay extra juicy.
2. Can I make this gluten-free?
Absolutely—just use a gluten-free soy sauce (like tamari) and check that your cornstarch is gluten-free certified.
3. Do I need to marinate the chicken first?
Nope! The coating and sauce are flavorful enough on their own. You’ll save time without sacrificing taste.
4. Can I prep this ahead of time?
Yes. Brown the chicken and make the sauce in advance. Assemble and bake when you’re ready to serve.
5. Is this recipe spicy?
Not at all—but you can add a pinch of chili flakes or a drizzle of sriracha to spice it up.
Tips & Tricks
– For extra crispiness, use a wire rack on your baking sheet to let heat circulate
– Want deeper flavor? Add a teaspoon of grated ginger to the sauce
– Don’t skip the stir halfway through baking—it helps everything coat evenly
– Use kitchen shears to cut chicken quickly and evenly
– If doubling the recipe, bake in two dishes to avoid overcrowding
Recipe Variations
1. Pineapple Sweet and Sour Chicken
Add 1 cup of pineapple chunks to the baking dish with the sauce before baking. The pineapple caramelizes and adds a tropical twist.
2. Veggie-Loaded Version
Toss in chopped bell peppers, onions, or zucchini in the last 10 minutes of baking. They absorb the sauce and add crunch and color.
3. Sweet and Sour Tofu
Swap chicken with firm tofu. Press it, cube it, and follow the same coating steps. Bake as directed. A great meatless Monday option!
4. Honey-Garlic Twist
Replace sugar with honey and add 1 tbsp of minced garlic to the sauce. The result? A richer, garlicky flavor with natural sweetness.
5. Low-Sugar Version
Cut sugar in half and add 1 tbsp of pineapple juice for natural sweetness. It still balances beautifully without being overly sweet.
Final Thoughts
This baked sweet and sour chicken brings that nostalgic takeout flavor into your own kitchen without the guilt or the greasy aftermath. You’ll be surprised by how simple it is to pull off and how well it holds up even the next day.
I’ve made it for date nights, weekday dinners, and even family get-togethers, and it never disappoints. The tangy, sticky sauce clings to the crispy chicken just right, and each bite feels like a celebration of balance and flavor. I love that I can customize it with vegetables, turn it meatless, or go full tropical with pineapple—all while sticking to a basic, trusty method.
This one’s earned a permanent spot in my kitchen rotation, and I hope it finds its way to yours too.
Baked Sweet And Sour Chicken
Ingredients
For the Chicken:
- 4 boneless skinless chicken breasts, cut into bite-sized pieces
- 1 cup cornstarch
- 2 large eggs beaten
- Salt and pepper to taste
- 2 tbsp olive oil for browning
For the Sweet and Sour Sauce:
- ½ cup sugar
- ¼ cup ketchup
- ¼ cup apple cider vinegar
- ¼ cup soy sauce
- 1 tbsp garlic powder
- 1 tbsp cornstarch mixed with 2 tbsp water for thickening
Instructions
- Preheat the oven to 350°F. Pat the chicken dry with paper towels, then season with a little salt and pepper.
- Pour the cornstarch into one bowl and beat the eggs in another. Dip each chicken piece into the cornstarch first, then into the egg until fully coated.
- Heat olive oil in a large skillet over medium-high heat. Add the chicken in batches and cook for 2–3 minutes on each side until golden. Don’t crowd the pan.
- Place the browned chicken pieces in a baking dish or on a lined baking sheet. Spread them out in a single layer.
- Whisk together the sugar, ketchup, vinegar, soy sauce, and garlic powder in a bowl. Pour into a saucepan and heat over medium. Once it bubbles, stir in the cornstarch slurry and cook for another 1–2 minutes until thick and shiny.
- Pour the sauce over the chicken and stir to coat. Bake uncovered for 25–30 minutes, stirring once halfway. The sauce should be bubbly and slightly caramelized.
- Let the chicken cool for a few minutes before serving. It’s great with rice or steamed veggies.