I’d planned a completely different dessert for my son’s birthday last summer, but life had other plans—like a power outage the night before. The oven was out, the heat was brutal, and I had two dozen kids showing up the next morning, expecting cake.
I panicked for about ten seconds, then remembered something I’d scribbled in my old recipe binder: no-bake Oreo icebox cake. The twist? I had a pack of Birthday Cake Oreos in the pantry and a tub of rainbow sprinkles that hadn’t seen the light of day since New Year’s.
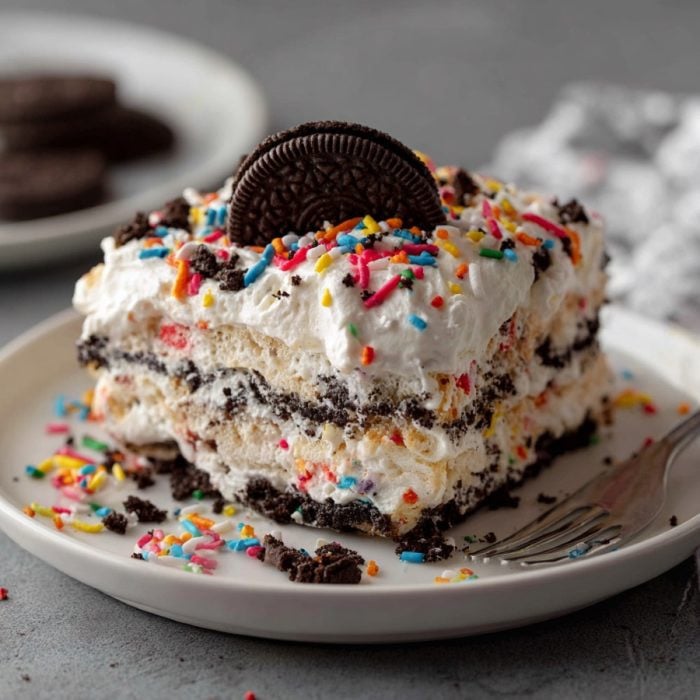
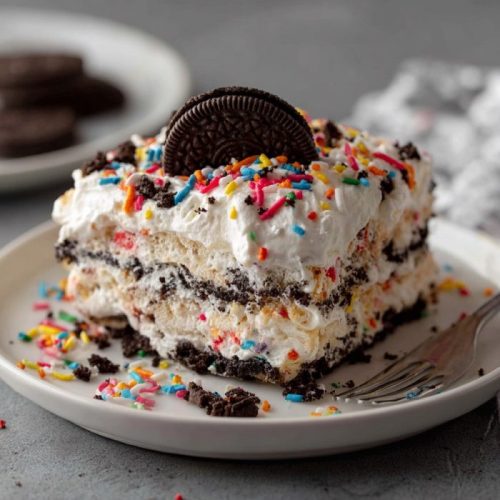
So I whipped up this Funfetti Oreo Icebox Cake on a whim, layering cookies and cream like I’d done a hundred times before but this version? It was pure magic. Cold, creamy, full of color, and surprisingly festive for a recipe that didn’t even touch the oven. The kids devoured it. My husband went back for thirds. Even my neighbor, who “doesn’t like sweets,” took home leftovers.
Let’s be honest—impressive with zero stress. If you’re like me and love a recipe that saves the day without making a mess, you’re going to adore this one.

Short Description
A creamy, no-bake dessert made with layers of Birthday Cake Oreos, whipped funfetti filling, and colorful sprinkles. Quick to prep, chill-and-serve, and perfect for parties or hot-weather treats.
Key Ingredients
- 1 package Birthday Cake Oreos (about 36 cookies)
- 1 cup milk (for dipping Oreos)
- 2 cups heavy whipping cream
- 1/2 cup confectioners’ sugar
- 1/2 cup dry white cake mix
- 8 oz cream cheese, softened
- 1/3 cup granulated sugar
- 1 tsp vanilla extract
- 1/4 cup rainbow sprinkles (use jimmies)
- Extra whipped cream and sprinkles for topping (optional)
Tools Needed
- Large mixing bowls
- Hand mixer or stand mixer
- 9″ springform pan
- Rubber spatula
- Measuring cups and spoons
- Small bowl for dipping Oreos
Cooking Instructions
Step 1: Whip the Cream
In a large bowl, whip the heavy cream to soft peaks using a hand mixer. Add the confectioners’ sugar and dry cake mix. Continue whipping until stiff peaks form—this should take 3–4 minutes. Gently fold in the rainbow sprinkles. Set aside.
Step 2: Make the Cream Cheese Layer
In a separate bowl, beat the softened cream cheese with the granulated sugar and vanilla until smooth and fluffy, about 2 minutes. Make sure there are no lumps.
Step 3: Combine the Layers
Gently fold the whipped cream mixture into the cream cheese mixture. Use a spatula to combine until the texture is uniform and light.
Step 4: Layer the Cake
Lightly grease a 9″ springform pan. Spread a thin layer of the cream mixture on the bottom to anchor the base. Quickly dip each Oreo in the milk—just a second or two—and create a single, even layer over the bottom of the pan.
Spread about one-third of the cream mixture over the cookies, smoothing it out. Repeat with two more layers of dipped Oreos and cream, ending with cream on top.
Step 5: Chill
Cover tightly with plastic wrap or foil and refrigerate for at least 4–6 hours, preferably overnight. This allows the cookies to soften and meld with the filling.
Step 6: Serve
Before serving, top with extra whipped cream and sprinkles for a festive touch. Slice chilled and enjoy cold straight from the fridge.
Why You’ll Love This Recipe
No-Bake & Stress-Free: Perfect for hot days, busy schedules, or last-minute celebrations.
Kid-Friendly & Crowd-Pleasing: Funfetti, Oreos, and cream—what’s not to love?
Make-Ahead Magic: Chill it overnight, and it’s ready when you are.
Colorful & Festive: A showstopper dessert without fancy decorating skills.
Customizable: Swap flavors, cookies, or toppings to suit the occasion.
Mistakes to Avoid & Solutions
Over-soaking the Oreos: Dip them briefly—1 to 2 seconds max. If they sit too long, they’ll turn mushy and fall apart.
Solution: Use tongs for control and dip just before layering.
Lumpy Cream Cheese: Cold cream cheese won’t mix well.
Solution: Let it soften fully at room temperature before beating.
Overwhipping the Cream: Whip to stiff peaks but don’t go too far or it’ll turn grainy.
Solution: Stop mixing when the cream holds its shape but still looks smooth.
Skipping Chill Time: The cake needs time to set properly.
Solution: Plan ahead and give it a full overnight rest if possible.
Using the wrong sprinkles: Nonpareils can bleed color.
Solution: Use “jimmies” style sprinkles, which hold up better in cream.
Serving and Pairing Suggestions
Best Served: Chilled, straight from the fridge. Perfect for summer gatherings.
Pair With:
Fresh berries on the side
A cold glass of milk
Sparkling lemonade for parties
Serving Style:
Slice at the table for a fun reveal
Add candles and serve as a no-bake birthday cake
Serve buffet-style at potlucks or cookouts
Storage and Reheating Tips
To Store: Cover tightly with plastic wrap or transfer to an airtight container. Store in the fridge for up to 4 days.
To Freeze: You can freeze slices individually. Wrap in plastic and foil, then freeze for up to 1 month. Thaw in the fridge overnight.
Reheating: No need! This cake is best enjoyed cold.
FAQs
1. Can I use regular Oreos instead of Birthday Cake Oreos?
Yes, but it’ll have a more classic chocolate-and-cream flavor. For a birthday vibe, stick with the birthday cake variety or add extra sprinkles.
2. Is the raw cake mix safe to eat?
To be safe, use heat-treated cake mix. Many stores carry it now, or you can microwave the dry mix for 30 seconds to reduce bacteria risk.
3. Can I make this ahead of time?
Absolutely. It’s even better the next day. Just keep it refrigerated until ready to serve.
4. What if I don’t have a springform pan?
Use a deep 9×9 dish or loaf pan lined with parchment paper for easy removal. Just be sure it has enough depth for layering.
5. Can I use Cool Whip instead of whipped cream?
Yes, about 3 cups of Cool Whip can replace the whipped cream and confectioners’ sugar mix for a shortcut version.
Tips & Tricks
Use cold metal bowls when whipping cream—it helps it firm up faster.
To make cleaner slices, wipe your knife between each cut.
Fold sprinkles in gently to keep the colors from bleeding.
For added texture, sprinkle crushed Oreos on top before chilling.
Want a clean edge? Run a knife along the pan edge before releasing the springform ring.
Recipe Variations
Chocolate Lover’s Version
Use regular Oreos and chocolate cake mix
Add mini chocolate chips to the filling
Top with chocolate ganache instead of glaze
Lemon Funfetti Icebox Cake
Swap cake mix for lemon cake mix
Use Golden Oreos instead of Birthday Cake
Add lemon zest to the cream cheese mixture
Strawberry Shortcake Twist
Replace Oreos with vanilla wafers
Add chopped fresh strawberries between layers
Use strawberry cake mix in the whipped cream
Low-Sugar Version
Use sugar-free Oreos and sweeteners like erythritol
Skip extra sprinkles or use dye-free versions
Use a reduced-fat cream cheese
Final Thoughts
No-Bake Funfetti Oreo Icebox Cake has this perfect balance of creamy, sweet, and slightly nostalgic flavor that hits the spot every single time. My kids now ask for it on their birthdays and even my husband sneaks bites straight from the fridge at night (he thinks I don’t notice).
It’s not about perfect piping or flawless layers, it’s about ease, joy, and sharing something delicious with people you love. If you’re in the mood to make dessert but want to keep it simple, this one’s your golden ticket. Whether you’re celebrating or just craving something sweet after dinner, this cake brings smiles without stress.
And honestly? It’s a keeper. Let it chill, slice it cold, and serve it up with a little sparkle.

No-Bake Funfetti Oreo Icebox Cake
Ingredients
- 1 package Birthday Cake Oreos about 36 cookies
- 1 cup milk for dipping Oreos
- 2 cups heavy whipping cream
- ½ cup confectioners’ sugar
- ½ cup dry white cake mix
- 8 oz cream cheese softened
- ⅓ cup granulated sugar
- 1 tsp vanilla extract
- ¼ cup rainbow sprinkles use jimmies
- Extra whipped cream and sprinkles for topping optional
Instructions
- In a large bowl, beat heavy cream to soft peaks. Add confectioners’ sugar and dry cake mix; whip to stiff peaks (about 3–4 minutes). Fold in sprinkles and set aside.
- In another bowl, beat softened cream cheese, granulated sugar, and vanilla until smooth and fluffy (about 2 minutes).
- Fold whipped cream into the cream cheese mixture until smooth and airy.
- Grease a 9" springform pan. Spread a thin layer of cream on the bottom. Dip Oreos in milk briefly and layer over the base. Add one-third of the cream mixture. Repeat two more times, ending with cream on top.
- Cover and refrigerate for at least 4–6 hours or overnight to set.
- Top with whipped cream and sprinkles. Slice and serve cold.


