Some recipes find their way into your routine without fanfare. This one did just that. I wasn’t searching for a “heritage” candy or trying to recreate something nostalgic—I just wanted to try something different on a quiet weekend. Kentucky Cream Pull Candy sounded old-fashioned, a little mysterious, and honestly, a bit fussy. But curiosity won.
The process is oddly satisfying: the hum of the thermometer climbing, the subtle shift in the sugar’s color, and that moment when the glossy pool cools just enough to start pulling. It’s hands-on, slightly unpredictable, and kind of addictive once you get into the groove.
What surprised me most is how versatile this candy is. In the spring, I’ll wrap pieces in pastel wax paper for a homemade gift. In summer, it melts slow and sweet on your tongue like taffy kissed with cream. Come fall, it pairs beautifully with a mug of something warm. And anytime I set it out—at gatherings, on dessert boards, or tucked into a lunchbox—it always starts a conversation.
This isn’t a candy that shouts for attention. But once someone tastes it, they always ask for the recipe.
Short Description
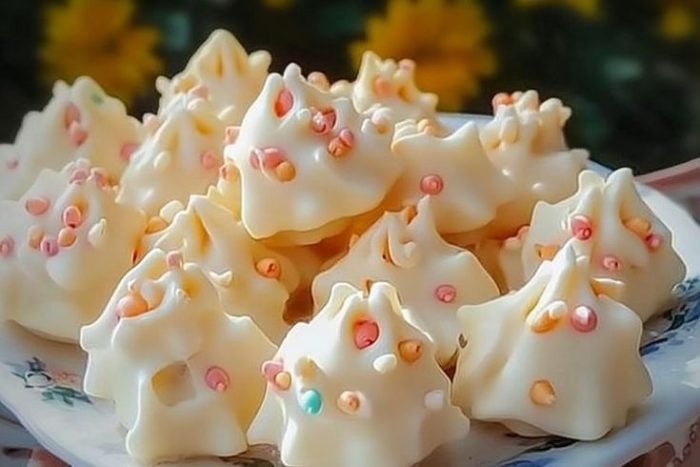
Kentucky Cream Pull Candy is a classic Southern treat known for its smooth, melt-in-your-mouth texture and nostalgic holiday charm. Made with simple ingredients and a little technique, this old-fashioned candy is worth the effort.
Key Ingredients
- 2 cups granulated sugar
- 1 cup heavy cream
- 1/2 cup light corn syrup
- 1/8 teaspoon salt
- 1/2 teaspoon vanilla extract
- Butter, for greasing surfaces and hands
Tools Needed
- Candy thermometer
- Heavy-bottomed saucepan
- Heatproof spatula or wooden spoon
- Buttered marble slab or large baking sheet
- Sharp knife or kitchen scissors
Cooking Instructions
Step 1: Cook the candy base
In a heavy-bottomed saucepan over medium heat, combine sugar, heavy cream, corn syrup, and salt. Stir constantly until sugar dissolves completely and the mixture starts to boil.
Step 2: Reach the hard-ball stage
Clip a candy thermometer to the side of the pan. Continue cooking without stirring until the temperature reaches 260°F (hard-ball stage). This usually takes about 15–20 minutes. The mixture should be thick and bubbling with a slightly golden tint.
Step 3: Pour and cool
Quickly pour the hot candy onto a buttered marble surface or a greased baking sheet. Don’t spread it. Let it cool for about 5–7 minutes, just until it’s cool enough to handle but still pliable. It should look glossy and feel warm—not hot.
Step 4: Pull the candy
With buttered hands, gather the candy and begin pulling it like taffy. Stretch it, fold it, and pull again. Continue for 10–15 minutes until the candy becomes light in color, thick, and creamy-looking. It should feel firmer with each pull.
Step 5: Shape and cut
Form the candy into long ropes and place them on a buttered surface. Let sit for 5–10 minutes to firm up, then cut into bite-sized pieces with a greased knife or scissors. Let cool completely before serving.
Troubleshooting Tip:
If your candy won’t set, it likely didn’t reach the hard-ball stage. Always use a reliable candy thermometer and calibrate it if needed.
Why You’ll Love This Recipe
– Ultra-creamy texture that melts in your mouth
– Perfect for gifting or holiday treats
– Only six simple ingredients
– No fancy equipment beyond a thermometer
– Deeply nostalgic with timeless flavor
Mistakes to Avoid & Solutions
1. Not using a thermometer
Solution: Don’t guess. Candy making is precise—always use a candy thermometer to hit 260°F exactly.
2. Overcooking the mixture
Solution: Once you hit 260°F, remove it immediately from heat to avoid hard, crumbly candy.
3. Pulling too soon or too late
Solution: Wait until it’s cool enough to touch but still pliable. Too hot and it’ll burn; too cool and it becomes brittle.
4. Sticky hands that make pulling hard
Solution: Generously butter your hands (and reapply often). This prevents sticking and helps you manage the candy easily.
5. Candy not setting after shaping
Solution: Let it rest in a cool, dry place—humidity can prevent proper setting.
Serving and Pairing Suggestions
Kentucky Cream Pull Candy is perfect on its own, but here’s how to enjoy it even more:
– Arrange on a platter with other holiday treats like fudge or brittle
– Pair with black tea or a hot toddy to balance the sweetness
– Serve as part of a Southern-style dessert table at family gatherings
– Package in decorative tins or jars for homemade gifts
Best served family-style for sharing or set out in small bowls for grazing.
Storage and Reheating Tips
Storage: Store in an airtight container at room temperature for up to 2 weeks. Keep away from heat and humidity.
Freezing: Avoid freezing—it alters the texture.
Reviving stale candy: If it becomes too hard, a few seconds in a barely warm oven (around 150°F) can soften it enough to enjoy.
Avoid refrigeration: It can make the candy sticky and uneven in texture.
FAQs
1. Can I use a silicone mat instead of a marble slab?
Yes, but make sure it’s greased. Silicone won’t hold heat the same way marble does, so cooling may take longer.
2. What happens if I don’t pull the candy long enough?
The texture stays dense and sticky instead of creamy and airy. Pulling incorporates air, giving it the signature melt-in-your-mouth texture.
3. Can I make this without corn syrup?
Corn syrup helps prevent crystallization. If you skip it, you may end up with grainy candy. If needed, substitute with glucose syrup or golden syrup.
4. Why does my candy turn brown instead of creamy white?
It likely cooked too long or at too high a temperature. Cook over medium heat and monitor closely once it nears 260°F.
5. Can I flavor this candy with peppermint or other extracts?
Yes, but add flavoring after cooking, just before pulling. Start with 1/4 teaspoon and adjust to taste.
Tips & Tricks
– Use a marble surface for the best cooling results. It helps control texture.
– Work fast during the shaping stage—this candy firms up quickly.
– Wrap individual pieces in wax paper for longer freshness and an old-school look.
– Butter your tools and hands to avoid a sticky mess.
– Don’t double the recipe unless you’ve mastered the pulling process—larger batches can be harder to handle.
Recipe Variations
1. Peppermint Cream Pull Candy
Add 1/4 tsp peppermint extract to the mixture after removing from heat. Garnish with crushed peppermint candies while shaping.
2. Chocolate Cream Pull Candy
Add 2 tbsp cocoa powder to the sugar mixture. You’ll get a rich chocolate flavor and a soft brown color. Pull as usual.
3. Maple Pull Candy
Replace corn syrup with real maple syrup and add a dash of cinnamon before pulling. This creates a deeper, caramelized flavor.
4. Nutty Pull Candy
Fold in finely chopped toasted pecans or walnuts just before shaping into ropes. Adds crunch and a Southern twist.
5. Holiday Swirl Candy
Divide the pulled candy into two parts and tint one with natural red or green food coloring. Twist together for festive swirls before cutting.
Final Thoughts
Making this candy isn’t just about the end result—it’s about the pause it creates. The kind where you focus fully, follow your instincts, and feel when the texture shifts beneath your hands. Even on a busy day, it slows you down in the best possible way.
No matter the season, this recipe brings a little calm and care into the kitchen. It’s one of those things that feels almost meditative once you get going—stirring, waiting, pulling. And every batch tells you a little more about what works.
I’ve shared it with neighbors in the spring, packed it into beach picnic tins in summer, offered it alongside apple slices in the fall, and, yes, passed it around during cozy indoor gatherings. It fits wherever you put it, which is part of its charm.
So when you’re in the mood to try something a bit different—something with a little old-school technique and a creamy payoff—give this one a go. It’s more than candy. It’s a small, sweet ritual worth repeating.
Kentucky Cream Pull Candy
Ingredients
- 2 cups granulated sugar
- 1 cup heavy cream
- ½ cup light corn syrup
- ⅛ tsp salt
- ½ tsp vanilla extract
- Butter (for greasing)
Instructions
- In a heavy saucepan over medium heat, combine sugar, cream, corn syrup, and salt. Stir constantly until the sugar dissolves and the mixture begins to boil.
- Attach a candy thermometer. Cook without stirring until it hits 260°F, about 15–20 minutes. The mixture should bubble thickly and turn slightly golden.
- Pour the hot mixture onto a buttered marble slab or greased baking sheet. Don’t spread it. Let cool for 5–7 minutes until it’s glossy and just cool enough to handle.
- With buttered hands, start pulling like taffy—stretch, fold, and repeat for 10–15 minutes. It should turn pale, creamy, and firmer as you go.
- Roll into ropes on a buttered surface. Let set for 5–10 minutes, then cut into bite-sized pieces using greased scissors or a sharp knife. Cool completely before serving.