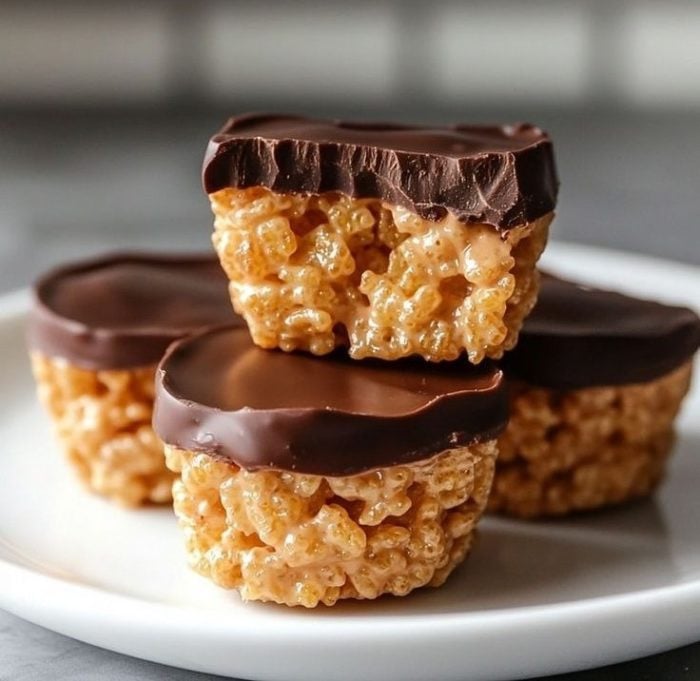
A few weeks ago, I was in the mood to create a treat that satisfied my sweet tooth without going overboard. I had a craving for something crunchy, creamy, and oh-so-decadent, so I decided to experiment with Rice Krispie treats, but with a twist.
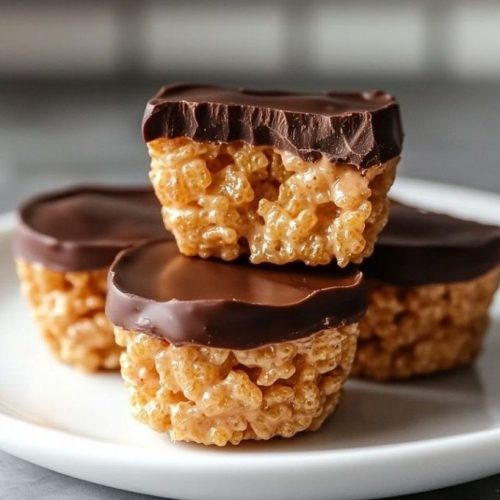
Instead of your usual marshmallow concoction, I used peanut butter and honey as the base, adding a rich layer of chocolate on top. The result? These irresistibly delicious Chocolate Peanut Butter Rice Krispie Cups.
They’ve become a favorite in my house, and I’m thrilled to share this easy, no-bake recipe with you. Trust me — they’re so good, you’ll want to make them every week.

Short Description
These Chocolate Peanut Butter Rice Krispie Cups are a decadent yet easy-to-make treat with a crispy peanut butter base topped with silky chocolate. They’re perfect for satisfying your sweet tooth while keeping things simple.
Key Ingredients
For the Base:
- 3 cups Rice Krispies cereal
- 1/2 cup peanut butter (creamy, natural or shelf-stable)
- 1/2 cup honey or corn syrup
- 1/4 cup brown sugar
- 1 tsp vanilla extract
For the Chocolate Topping:
- 1 cup semisweet chocolate chips
- 2 tbsp peanut butter (for smoothness)
Optional:
- Mini chocolate chips or flaky sea salt (for topping)
Tools Needed
- Medium saucepan
- Microwave-safe bowl
- Mini muffin tin (or silicone cupcake mold)
- Spoon or spatula
- Parchment paper (optional)
Step-by-Step Instructions
Step 1: Make the Base
Start by placing a medium saucepan over medium heat. Add the honey (or corn syrup) and brown sugar. Stir continuously until the sugar dissolves completely and the mixture starts to bubble gently.
Step 2: Stir in the Peanut Butter
Remove the saucepan from the heat. Immediately stir in the peanut butter and vanilla extract. Keep stirring until everything is well combined, and the mixture becomes smooth and creamy.
Step 3: Add the Rice Krispies
Now, it’s time to add the Rice Krispies. Pour the cereal into the saucepan and gently stir, ensuring every piece is coated with the peanut butter mixture.
Step 4: Fill the Muffin Tins
Lightly grease your mini muffin tin, or line it with paper liners for easy removal. Spoon the Rice Krispie mixture into each cup, pressing it down gently with a spoon or your fingers to pack it in. Aim to fill each cup about three-quarters full.
Step 5: Make the Chocolate Topping
To make the topping, place the semisweet chocolate chips and peanut butter into a microwave-safe bowl. Microwave in 30-second intervals, stirring after each round, until the chocolate is completely melted and smooth.
Step 6: Top and Chill
Spoon the melted chocolate mixture over the Rice Krispie cups, smoothing out the tops with a spatula or the back of a spoon.
If you’re feeling fancy, sprinkle a few mini chocolate chips or a pinch of flaky sea salt on top for an extra touch of texture and flavor. Refrigerate the cups for at least 30 minutes, or until the chocolate topping is fully set.
Why You’ll Love This Recipe
Simple & Quick: These Chocolate Peanut Butter Rice Krispie Cups are easy to make and come together in under an hour.
Perfect Balance of Flavors: The creamy peanut butter base combined with the rich chocolate topping creates a satisfying, indulgent treat.
No Baking Required: This no-bake recipe means you can enjoy these treats without heating up your kitchen.
Customizable: Add mini chocolate chips, sprinkle flaky sea salt, or experiment with different nut butters for a personalized touch.
Perfect Portion Sizes: Made in a mini muffin tin, these cups are great for portion control and sharing.
Mistakes to Avoid & Solutions
1. Mistake: The mixture isn’t sticking together.
Solution: Make sure the peanut butter and honey/corn syrup are fully melted and well mixed before adding the Rice Krispies. If it’s still too dry, add a tablespoon of peanut butter or honey.
2. Mistake: The Rice Krispies are too soggy.
Solution: Be careful not to overheat the peanut butter and honey mixture. Once combined, remove it from the heat immediately to prevent the Rice Krispies from getting too soggy.
3. Mistake: The chocolate topping doesn’t set properly.
Solution: Ensure the chocolate is melted smoothly by stirring in the peanut butter before microwaving. Refrigerate the cups long enough for the chocolate to firm up before serving.
4. Mistake: The cups stick to the muffin tin.
Solution: Lightly grease or line your mini muffin tin with paper liners to prevent sticking and make removal easier.
Serving and Pairing Suggestions
Serve as a Snack or Dessert: These make great after-school treats or a light dessert after dinner.
Pair with a Glass of Milk: The creamy peanut butter and rich chocolate flavors pair perfectly with a tall glass of milk.
Perfect for Parties: Serve them on a dessert table for a crowd-pleasing bite-sized treat.
Great for a Picnic: Since they don’t need refrigeration for short periods, they’re perfect to bring along for a picnic or BBQ.
Storage and Reheating Tips
Storage: Store the Rice Krispie cups in an airtight container at room temperature for up to 5 days.
Refrigeration: If you prefer to keep them fresh longer, store them in the fridge for up to 1 week.
Freezing: For longer storage, freeze them in a single layer on a baking sheet, then transfer them to a freezer-safe bag. They’ll last up to 3 months.
Reheating: These cups are best served chilled, but if you want them softer, microwave them for 10-15 seconds.
FAQs
1. Can I use crunchy peanut butter instead of creamy?
Yes! Crunchy peanut butter will add a little extra texture to the base.
2. Can I substitute the honey with maple syrup?
Absolutely. Maple syrup will provide a slightly different flavor but still work well as a sweetener.
3. How do I know when the chocolate topping is ready?
The chocolate topping should be smooth and glossy once it’s fully melted. Don’t let it cool too much before pouring over the cups.
4. Can I make these without a muffin tin?
Yes! You can also form the mixture into small balls on parchment paper for bite-sized treats.
5. Can I freeze these for later?
Yes, you can freeze these Rice Krispie cups. Just make sure they are well wrapped or stored in an airtight container to prevent freezer burn.
Tips & Tricks
– If you want to add a little extra flavor, sprinkle a pinch of cinnamon or a dash of sea salt into the peanut butter mixture before adding the Rice Krispies.
– For a more indulgent treat, try adding a layer of marshmallows between the peanut butter mixture and chocolate topping.
Recipe Variations
Nut-Free Version: Replace the peanut butter with sunflower seed butter for a nut-free alternative.
Add-ins: Mix in mini marshmallows, dried fruit, or even crushed pretzels for some extra crunch and flavor.
Dairy-Free: Use dairy-free chocolate chips and a plant-based peanut butter for a vegan-friendly twist.
Final Thoughts
Making these Chocolate Peanut Butter Rice Krispie Cups was a true experiment in satisfying a craving with simplicity. What I love most about this recipe is its versatility and ease. You can enjoy them as a quick snack, serve them at a party, or just indulge in a few after a long day.
Each bite delivers that perfect balance of rich chocolate and smooth peanut butter, with a delightful crunch from the Rice Krispies. They’re not too heavy but still satisfy your sweet tooth — and they’re so easy to make, you’ll never need to buy store-bought treats again. I can’t wait for you to try this recipe and see how it becomes a new favorite in your home!

Chocolate Peanut Butter Rice Krispie Cups
Ingredients
- 3 cups Rice Krispies cereal
- ½ cup peanut butter
- ½ cup honey or corn syrup
- ¼ cup brown sugar
- 1 tsp vanilla extract
- 1 cup semisweet chocolate chips
- 2 tbsp peanut butter
Instructions
- Heat honey (or corn syrup) and brown sugar in a medium saucepan over medium heat, stirring constantly until the sugar dissolves and the mixture starts to bubble.
- Remove the pan from heat and stir in peanut butter and vanilla extract until smooth and creamy.
- Pour Rice Krispies into the mixture and stir until the cereal is evenly coated.
- Grease or line a mini muffin tin. Spoon the mixture into each cup, pressing down gently to pack it in about three-quarters full.
- In a microwave-safe bowl, combine chocolate chips and peanut butter. Microwave in 30-second intervals, stirring each time, until smooth.
- Spoon the melted chocolate over the Rice Krispie cups and smooth out the tops. Optionally, add mini chocolate chips or flaky sea salt. Refrigerate for at least 30 minutes until the chocolate sets.


