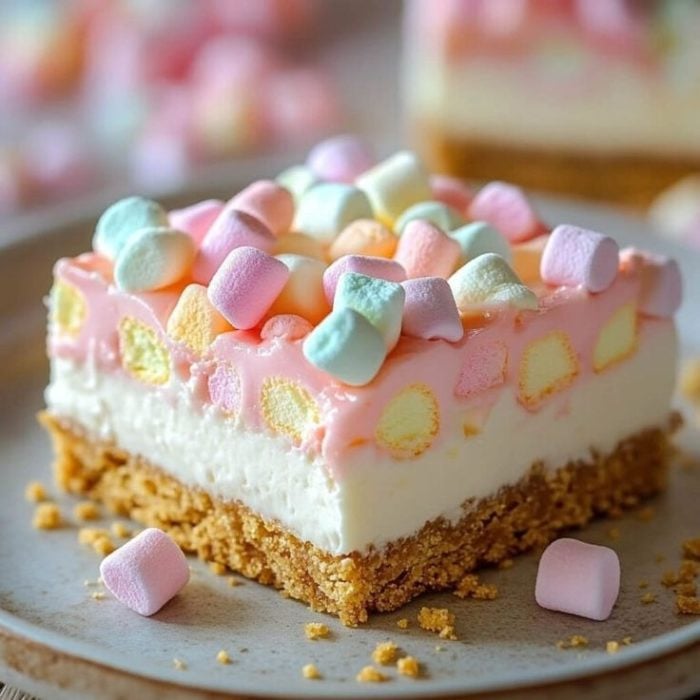
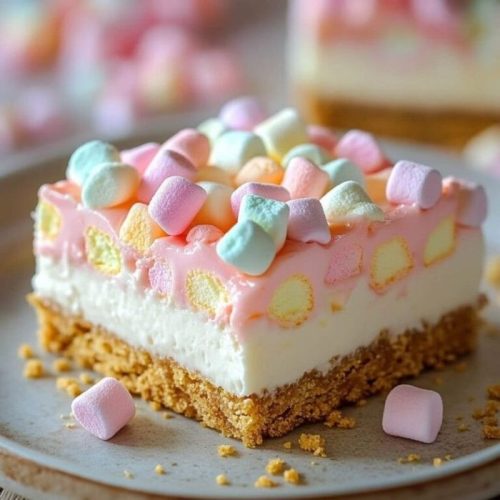
I recently found myself desiring something sweet but didn’t want to turn on the oven. That’s when I remembered an old family favorite—marshmallow slice. As a child, I loved its soft, pillowy filling paired with a crumbly crust, and every bite felt like pure joy. But this time, I wanted to give it a little upgrade—a creamy, cheesecake-like layer with just the right balance of sweetness.
There’s something so satisfying about whipping up a dessert in minutes, especially when it requires minimal effort but delivers maximum flavor. This no-bake marshmallow slice is a delightful mix of textures: a buttery graham cracker crust, a rich yet airy filling, and bursts of colorful mini marshmallows that make each bite fun.
The added white chocolate chips give it a subtle, creamy sweetness. It’s a crowd-pleaser, perfect for casual gatherings, kids’ parties, or even an indulgent afternoon treat with a cup of tea. Let’s dive into this incredibly simple yet irresistible recipe!

Short Description
This No-Bake Marshmallow Slice is a creamy, dreamy dessert featuring a buttery graham cracker crust, a rich marshmallow-infused cheesecake filling, and optional white chocolate chips for extra sweetness. Quick, easy, and perfect for any occasion!
Key Ingredients
For the Crust:
- 1 ½ cups crushed graham crackers (or digestive biscuits, vanilla wafers, or shortbread cookies!)
- ½ cup unsalted butter, melted
For the Marshmallow Filling:
- 8 oz cream cheese, softened
- ½ cup powdered sugar
- 1 teaspoon vanilla extract
- 1 ½ cups heavy whipping cream
- 2 cups mini rainbow marshmallows
- ½ cup white chocolate chips (optional, but adds extra sweetness!)
Tools Needed
- Mixing bowls
- Hand mixer or stand mixer
- 8×8-inch baking dish
- Spatula
- Measuring cups and spoons
- Parchment paper (for easy removal)
Step-by-Step Cooking Instructions
Step 1: Prepare the Crust
Line an 8×8-inch baking dish with parchment paper for easy removal. In a mixing bowl, combine the crushed graham crackers and melted butter. Stir until the mixture resembles wet sand.
Press it firmly into the bottom of the dish, ensuring an even layer. Place in the refrigerator to chill while you prepare the filling.
Step 2: Whip the Cream
In a large bowl, use a hand mixer to whip the heavy cream until stiff peaks form. Set aside.
Step 3: Make the Marshmallow Filling
In another bowl, beat the softened cream cheese, powdered sugar, and vanilla extract until smooth and creamy. Gently fold in the whipped cream, mixing until fully incorporated.
Step 4: Add the Marshmallows & Chocolate Chips
Fold in the mini rainbow marshmallows and white chocolate chips (if using), ensuring they are evenly distributed throughout the mixture.
Step 5: Assemble the Slice
Spread the marshmallow filling evenly over the chilled crust, smoothing the top with a spatula. Cover and refrigerate for at least 4 hours, or until firm.
Step 6: Slice & Serve
Once set, lift the slice out of the pan using the parchment paper. Cut into squares.
Why You’ll Love This Recipe
No baking required – Perfect for warm days when you don’t want to turn on the oven.
Quick & easy – Comes together in just a few simple steps.
Kid-friendly – A colorful, fun dessert that kids will love.
Versatile – Swap ingredients to suit your taste preferences.
Mistakes to Avoid & Solutions
Mistake: Overmixing the whipped cream.
Solution: Stop beating once stiff peaks form to prevent a runny filling.
Mistake: Pressing the crust too lightly.
Solution: Firmly pack it down to prevent crumbling.
Mistake: Serving too soon.
Solution: Let it chill for at least 4 hours to ensure a firm texture.
Serving & Pairing Suggestions
Serve chilled with a drizzle of chocolate sauce or fresh berries for a fruity contrast. It pairs beautifully with a cup of coffee, milk, or a light citrus tea.
Storage & Reheating Tips
Store leftovers in an airtight container in the fridge for up to 5 days. For longer storage, freeze individual squares for up to a month and thaw in the fridge before serving.
FAQs
1. Can I use a different type of cookie for the crust?
Yes! Digestive biscuits, vanilla wafers, or shortbread cookies work well.
2. Can I make this ahead of time?
Absolutely! It’s best made the night before to allow the flavors to meld.
3. Can I use regular marshmallows instead of mini ones?
Yes, just chop them into smaller pieces for even distribution.
4. Can I make this dairy-free?
Try using dairy-free cream cheese and coconut cream as substitutes.
5. How do I prevent the crust from crumbling?
Ensure you press it firmly into the pan and chill it before adding the filling.
Final Thoughts
Of all the no-bake desserts I’ve made, this Marshmallow Slice is one I keep coming back to. It’s the perfect combination of creamy, crunchy, and sweet, making it a hit for any occasion. I love how effortlessly it comes together—no oven, no stress, just a handful of ingredients and a little patience while it chills. The mini marshmallows add a pop of color and fun, making it especially great for kids (and the kid in all of us!).
It’s also incredibly versatile; you can switch up the flavors, add a drizzle of chocolate, or even mix in some nuts for extra crunch. Every bite is light, fluffy, and just the right amount of indulgent. If you need a quick and crowd-pleasing dessert, this one never disappoints. Give it a try, and don’t be surprised if it becomes a new favorite in your kitchen!

No-Bake Marshmallow Slice
Ingredients
- 1½ cups crushed graham crackers
- ½ cup unsalted butter
- 8 oz cream cheese
- ½ cup powdered sugar
- 1 tso vanilla extract
- 1½ cups heavy whipping cream
- 2 cups mini rainbow marshmallows
- ½ cup white chocolate chips
Instructions
- Prepare the crust: Line an 8x8-inch baking dish with parchment paper. Mix crushed graham crackers and melted butter until combined, then press firmly into the dish. Chill while making the filling.
- Whip the cream: Using a hand mixer, whip the heavy cream until stiff peaks form. Set aside.
- Make the filling: Beat cream cheese, powdered sugar, and vanilla extract until smooth. Gently fold in the whipped cream until fully combined.
- Add mix-ins: Fold in the mini rainbow marshmallows and white chocolate chips until evenly distributed.
- Assemble and chill: Spread the filling evenly over the crust, smooth the top, cover, and refrigerate for at least 4 hours until firm.
- Slice and serve: Lift from the pan using parchment paper, cut into squares.


