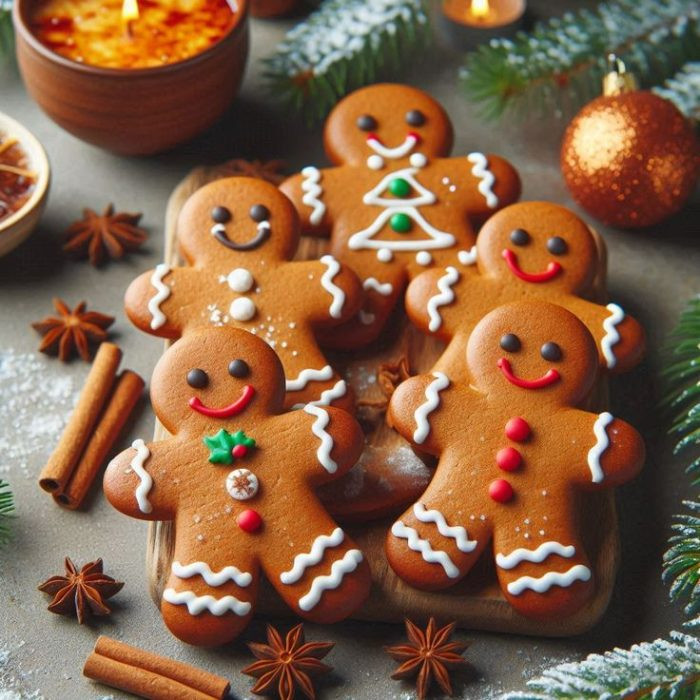
Last December, right after one of those marathon days at the office where every email felt like it multiplied on its own, I came home craving something fun to pull me out of work mode. The kids were sprawled across the living room floor drawing Santa faces on leftover envelopes, and my husband was attempting to hang lights while being “supervised” by our dog. The whole scene felt like a warm holiday hug calling me back into family life. As soon as the kids saw me walk into the kitchen, they yelled, “Mom, can we bake something Santa-y?”
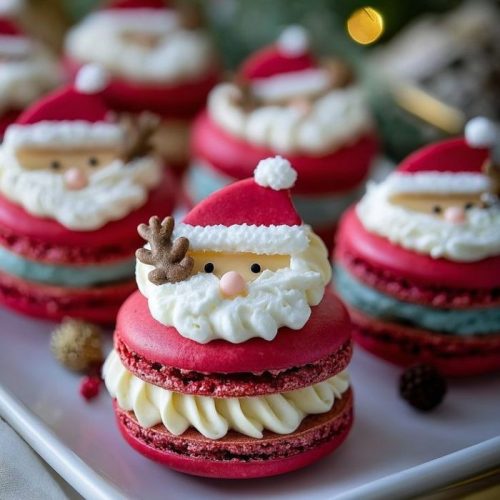
I laughed because “Santa-y” wasn’t exactly a precise request, but it did spark something in me. I had been wanting to try festive macarons for ages, and that night felt like the perfect moment. I pulled out the almond flour and powdered sugar, and instantly the kids flocked around me like I had just announced a magic show. The kitchen filled with the soft, sweet scent of sugar as we sifted ingredients. My son asked if we were “summoning Santa through cookies,” and honestly, that description wasn’t too far off from the energy in the room.
As the glossy batter came together, the kids took turns peeking into the mixing bowl with wide eyes. When we piped the little macaron circles and added tiny Santa hats and beards with food coloring, they giggled nonstop, arguing about whose Santa looked “more jolly.” When the macarons baked, the entire kitchen smelled like warm almonds and winter coziness.
That night, I realized how these delicate little cookies can turn a long day into something sweet and full of laughter. Now Santa Claus Macarons have become a yearly tradition in our home, and every time I make them, they bring that same spark of holiday magic.

Short Description
A playful batch of Santa Claus Macarons featuring crisp, airy shells and creamy filling, decorated with festive Santa details for an irresistible holiday treat.
Key Ingredients
For the Macaron Shells
- 100g powdered sugar
- 100g almond flour
- 90g aged egg whites
- 90g granulated sugar
- Red food coloring
- White food coloring or edible white gel
For the Filling
- ½ cup softened butter
- 1½ cups powdered sugar
- 1 teaspoon vanilla extract
- 1 tablespoon heavy cream
Tools Needed
- Food processor
- Sifter
- Mixing bowls
- Electric mixer
- Piping bags
- Baking sheet
- Parchment paper or silicone mat
- Oven thermometer
- Cooling rack
Cooking Instructions
Step 1: Prepare the Dry Ingredients
Pulse powdered sugar and almond flour in a food processor for 10 seconds. Sift the mixture twice to ensure a fine, smooth consistency. Discard any large bits that remain.
Step 2: Make the Meringue
In a clean bowl, whisk aged egg whites on medium speed until foamy. Gradually add granulated sugar and continue whipping until stiff, glossy peaks form. Add red food coloring until you reach a Santa hat shade.
Step 3: Fold the Batter
Gently fold the dry ingredients into the meringue using a spatula. The batter should become smooth and flow like thick lava. If it is too stiff, fold gently 3 more times. If too runny, you may have overmixed.
Step 4: Pipe the Macaron Shells
Transfer batter to a piping bag. On a lined baking sheet, pipe small circles about 1½ inches wide. Tap the tray firmly on the counter to release air bubbles.
Step 5: Rest the Shells
Let the piped shells sit for 30 to 45 minutes until a thin skin forms on top. When lightly touched, the batter should not stick.
Step 6: Bake
Preheat the oven to 300°F. Bake for 14 to 16 minutes until the shells rise and form sturdy “feet.” Allow them to cool completely before removing from the pan.
Step 7: Create Santa Decorations
Using white food gel or dyed frosting, pipe a fluffy beard shape on one half of the shells. Add a small red hat using leftover batter or colored frosting. Let decorations set for 10 minutes.
Step 8: Make the Filling
Beat softened butter until creamy. Add powdered sugar gradually. Mix in vanilla and heavy cream until smooth and fluffy.
Step 9: Fill the Macarons
Pipe the filling onto the undecorated shells. Gently place decorated shells on top to form a sandwich.
Why You’ll Love This Recipe
Light, crisp shells with chewy centers
Perfectly festive for holiday celebrations
Kid friendly decorating activity
Customizable colors and details
Makes a beautiful edible gift
Gluten free shells
Ideal for pairing with warm winter drinks
Adds holiday joy to any dessert table
Mistakes to Avoid & Solutions
Skipping the resting step
Leads to flat shells.
Solution: Always rest 30 to 45 minutes.
Overmixing the batter
Makes runny batter that spreads too much.
Solution: Stop folding when the batter flows slowly and ribbons.
Incorrect oven temperature
Causes cracked or hollow shells.
Solution: Use an oven thermometer for accuracy.
Using wet tools
Prevents meringue from forming.
Solution: Keep bowls and mixers completely dry.
Removing shells too early
Makes them break.
Solution: Cool fully before lifting.
Serving and Pairing Suggestions
These macarons shine at holiday parties, cookie exchanges, or cozy nights in.
Serve them with peppermint hot chocolate, ginger tea, or warm milk for the kids.
Display them on a red or white platter like a little Santa parade for extra cuteness.
Storage and Reheating Tips
FAQs
1. Do I really need aged egg whites?
Yes, aged egg whites produce more stable meringue.
2. Why did my macarons crack?
Your oven may be too hot or the shells did not rest long enough.
3. Can I color only half the batter?
Yes. Reserve some batter for white decorations or separate before coloring.
4. What fillings work besides buttercream?
Ganache, jam, or cream cheese frosting work beautifully.
5. How do I get perfectly round shapes?
Use a printed template under parchment paper.
Tips & Tricks
Weigh ingredients for best results
Use a silicone mat for even baking
Tap the tray multiple times to remove air
Let macarons mature overnight for better texture
Add the smallest drop of gel coloring to avoid thinning the batter
Recipe Variations
Chocolate Santa Macarons
Add 1 tablespoon cocoa powder to the dry mixture. Fill with chocolate ganache.
Peppermint Santa Macarons
Add ⅛ teaspoon peppermint extract to the filling and garnish with crushed candy canes.
Strawberry Santa Macarons
Mix 1 tablespoon strawberry powder into the shells and use strawberry buttercream.
Snowy White Santa Macarons
Color shells white and decorate with red details for a reverse Santa design.
Final Thoughts
Santa Claus Macarons have become one of those recipes that instantly flip a long day into something joyful. There is a sweet kind of magic in decorating each tiny face, seeing the kids concentrate with their tongues sticking out just a little, and laughing when one Santa ends up looking a bit sleepy. These small moments make the holidays feel fuller and warmer.
Bringing out a plate of these always brightens the whole room. They’re festive, fun, and just fancy enough to make everyone feel a little special. The way simple ingredients transform into edible holiday characters has a way of pulling people together around the table. Making them has turned into a tradition filled with giggles, red-tinted fingers, and the sweet scent of almonds drifting through the kitchen. These little treats have a knack for adding a spark of joy to any celebration.
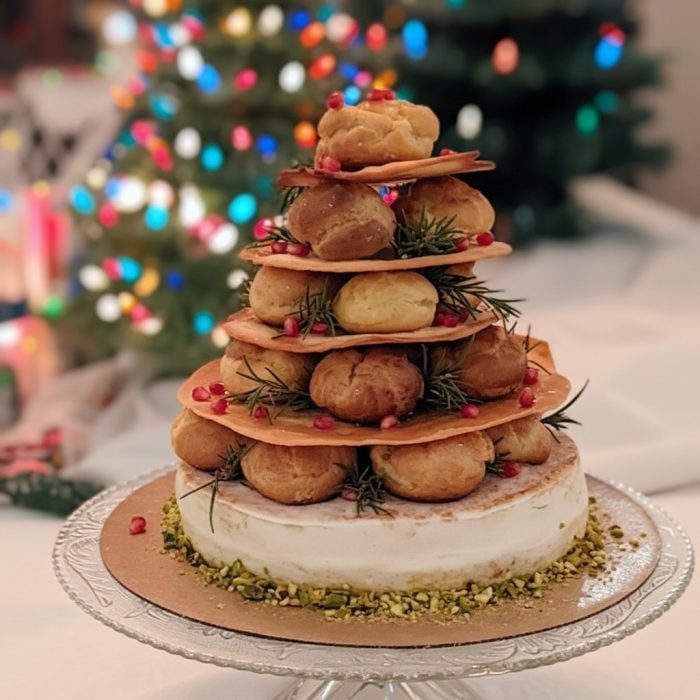
Festive Santa Claus Macarons
Ingredients
For the Choux Pastry
- 1 cup water
- ½ cup unsalted butter
- 1 cup all-purpose flour
- 4 large eggs
- ¼ teaspoon salt
For the Cream Filling
- 1½ cups heavy cream
- 3 tablespoons sugar
- 1 teaspoon vanilla extract
- Green food coloring
For Decoration
- Powdered sugar
- Sprinkles
- Small star candies
Instructions
- Heat water, butter, and salt until boiling, then stir in flour all at once until a smooth dough forms; cook for 1 minute.
- Let the dough cool slightly, then mix in eggs one at a time until glossy; add a bit more egg if too stiff.
- Preheat oven to 375°F and pipe 1-inch mounds onto a parchment-lined baking sheet; smooth peaks with a damp finger.
- Bake 20–25 minutes until golden and firm, then cool fully on a rack.
- Whip heavy cream, sugar, vanilla, and green food coloring until stiff peaks form.
- Poke a hole in each puff and fill with the green cream using a piping bag.
- Stack the filled puffs in a cone on a serving plate, using extra cream between layers for stability.
- Finish with powdered sugar, sprinkles, and a star candy, then chill for 10 minutes to set.