On a rainy midweek morning, I opened the pantry and noticed how quiet the house felt before the day fully kicked in. The kids were still getting ready, my husband was hunting for his work bag, and I needed something quick to prep for our family’s busy schedule. A small row of ingredients on the counter sparked an idea: a homemade protein bar that could handle the chaos of our daily routine without adding any stress to it.
While mixing everything together, I could hear the usual morning sounds drifting in from the hallway—zippers, footsteps, half-finished conversations. There was something grounding about shaping each bar, almost like building a tiny bit of order before everyone scattered for the day. The dough came together easily, and the kitchen warm with a peanut-buttery aroma felt like a small pocket of calm.
By the time the bars were chilling in the fridge, the sun had pushed its way through the clouds. Everyone grabbed a piece before heading out, and suddenly those bars became a morning win we didn’t know we needed. They’ve been part of our routine ever since, fitting neatly into busy mornings, gym bags, and late-afternoon cravings.
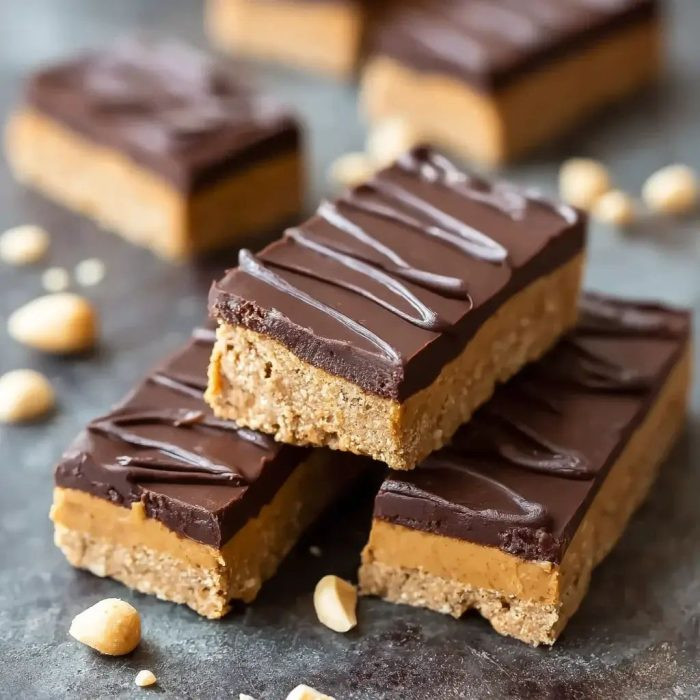
Short Description
Soft homemade Protein Bars Recipe made with creamy peanut butter, smooth protein powder, and a touch of maple syrup, giving you a nutritious, energizing snack that works perfectly for busy mornings or quick grab-and-go fuel.
Key Ingredients
-
1 ½ cups peanut butter or allergy-friendly substitute
-
¾ cup protein powder (90 g)
-
¼ cup pure maple syrup or honey
-
½ teaspoon salt
-
4 oz melted chocolate chips (optional)
Tools Needed
-
Mixing bowl
-
Rubber spatula or spoon
-
8×8 baking pan
-
Parchment paper
-
Knife for slicing
-
Microwave-safe bowl for melting chocolate
Cooking Instructions
Step 1: Mix the Base
Add peanut butter, protein powder, maple syrup or honey, and salt to a mixing bowl. Stir until the mixture forms a dense, smooth dough. It should be easy to press between your fingers.
Troubleshooting tip: If the dough feels too dry or crumbly, add one tablespoon of maple syrup at a time. If it feels too sticky, sprinkle in one tablespoon of protein powder.
Step 2: Shape the Bars
Line an 8×8 pan with parchment paper. Transfer the dough into the pan and press it down firmly using your hands or a spatula to create an even layer. Make sure to reach the corners for uniform bars.
Step 3: Add the Optional Chocolate Coating
Melt chocolate chips in a microwave-safe bowl in 20-second intervals, stirring between each round until smooth. Pour the melted chocolate over the pressed dough.
Optional: Stir 2 teaspoons of oil into the melted chocolate for a silky finish.
Step 4: Chill and Slice
Refrigerate the pan for at least 1 hour, or until firm. Once chilled, lift the slab out of the pan and slice into bars or squares using a sharp knife.
Step 5: Serve
Enjoy chilled straight from the fridge or allow the bars to soften at room temperature for a creamier texture.
Why You’ll Love This Recipe
Easy to customize with different flavors
Uses everyday pantry ingredients
Naturally sweetened and nutrient-dense
No baking required
Perfect for meal prep
Kid-friendly and lunchbox-ready
Great for on-the-go snacking
Soft, chewy, and satisfying
Mistakes to Avoid & Solutions
Dry Dough
The mixture won’t press together or crumbles when shaped.
Solution: Add small amounts of maple syrup or a splash of warm water until the dough becomes cohesive.
Sticky Dough
Too soft to shape or sticks to your hands.
Solution: Mix in one tablespoon of protein powder at a time until it firms up.
Uneven Slicing
Bars break apart when cutting.
Solution: Chill the mixture fully before slicing and use a sharp, warmed knife.
Chocolate Coating Cracks
Chocolate separates from the base.
Solution: Let the bars rest at room temperature for 3 to 5 minutes before cutting, or stir a teaspoon of oil into the melted chocolate.
Bars Too Soft in Warm Weather
They lose shape at room temperature.
Solution: Store in the refrigerator or add one to two tablespoons extra protein powder for a firmer texture.
Serving and Pairing Suggestions
Serve the bars as a quick breakfast-on-the-go, a post-workout snack, or an afternoon bite with tea or iced coffee.
Pair them with yogurt bowls, fresh fruit, or a refreshing smoothie.
For gatherings or brunch buffets, slice the bars into bite-size squares and arrange them neatly on a chilled platter.
Storage and Reheating Tips
Store the bars in an airtight container in the refrigerator for up to one week.
For longer storage, freeze them for up to two months with parchment paper between layers.
Thaw frozen bars in the refrigerator overnight before eating.
No reheating is needed, but letting them rest at room temperature for a few minutes will bring back their soft, creamy texture.
FAQs
1. Can I use any protein powder?
Yes, but each type absorbs moisture differently. Start with the recommended amount and adjust if needed.
2. Can I make these bars nut-free?
Absolutely. Use sunflower seed butter or soy nut butter as a direct substitute.
3. Why is my dough too dry?
Your protein powder may be more absorbent. Add a little extra maple syrup or nut butter until it smooths out.
4. Can I reduce the sweetness?
Yes. Use less maple syrup and increase the nut butter slightly to maintain consistency.
5. Can I add mix-ins?
Definitely. Try crushed cereal, mini chocolate chips, chia seeds, or raisins.
Tips & Tricks
Warm the peanut butter slightly for easier mixing
Line the pan with parchment for clean removal
Use an offset spatula to smooth the top evenly
Chill longer for cleaner cuts
Add a pinch of cinnamon or cocoa powder for extra depth
Use flavored protein powder to change the profile instantly
Drizzle the top with melted almond butter for a bakery-style finish
Recipe Variations
Chocolate Peanut Butter Bars: Use chocolate protein powder and add 2 tablespoons cocoa powder. Prepare as directed and top with dark chocolate for a richer flavor.
Coconut Almond Bars: Swap peanut butter with almond butter. Add ¼ cup shredded coconut to the dough and use vanilla protein powder. Top with white chocolate if desired.
Chunky Peanut Crunch Bars: Add ¼ cup crushed peanuts to the dough. Skip the chocolate coating and press extra nuts on top before chilling.
Berry Swirl Bars: Use vanilla protein powder and stir in 2 tablespoons freeze-dried berry powder. Swirl 1 tablespoon raspberry jam over the top before chilling.
Mocha Protein Bars: Add 1 teaspoon espresso powder and use chocolate protein powder. Finish with a thin layer of melted chocolate for a coffee-house flavor.
Final Thoughts
Each batch of these protein bars brings a little rhythm back into a busy day. There is a quiet joy in knowing you can create something nourishing without needing complicated steps or a long list of ingredients. These bars have supported long workdays, weekend hikes, and lazy afternoons when no one wants to cook.
Whenever I cut them into neat squares and stack them in the fridge, it feels like preparing a small gift for my family. They’re reliable, flexible, and easy to share. If you give them a try, you might find that they settle into your routine just as naturally—ready whenever you need something simple, steady, and satisfying.

Protein Bars
Ingredients
- 1 ½ cups peanut butter or allergy-friendly substitute
- ¾ cup protein powder 90 g
- ¼ cup pure maple syrup or honey
- ½ teaspoon salt
- 4 oz melted chocolate chips optional
Instructions
- Mix peanut butter, protein powder, maple syrup (or honey), and salt until a smooth, dense dough forms. Adjust with extra syrup if dry or more protein powder if sticky.
- Press the dough evenly into a parchment-lined 8×8 pan.
- Melt chocolate in 20-second intervals and pour over the top. Add a little oil if you want a smoother finish.
- Chill for 1 hour, then lift out and slice into bars.
- Serve chilled or let soften slightly for a creamier bite.