Rain tapped softly against the windows as the scent of cocoa filled the kitchen. The sponge was rising in the oven, and that sweet, familiar aroma carried me straight back to childhood afternoons spent in the school canteen. It was the kind of smell that promised comfort before the first bite even happened.
While the cake baked, I stirred together warm milk, cocoa, and cornflour until the custard turned glossy and thick. The kids hovered nearby, spoons in hand, waiting for a taste. When I finally poured the rich chocolate custard over the warm sponge, the whole room went quiet, everyone focused on that first, melting spoonful.
Now, this dessert often returns to our table on rainy evenings. It’s simple to make and brings an easy warmth to the house, soft sponge, silky custard, and a touch of nostalgia that never loses its charm.
Short Description
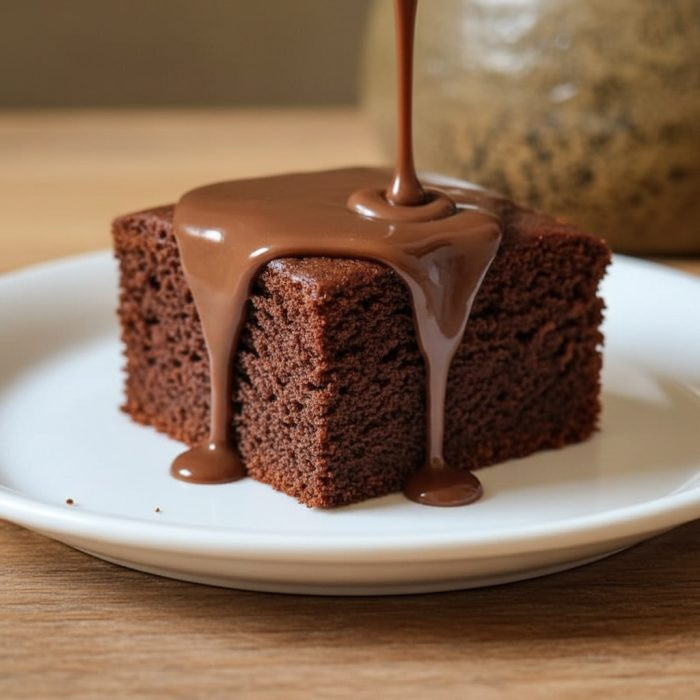
This School Chocolate Sponge & Custard is a nostalgic dessert featuring a light cocoa sponge and rich, homemade chocolate custard. It’s soft, comforting, and the perfect warm treat for family nights or anyone craving a taste of childhood.
Key Ingredients
For the Sponge
-
½ cup unsalted butter, softened
-
¾ cup caster sugar
-
2 large eggs
-
1 tsp vanilla extract
-
1½ cups self-raising flour
-
¼ cup unsweetened cocoa powder
-
3 tbsp milk
For the Chocolate Custard
-
2 cups whole milk
-
4 tbsp caster sugar
-
2 tbsp unsweetened cocoa powder
-
2 tbsp cornflour
-
1 tsp vanilla extract
Tools Needed
-
8×8-inch baking tin
-
Mixing bowls
-
Electric mixer or hand whisk
-
Sieve
-
Saucepan
-
Whisk
-
Spatula
-
Baking parchment
Cooking Instructions
Step 1: Preheat the Oven
Set your oven to 350°F (Gas Mark 4). Grease and line an 8×8-inch baking tin with parchment paper, leaving a little overhang for easy removal.
Step 2: Cream the Butter and Sugar
In a large bowl, beat softened butter and caster sugar until pale, fluffy, and light. This step adds air, giving the sponge that soft texture we love.
Step 3: Add the Eggs and Vanilla
Beat in the eggs one at a time, followed by vanilla extract. Add a spoonful of flour with the second egg to prevent curdling.
Step 4: Fold in the Dry Ingredients
Sift together self-raising flour and cocoa powder, then gently fold into the mixture until just combined. Avoid over-mixing to keep the sponge airy.
Step 5: Adjust the Consistency
Stir in the milk to create a soft, dropping batter. Pour into the prepared tin and smooth the top with a spatula.
Step 6: Bake the Sponge
Bake for 25–30 minutes until the top is springy and a skewer comes out clean. Let it cool slightly while you make the custard.
Step 7: Make the Chocolate Custard
In a small bowl, mix cornflour, sugar, and cocoa powder with a splash of milk to form a smooth paste. Warm the remaining milk in a saucepan until almost boiling. Pour the hot milk into the cocoa paste, whisking constantly to avoid lumps. Return the mixture to the saucepan and stir over low heat until thick, smooth, and glossy. Stir in vanilla extract.
Step 8: Serve and Enjoy
Cut the warm sponge into nine generous squares. Place each in a bowl and pour a big ladle of hot custard over the top. Serve immediately and enjoy while it’s warm and silky.
Why You’ll Love This Recipe
Brings back childhood memories in every bite
Uses simple pantry ingredients
Soft, fluffy sponge paired with creamy custard
Ideal for cozy weekends or family desserts
Easy to make with no fancy tools required
Mistakes to Avoid & Solutions
Over-mixing the sponge batter
Too much mixing makes the cake dense and heavy.
Solution: Fold gently until ingredients are just combined.
Curdled batter
Adding eggs too fast can cause curdling.
Solution: Add one egg at a time and beat gently, with a spoonful of flour if needed.
Lumpy custard
Heating too quickly or skipping whisking creates lumps.
Solution: Stir continuously on medium-low heat until smooth and thickened.
Dry sponge
Overbaking can dry out the texture.
Solution: Check doneness early; the sponge should spring back lightly when touched.
Thin custard
Undercooking won’t let the custard set properly.
Solution: Cook until it coats the back of a spoon, then remove from heat.
Serving and Pairing Suggestions
Serve warm with extra custard on the side for pouring.
Add a sprinkle of grated chocolate or a dollop of whipped cream for a richer finish.
Pair with fresh strawberries or raspberries for contrast.
For extra nostalgia, serve in shallow bowls just like the school canteen days.
Storage and Reheating Tips
Store sponge and custard separately in airtight containers.
The sponge keeps for up to 3 days at room temperature.
Reheat custard gently in a saucepan over low heat, stirring constantly to avoid curdling.
You can freeze the sponge (without custard) for up to 2 months. Thaw at room temperature before reheating.
FAQs
1. Can I make the sponge ahead of time?
Yes! Bake it a day early, cover tightly, and warm it before serving with fresh custard.
2. Can I use cocoa powder in the custard only?
You can, but adding cocoa to the sponge too gives that full chocolate experience.
3. Can I make the custard dairy-free?
Yes, substitute milk with almond or oat milk and use dairy-free butter in the sponge.
4. What if I don’t have self-raising flour?
Use all-purpose flour and add 2 tsp baking powder for the same lift.
5. How thick should the custard be?
It should coat the back of a spoon, not too runny, not too thick.
Tips & Tricks
Sift the flour and cocoa for a lighter sponge.
Use room temperature ingredients for even mixing.
Whisk the custard continuously for that silky, lump-free texture.
Serve the sponge slightly warm so the custard melts into it perfectly.
Recipe Variations
Mint Chocolate Sponge: Add ½ tsp peppermint extract to the sponge batter for a refreshing twist.
Mocha Version: Mix 1 tsp instant coffee granules into the custard for a subtle mocha flavor.
Caramel Custard Twist: Replace cocoa in the custard with 1 tbsp caramel sauce for a sweet, buttery alternative.
Final Thoughts
This School Chocolate Sponge & Custard is more than just dessert, it’s a warm reminder of simpler days, laughter-filled lunch breaks, and second helpings at the canteen. It’s soft, rich, and indulgent without being fussy, the kind of pudding that makes everyone feel like a kid again.
I often make it on chilly evenings when the house feels quiet and we need a bit of warmth. The first spoonful always brings that same smile it did years ago, rich sponge, velvety custard, and a wave of nostalgia that never fades.

Classic School Chocolate Sponge & Custard
Ingredients
For the Sponge
- ½ cup unsalted butter softened
- ¾ cup caster sugar
- 2 large eggs
- 1 tsp vanilla extract
- 1½ cups self-raising flour
- ¼ cup unsweetened cocoa powder
- 3 tbsp milk
For the Chocolate Custard
- 2 cups whole milk
- 4 tbsp caster sugar
- 2 tbsp unsweetened cocoa powder
- 2 tbsp cornflour
- 1 tsp vanilla extract
Instructions
- Preheat oven to 350°F (Gas Mark 4), grease and line an 8×8-inch tin with parchment.
- Beat butter and sugar until pale and fluffy.
- Add eggs one at a time with vanilla, mixing well.
- Sift in flour and cocoa, gently fold to combine.
- Add milk for a soft batter, pour into tin, and smooth top.
- Bake 25–30 minutes until springy; cool slightly.
- Mix cornflour, sugar, and cocoa with milk; whisk into hot milk, cook until thick, then add vanilla.
- Cut sponge, top with hot chocolate custard, and serve warm.