My daughter came home last Friday with a handwritten recipe card from her best friend Mia. It was smudged at the corners, dotted with doodles, and labeled in big bubble letters: “No-Bake Cheesecake Krispies! Apparently, they had made it during their after-school cooking club, and my daughter begged me to try it with her over the weekend. I usually plan our baking together more thoughtfully, but this time I just said, “Alright, grab the Rice Krispies and I’ll meet you in the kitchen.”
She took the lead, measuring out the cereal, scooping marshmallow creme with determination, and insisting on licking the spatula like it was some rite of passage. I helped her melt the butter and mix in the softened cream cheese, she called it “fluffy lava.”
As she stirred, we chatted about school, sleepovers, and what kind of bakery she’d open one day. We pressed the mix into the pan together, not too neat, not too perfect, and waited for it to chill while we cleaned up (and by cleaned up, I mean sampled the leftover bits in the bowl).
Later that night, we cut them into messy squares and passed them around the table. Even my husband, who usually prefers his sweets straight from the freezer aisle, had two. The whole thing felt easy and warm, one of those days where the food wasn’t just good, it was part of the memory.
Short Description
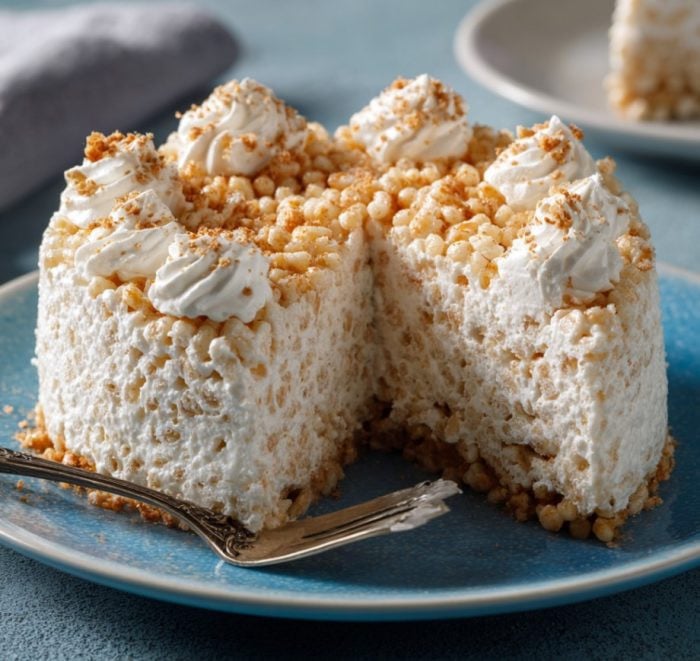
A no-bake treat that combines the crispy goodness of Rice Krispies with a creamy cheesecake twist, perfect for parties, after-school snacks, or a sweet bite anytime.
Key Ingredients
- 6 tablespoons (85g) unsalted butter
- 10 ounces (280g) marshmallow creme
- 1 teaspoon vanilla extract
- ½ teaspoon salt
- 3 ounces (85g) cream cheese, softened
- 5 cups Rice Krispies cereal
- Optional: graham cracker crumbs or white chocolate chips for topping
Tools Needed
- Large saucepan
- Heatproof spatula or wooden spoon
- Large mixing bowl
- 8×8 or 9×9-inch square pan
- Parchment paper or nonstick spray
- Offset spatula or spoon for spreading
Cooking Instructions
Step 1: Melt the Butter
In a large saucepan, melt the butter over medium-low heat. Stir gently to keep it from browning.
Step 2: Add Marshmallow Creme and Cream Cheese
Stir in the marshmallow creme and softened cream cheese. Keep mixing until the mixture is smooth and creamy. Reduce the heat to low so it doesn’t scorch.
Step 3: Flavor It
Add the vanilla extract and salt. Stir to combine. The mixture should smell rich and sweet with a little tang from the cream cheese.
Step 4: Mix in the Cereal
Turn off the heat. Quickly add the Rice Krispies and fold everything together with a spatula until evenly coated.
Step 5: Press into Pan
Line your square pan with parchment or lightly spray with nonstick spray. Pour the mixture into the pan and press it down gently with a spatula or clean hands. Don’t press too hard—you want soft, chewy bars.
Step 6: Chill and Set
Let the bars cool at room temperature for at least 30 minutes. For firmer bars, refrigerate for 1 hour before slicing.
Step 7: Add Optional Toppings
Sprinkle graham cracker crumbs or drizzle melted white chocolate on top before serving for extra flavor and flair.
Why You’ll Love This Recipe
Crispy Meets Creamy: It’s the best of both worlds—cheesecake flavor with that classic krispie crunch.
No Oven Needed: Perfect for warm days or last-minute desserts.
Easy to Make: Comes together in under 15 minutes with just a few ingredients.
Customizable: Top it, flavor it, or shape it however you like.
Kid-Friendly: Simple enough for little helpers to join in.
Mistakes to Avoid & Solutions
Using Cold Cream Cheese
Problem: It clumps and doesn’t melt smoothly.
Solution: Let it soften at room temperature for at least 30 minutes before adding.
Overheating the Mixture
Problem: The marshmallow and butter burn or separate.
Solution: Use medium-low heat and stir constantly. Don’t walk away from the stove.
Pressing Too Firmly
Problem: Bars turn out hard and dry.
Solution: Press gently into the pan—just enough to shape.
Not Coating Quickly
Problem: Cereal gets unevenly coated and clumps.
Solution: Mix immediately after adding cereal and work fast before it sets.
Skipping Parchment Paper
Problem: Treats stick to the pan and break apart.
Solution: Always line the pan or grease it well.
Serving and Pairing Suggestions
Cut into small squares and serve on a dessert tray for parties or potlucks.
Pair with a glass of cold milk, iced coffee, or lemonade.
Serve with a side of berries or drizzle with chocolate sauce.
Try cutting them into mini bites and placing them in paper liners for a buffet-style dessert table.
Pair with fruit skewers for a light, sweet-savory combo at brunch or picnics.
Storage and Reheating Tips
Room Temperature: Store in an airtight container for up to 3 days.
Refrigerator: Keeps well up to 5 days if you prefer firmer bars. Let sit at room temp before serving.
Freezer: Wrap individually and freeze up to 1 month. Thaw in fridge or on counter for 30–60 minutes.
Reheating: Not needed—but if you prefer a slightly gooey texture, microwave a bar for 5–7 seconds.
FAQs
1. Can I use regular marshmallows instead of marshmallow creme?
Yes! Use about 4 cups of mini marshmallows. Melt them with the butter just like the creme.
2. Can I add mix-ins like chocolate chips or nuts?
Absolutely. Stir them in after the cereal to avoid melting, or press them on top before chilling.
3. What if I only have flavored Rice Krispies?
Go for it! Fruity, cocoa, or even cinnamon varieties can work for a fun twist.
4. Can I make this dairy-free?
Yes. Use plant-based butter and dairy-free cream cheese. Many marshmallow cremes are naturally dairy-free, but always check the label.
5. How can I make this less sweet?
Cut back slightly on marshmallow creme (try 8 oz) and add 1 extra tablespoon of cream cheese for more tang.
Tips & Tricks
Spray your spatula (or hands) with cooking spray to prevent sticking when pressing the mixture into the pan.
Let your kids add sprinkles or crushed cookies to make it more fun.
Want a cleaner cut? Chill before slicing and use a sharp knife dipped in warm water.
For a snack bar style, press into a loaf pan and cut into long rectangles.
Store bars between layers of wax paper to keep them from sticking.
Recipe Variations
1. Strawberry Cheesecake Krispies
Add 1 tablespoon strawberry jam to the melted mix and swirl before pressing into the pan. Top with freeze-dried strawberries.
2. Chocolate Drizzle Version
Melt ¼ cup chocolate chips and drizzle over the bars once they’ve cooled. Adds a rich finish without overpowering the cheesecake flavor.
3. Graham Cracker Crust Twist
Press a layer of crushed graham crackers mixed with melted butter into the bottom of the pan before adding the Krispies mixture.
4. Lemon Cheesecake Bars
Swap vanilla extract for lemon zest and ½ teaspoon lemon juice for a citrusy kick. Finish with a light dusting of powdered sugar.
5. Cookie Dough Version
Stir in ¼ cup mini chocolate chips and a dash of brown sugar. Tastes like cheesecake meets cookie dough.
Final Thoughts
My daughter ended up saving the last two bars in a tiny container labeled “Mom & Me Only,” stashed in the back of the fridge behind the pickles. I pretended not to see it for a couple of days. When we finally split one after dinner, she leaned her head on my shoulder and said, “We should make these again next weekend.”
That’s the kind of recipe this is. Not fancy, not fussy—just sweet, simple, and the kind that turns an ordinary afternoon into something worth remembering.
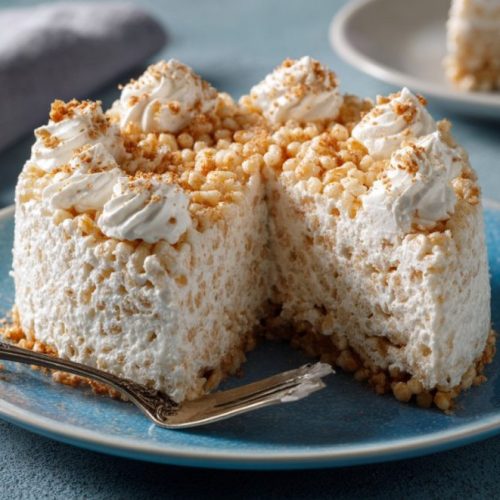
No-Bake Cheesecake Rice Krispies Treats
Ingredients
- 6 tablespoons 85g unsalted butter
- 10 ounces 280g marshmallow creme
- 1 teaspoon vanilla extract
- ½ teaspoon salt
- 3 ounces 85g cream cheese, softened
- 5 cups Rice Krispies cereal
- Optional: graham cracker crumbs or white chocolate chips for topping
Instructions
- In a large pot, melt the butter over medium-low heat. Stir so it doesn't brown.
- Add the marshmallow creme and softened cream cheese. Stir until smooth and creamy. Turn the heat down if needed.
- Stir in the vanilla and salt. The mix should smell sweet and a little tangy.
- Turn off the heat. Pour in the Rice Krispies and mix until everything is well coated.
- Line a square pan with parchment or spray with nonstick spray. Press the mix into the pan gently—don’t pack it too tightly.
- Let the treats cool on the counter for 30 minutes. For firmer bars, chill in the fridge for 1 hour.
- Add crushed graham crackers or drizzle with melted white chocolate if you like. Slice and enjoy!