The first real day of summer vacation always feels a little bit wild—no school alarms, no homework routines, and a sudden burst of freedom that fills the air. That morning, my son had already pulled every crayon from the box and was halfway through drawing a life-sized dinosaur on the patio with sidewalk chalk. I knew we needed an activity that could match his energy but also bring us together for some hands-on fun.
That’s when the idea of making our own bouncy balls popped into my head—not the store-bought kind, but colorful tie-dye bouncy balls using everyday kitchen staples. The best part? He could choose all the colors himself.
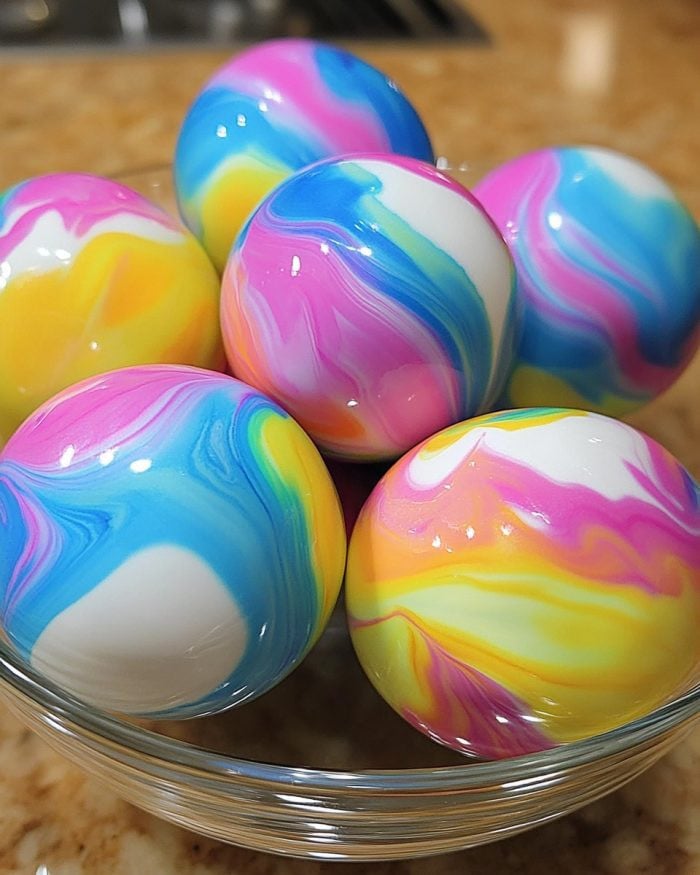
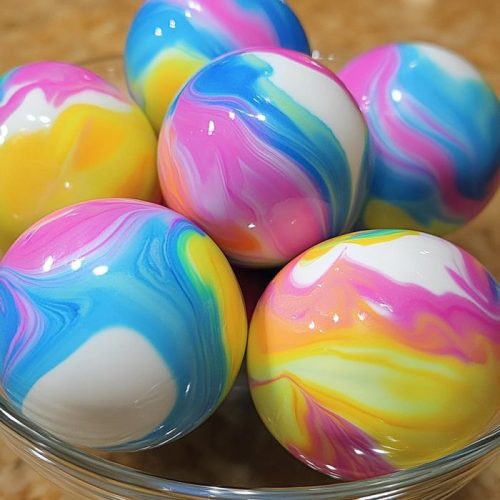
We turned our kitchen island into a mini craft lab, lined with mixing bowls, spoons, and every bottle of food coloring we had. There was something exciting about watching his tiny hands pour glue into a bowl and wait wide-eyed as color and science combined into something fun and squishy. Some colors swirled like a galaxy, others looked like melted rainbow sherbet. When the first ball dried and bounced across the kitchen floor, my son’s laugh bounced right along with it.
This little project became more than a summer craft—it was a memory in motion.
Short Description
These vibrant tie-dye bouncy balls are a fun DIY craft made from simple kitchen ingredients. Perfect for kids and grownups alike, they’re easy to make, customizable, and great for hands-on family fun.
Key Ingredients
- 1/2 cup white school glue
- 1/4 cup water
- 1/2 teaspoon baking soda
- Food coloring (various colors for tie-dye effect)
- 1/4 cup liquid starch
- 1 tablespoon cornstarch
Tools Needed
- Small mixing bowls (one for each color)
- Plastic spoon or craft stick
- Wax paper (for drying)
Cooking Instructions
Step 1: Mix the Glue and Water
In a small mixing bowl, combine 1/2 cup of white school glue with 1/4 cup of water. Stir until fully blended.
Step 2: Add the Baking Soda
Stir in 1/2 teaspoon of baking soda into the glue mixture. This will help the mixture begin to thicken and react later on.
Step 3: Divide and Color
Separate the glue mixture into smaller bowls, one for each color you want to make. Add a few drops of food coloring to each bowl and stir until you achieve your desired shades.
Step 4: Add Liquid Starch Gradually
Slowly add about 1/4 cup of liquid starch to each bowl, stirring as you go. The mixture will begin to thicken and form a gooey ball. If it’s too runny, add a touch more starch. Keep stirring until it pulls away from the bowl.
Step 5: Incorporate Cornstarch and Knead
Sprinkle 1 tablespoon of cornstarch into each bowl. Use your hands to knead the mixture until it forms a soft, stretchable dough. It should feel pliable, not sticky.
Step 6: Shape Your Balls
Take small portions (about 1-2 inches wide) and roll them into balls. For a tie-dye effect, press multiple colors together and gently swirl before rolling.
Step 7: Let Them Dry
Place the balls on wax paper and allow them to dry for 2–3 hours. Once dry, they should have a slightly firm outer shell and bounce when dropped.
Step 8: Bounce and Play
Give them a bounce! Watch the colorful patterns come to life as they spring around the room.
Why You’ll Love This Recipe
– Uses safe, non-toxic kitchen ingredients
– Engages kids in a sensory, hands-on activity
– Creative and fun with endless color combinations
– No stovetop or oven required
– Easy clean-up and minimal prep
– Customizable size and texture
– Great for summer activities or rainy-day fun
Mistakes to Avoid & Solutions
Mistake 1: Mixture too sticky
Solution: Add a little more cornstarch and knead until smooth.
Mistake 2: Balls not holding shape
Solution: Make sure you’ve added enough liquid starch to activate the glue. If needed, add small amounts incrementally.
Mistake 3: Colors bleeding into each other
Solution: Swirl gently and don’t overmix when combining colors. Let them slightly set before rolling into balls.
Mistake 4: Not drying fully
Solution: Let the balls rest on wax paper for the full 2–3 hours, preferably in a cool, dry area. Rotate them after 1 hour to ensure even drying.
Mistake 5: Balls harden over time
Solution: Store in an airtight container to maintain bounce.
Serving and Pairing Suggestions
These aren’t edible, of course, but they’re perfect for:
– A weekend family crafting session
– Kids’ birthday party activities
– Homemade party favors
– Science-themed fun days
– DIY gifts with personalized colors
Storage and Reheating Tips
– Store in an airtight container or zip-top bag
– Avoid direct sunlight or heat to prevent drying
– Do not refrigerate or freeze
– If they begin to harden, knead with damp hands to soften slightly
FAQs
1. Can I use clear glue instead of white school glue?
Yes, clear glue will work and may produce more translucent, jewel-like colors.
2. What if I don’t have liquid starch?
Liquid starch is essential for this recipe. If unavailable, look for a DIY liquid starch substitute online using cornstarch and water.
3. Are these safe for toddlers?
Yes, as long as they are not put in the mouth. Always supervise young children during play.
4. How long do the balls stay bouncy?
They typically stay bouncy for 3–5 days if stored properly.
5. Can I remake them if they dry out?
If dried out completely, it’s better to make a fresh batch.
Tips & Tricks
– Use gloves to avoid staining hands with food coloring
– Let each color set for a few minutes before combining for more distinct patterns
– Add a drop of essential oil for a fun scent twist
– Try glow-in-the-dark paint for nighttime fun
Recipe Variations
Galaxy Bouncy Balls: Use black, blue, and purple food coloring with a touch of silver glitter. Follow all the same steps but swirl together to mimic galaxy patterns.
Neon Swirl Bouncy Balls: Use neon food coloring and clear glue. Add small fluorescent pigment for an extra glow.
Scented Bouncy Balls: Add 1–2 drops of essential oil like lavender or citrus when mixing glue and water for a fun sensory twist.
Mini Bouncers: Halve the recipe and make marble-sized mini balls for fun variety and quicker dry time.
Themed Party Colors: Match school or birthday colors and package in small bags as party favors.
Final Thoughts
Creating tie-dye bouncy balls became more than just a summer craft in our home—it was a colorful escape from screens, a bonding moment that stretched across the kitchen counter and bounced straight into our hearts. Watching my son mix, stir, and swirl his way into a world of bright, squishy fun reminded me of how simple ingredients can bring enormous joy. The slight stickiness, the splash of dye on the counter, the impatient peeks at the drying balls—it all added up to a day we’ll both remember.
These bouncy balls aren’t perfect or store-bought, but they hold something even better: the fingerprints of a sunny day and the bounce of laughter in the air. Give them a try, and let your creativity take the leap. You never know how much joy a small bounce can bring until it skips across your kitchen floor.
Tie-Dye Bouncy Balls Made with Kitchen Ingredients
Ingredients
- ½ cup white school glue
- ¼ cup water
- ½ teaspoon baking soda
- Food coloring various colors for tie-dye effect
- ¼ cup liquid starch
- 1 tablespoon cornstarch
Instructions
- Mix 1/2 cup white glue with 1/4 cup water until smooth.
- Stir in 1/2 teaspoon baking soda.
- Divide mixture into bowls, add food coloring, and mix.
- Gradually add 1/4 cup liquid starch to each bowl, stirring until thick and forming a ball.
- Add 1 tablespoon cornstarch to each, then knead until soft and stretchy.
- Roll dough into 1-2 inch balls; combine colors for tie-dye effect if desired.
- Place balls on wax paper and let dry 2–3 hours.
- Once dry, bounce and enjoy your colorful bouncy balls!