There’s a running joke in our house that my husband considers Oreo cookies a food group of their own. He’s not usually vocal about desserts, but if there’s a way to sneak Oreos into anything, he’ll find it—and proudly declare it his “improvement.” So when I made red velvet cupcakes last weekend and had a few leftover crumbles, I spotted the half-full Oreo pack beside the coffee machine and smiled.
Valentine’s Day years ago when I tried to surprise him with a red velvet cake. He was grateful, but the next morning I found a handful of crushed Oreos sprinkled over his slice in the fridge. That’s when I realized I’d been out-desserted. So this time, I decided to take matters into my own hands. Instead of waiting for him to remix my creation, I went all in.
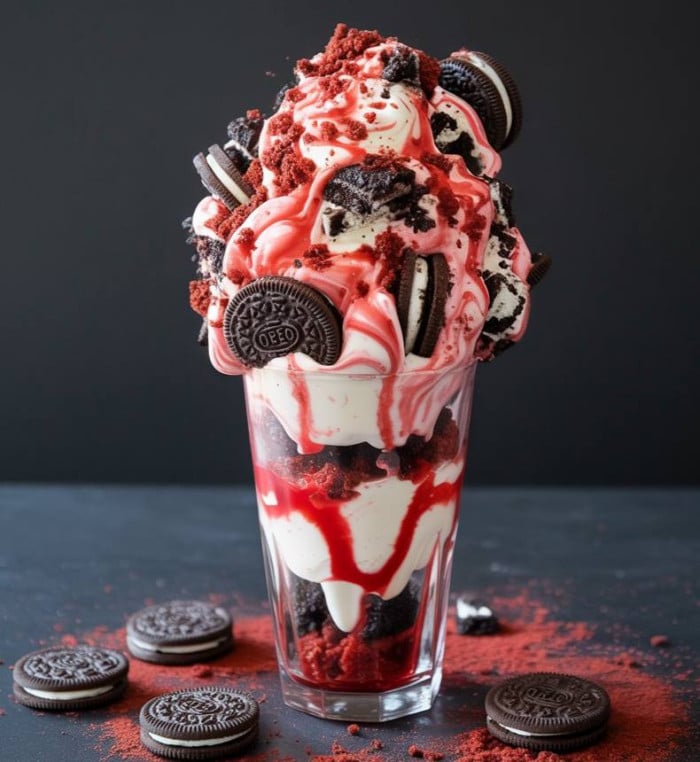
I folded a tangy cream cheese layer into soft whipped cream, crumbled those leftover cupcakes into fluffy chunks, and gave his favorite cookies a leading role. A Red Velvet Oreo Parfait that disappeared in record time. He took one bite, then immediately asked if I wrote the recipe down. I hadn’t. But you can bet I did afterward—because this one is worth keeping.
These parfaits are rich but surprisingly light, with a cool creaminess that makes them feel like a cross between cheesecake and trifle. It’s the kind of dessert you serve in fancy glasses for guests, or eat standing by the fridge late at night because you “just need one more spoonful.” Either way, this one’s for the Oreo-lovers.
Short Description
A creamy, no-bake dessert layering red velvet cake, tangy whipped cheesecake, and crushed Oreos into a rich yet airy parfait—perfect for casual entertaining or an indulgent treat.
Key Ingredients
- 2 cups red velvet cake, crumbled
- 1 cup cream cheese, softened
- 1 cup heavy cream
- 1/2 cup granulated sugar
- 1 teaspoon vanilla extract
- 1 cup crushed Oreo cookies
- 1/2 cup mini chocolate chips (optional)
Tools Needed
- Electric mixer or stand mixer
- Two mixing bowls
- Rubber spatula
- Measuring cups and spoons
- Serving glasses, jars, or dessert bowls
- Spoon or piping bag (for layering neatly)
Cooking Instructions
Step 1: Prepare the Cheesecake Filling
In a medium mixing bowl, beat the softened cream cheese, granulated sugar, and vanilla extract until the mixture is smooth and creamy. It should be thick but spreadable, with no lumps.
Step 2: Whip the Cream
In a separate bowl, whip the heavy cream using a stand mixer or hand mixer on high speed until stiff peaks form. The cream should be thick enough to hold its shape when you lift the beaters.
Step 3: Combine the Mixtures
Gently fold the whipped cream into the cream cheese mixture using a rubber spatula. Do this in batches and use slow, folding motions to keep the mixture airy. You should end up with a smooth, fluffy filling.
Step 4: Layer the Parfaits
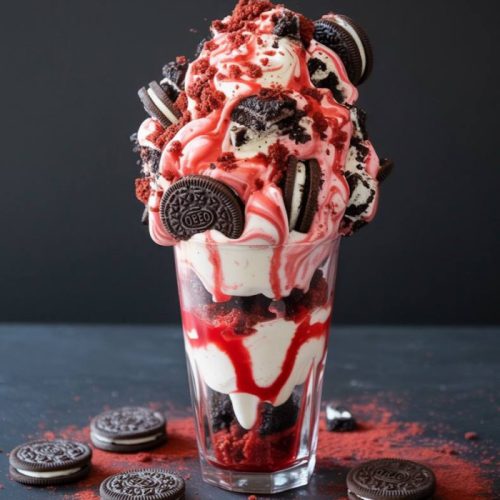
In serving glasses or bowls, start with a layer of red velvet cake crumbles, followed by a generous spoonful of the cheesecake filling, then a sprinkle of crushed Oreos. Repeat the layers until the glasses are full, ending with a bit of filling on top.
Step 5: Add the Finishing Touches
Top each parfait with a few mini chocolate chips if using. You can also garnish with an extra Oreo half for presentation.
Step 6: Chill Before Serving
Cover the glasses and refrigerate for at least 2 hours before serving. This helps the layers set and lets the flavors meld together beautifully.
Why You’ll Love This Recipe
– No baking required—perfect for warmer days or busy nights
– Rich, creamy texture without being overly heavy
– Great use for leftover red velvet cake or cupcakes
– Oreo lovers get their fix in every bite
– Easy to make ahead for entertaining
– Visually stunning in clear glasses or jars
– Customizable layers for endless variations
Mistakes to Avoid & Solutions
1. Overbeating the cream
Whipped cream should reach stiff peaks but not become grainy. If it does, start over with fresh cream.
2. Folding too aggressively
Stirring too hard when combining the whipped cream and cream cheese can deflate the mixture. Use gentle folding to keep it light.
3. Layering too loosely
Pack the cake and cookie layers just enough to hold shape but not so tightly they lose fluffiness. Think structured but soft.
4. Skipping the chill time
The dessert needs at least 2 hours to firm up. Without it, the parfait will be too soft and won’t hold its layers well.
5. Using dry cake
If your red velvet cake is on the dry side, drizzle it with a teaspoon of milk or simple syrup before layering to add moisture.
Serving and Pairing Suggestions
Serve these parfaits:
– In mini jars for individual party servings
– In a trifle dish for family-style presentation
– As a plated dessert with a chocolate drizzle and fresh strawberries
Pair with:
– Coffee or espresso for a bold contrast
– Milkshakes (especially cookies & cream) for a double treat
– A scoop of vanilla or strawberry ice cream on the side
Storage and Reheating Tips
Refrigerator: Store covered in the fridge for up to 3 days.
Freezing: Not recommended, as the whipped filling may separate when thawed.
Make-ahead tip: You can prepare the components (filling and cake) up to 24 hours in advance and assemble just before chilling.
Reheating: No reheating needed—serve chilled directly from the fridge.
FAQs
1. Can I use store-bought red velvet cake?
Yes, store-bought cake works just fine. Just make sure it’s moist. If it feels dry, drizzle with a little milk or simple syrup.
2. What kind of cream cheese is best?
Full-fat block cream cheese at room temperature works best. Avoid whipped or low-fat versions for proper texture.
3. Can I make this ahead for a party?
Absolutely! Assemble the night before and chill. Add chocolate chips or cookie garnish right before serving.
4. Are there gluten-free alternatives?
You can use gluten-free red velvet cake and gluten-free chocolate sandwich cookies to make this parfait entirely gluten-free.
5. What if I don’t have mini chocolate chips?
You can chop a dark chocolate bar into small pieces or skip them altogether—the dessert is still rich and flavorful without them.
Tips & Tricks
– Let the cream cheese soften fully for the smoothest texture.
– Use a piping bag or zip-top bag with the corner snipped to layer the filling neatly.
– Chill your mixing bowl before whipping cream for faster, fluffier results.
– Crush Oreos by placing them in a zip-top bag and using a rolling pin.
– For dramatic presentation, use parfait glasses or mason jars with a wide mouth.
Recipe Variations
1. Chocolate Peanut Butter Version
Swap red velvet for chocolate cake.
Add 2 tbsp peanut butter to the cream cheese mixture.
Replace Oreos with crushed Nutter Butters for a nutty crunch.
2. Strawberry Shortcake Parfait
Use vanilla or white cake.
Add diced fresh strawberries between layers.
Skip Oreos and top with granola or white chocolate chips.
3. Mocha Oreo Parfait
Add 1 tsp instant coffee to the whipped cream.
Use chocolate cake and coffee-flavored Oreos.
Sprinkle cocoa powder on top instead of chocolate chips.
4. Holiday Peppermint Twist
Add 1/4 tsp peppermint extract to the cream cheese mixture.
Use chocolate cake and crushed peppermint Oreos.
Garnish with crushed candy canes for a festive finish.
Final Thoughts
This Red Velvet Oreo Parfait is one of those desserts that balances comfort and creativity. It’s got that satisfying richness you crave after dinner, with just enough crunch and tang to keep it interesting. I love how easy it is to throw together with leftovers or pantry staples, yet it looks like something from a patisserie when served in a glass. My husband says it tastes like his childhood dreams met adult cheesecake—and that’s a compliment I’ll take.
If you’re like me and often find yourself with cake crumbs, a half block of cream cheese, and some snack cookies that need a purpose, this dessert is the perfect solution. It’s forgiving, fun to assemble, and endlessly customizable.
Red Velvet Oreo Parfait Explosion
Ingredients
- 2 cups red velvet cake crumbled
- 1 cup cream cheese softened
- 1 cup heavy cream
- ½ cup granulated sugar
- 1 teaspoon vanilla extract
- 1 cup crushed Oreo cookies
- ½ cup mini chocolate chips optional
Instructions
- In a medium mixing bowl, beat the softened cream cheese, granulated sugar, and vanilla extract until the mixture is smooth and creamy. It should be thick but spreadable, with no lumps.
- In a separate bowl, whip the heavy cream using a stand mixer or hand mixer on high speed until stiff peaks form. The cream should be thick enough to hold its shape when you lift the beaters.
- Gently fold the whipped cream into the cream cheese mixture using a rubber spatula. Do this in batches and use slow, folding motions to keep the mixture airy. You should end up with a smooth, fluffy filling.
- In serving glasses or bowls, start with a layer of red velvet cake crumbles, followed by a generous spoonful of the cheesecake filling, then a sprinkle of crushed Oreos. Repeat the layers until the glasses are full, ending with a bit of filling on top.
- Top each parfait with a few mini chocolate chips if using. You can also garnish with an extra Oreo half for presentation.
- Cover the glasses and refrigerate for at least 2 hours before serving. This helps the layers set and lets the flavors meld together beautifully.