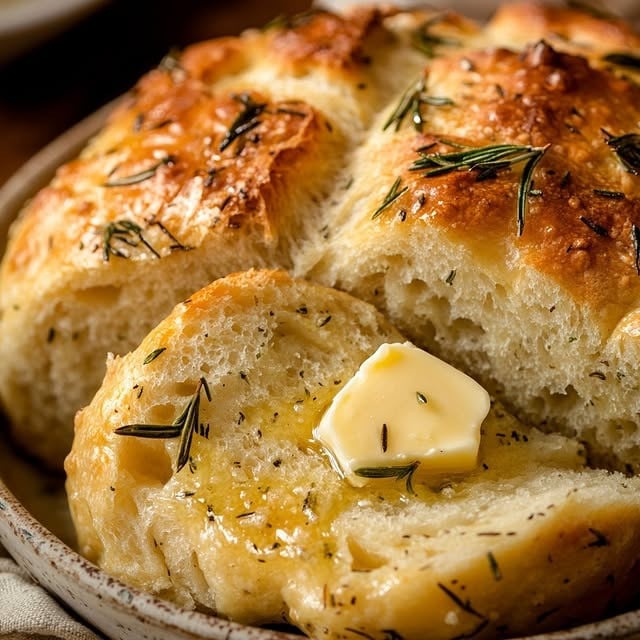
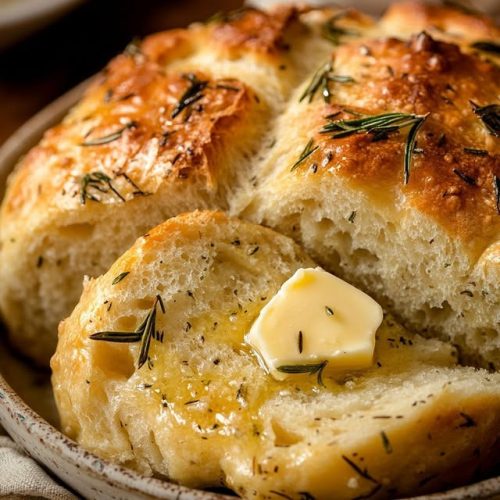
The smell of rosemary and garlic baking in my kitchen makes you pause mid-scroll. A few weeks ago, I had one of those rare, blissfully quiet mornings—the kind where you wander barefoot with coffee in hand and no urgent plans. That’s when I decided to revisit an old favorite: no-knead bread. But this time, I gave it a fragrant, earthy twist with fresh rosemary and garlic.
I remember reading about this bread years ago in a cookbook that had no photos, just stories. The author described letting the dough rise overnight, saying the wait made the first bite even better. Curious and skeptical, I tried it. The result? A golden, crackly crust, soft inside, and just enough chew. No kneading, no fuss, just magic.
That quiet morning turned into something special. While the dough rested, I prepped a pot of soup and opened the windows. The scent of bread rising with garlic and rosemary mingled with fresh air—it felt like I was treating myself without even trying.
Now it’s become a small ritual. And if you’ve never made no-knead bread before, this recipe might just be the one that turns you into a weekend baker.

Short Description
This rustic no-knead rosemary garlic bread is crusty on the outside, tender inside, and full of rich, herb-infused flavor. Easy to make with simple ingredients—no kneading required.
Key Ingredients
- 3 cups all-purpose flour
- 3 cloves garlic, minced
- 1 tablespoon fresh rosemary, finely chopped
- 1¼ teaspoons kosher salt
- ¾ teaspoon black pepper, freshly ground
- ½ teaspoon instant yeast
Optional Add-ins:
- 1–2 tablespoons olive oil (for a softer, richer loaf)
Grated Parmesan (sprinkled before baking for a cheesy crust)
Tools Needed
- Large mixing bowl
- Wooden spoon or spatula
- Plastic wrap or clean kitchen towel
- Dutch oven or baking stone
- Sharp knife or bread lame
- Parchment paper
- Wire rack for cooling
Cooking Instructions
Step 1: Combine Dry Ingredients
In a large mixing bowl, whisk together flour, salt, pepper, and instant yeast. Add the garlic and rosemary, stirring until evenly distributed throughout the mixture.
Step 2: Add Water
Slowly pour in 1½ cups of lukewarm water. Stir with a wooden spoon until a shaggy, sticky dough forms. Cover the bowl with plastic wrap or a damp towel. Let it rest for 5 minutes to hydrate.
Step 3: First Rise
Leave the dough at room temperature for 12–18 hours. The dough will rise slowly, becoming bubbly and slightly sticky with visible air pockets.
Step 4: Shape the Dough
Flour your work surface and gently turn the dough out. Dust the top with a little flour if needed. Fold it over itself a few times, then shape into a round or oval loaf. Avoid overworking it—just enough to hold shape.
Step 5: Second Rise
Place the shaped dough onto parchment paper or in a floured proofing basket. Cover and let it rise again for 2–3 hours until doubled in size. Preheat the oven to 450°F (230°C) during the last hour of proofing. If using a Dutch oven, preheat that too.
Step 6: Bake Until Golden
Carefully transfer the dough into the preheated Dutch oven (with parchment). Score the top with a sharp knife. Bake uncovered for 30–35 minutes, or until the crust is deep golden and sounds hollow when tapped underneath.
Step 7: Cool and Slice
Transfer the bread to a wire rack and let it cool completely before slicing. This helps set the crumb and prevents it from becoming gummy.
Why You’ll Love This Recipe
– No kneading required
– Packed with natural flavor from rosemary and garlic
– Flexible rise time fits your schedule
– Easy for beginners and satisfying for seasoned bakers
Mistakes to Avoid & Solutions
Dough is too wet to handle:
Solution: Add 1 tablespoon of flour at a time to help shape. Don’t worry—it should still be a bit sticky.
Bread turns out dense:
Solution: Check that your yeast is fresh, and don’t shorten the rise time. This long rise develops structure.
Crust too dark or burnt:
Solution: Tent with foil halfway through baking if your oven runs hot.
Bottom too tough or overbaked:
Solution: If not using a Dutch oven, use a baking stone or layer parchment paper over cornmeal.
Bread sticks to Dutch oven:
Solution: Always use parchment paper when baking. It also makes transferring the dough easier.
Serving and Pairing Suggestions
– Serve warm with whipped butter, olive oil, or herbed cream cheese
– Excellent alongside soups, stews, and hearty salads
– Slice and toast for breakfast with avocado or eggs
– Makes a fantastic base for rustic sandwiches or grilled cheese
Storage and Reheating Tips
Room Temperature: Wrap in a clean towel or store in a bread box for up to 3 days
Freezing: Slice, wrap in plastic, then foil, and freeze up to 1 month
Reheat Slices: Toast lightly or warm in a 350°F oven for 5–10 minutes
Whole Loaf Reheating: Wrap in foil and warm at 350°F for 15–20 minutes
FAQs
1. What if I don’t have a Dutch oven?
Use a baking stone or heavy oven-safe pot with a lid. You can also bake on a parchment-lined tray, though the crust won’t be quite as crisp.
2. Can I use dried rosemary?
Yes, but reduce the amount to 1–1½ teaspoons since dried herbs are more concentrated in flavor.
3. Is it okay to use active dry yeast instead of instant?
Yes, but dissolve it in the warm water first and let it sit for 5–10 minutes before adding to the dry mix.
4. How do I know if the dough has risen enough?
It should look puffed, have visible bubbles, and jiggle slightly when you move the bowl.
5. Why is my crust soft instead of crispy?
Let the bread cool uncovered. If it’s stored while warm, trapped steam can soften the crust.
Tips & Tricks
– Add the garlic raw—it mellows and sweetens while baking
– Don’t skip the rest after mixing; it makes shaping easier
– Want extra crunch? Sprinkle coarse sea salt and Parmesan on top
– For deeper flavor, use roasted garlic instead of fresh
– Store the dough in the fridge for up to 24 hours before shaping—it deepens flavor
Recipe Variations
Cheesy Herb Loaf
Add 1 cup shredded mozzarella or white cheddar to the dough before the first rise. Sprinkle with Parmesan before baking.
Olive & Rosemary Twist
Stir in ½ cup chopped kalamata olives for a Mediterranean flair. Keep the rosemary or swap for thyme.
Whole Wheat Version
Use 1½ cups whole wheat flour + 1½ cups all-purpose. Add 1–2 tbsp olive oil to keep it tender.
Spicy Garlic Bread
Add ½ tsp crushed red pepper flakes with the garlic and rosemary for a bit of kick.
Lemon Rosemary Loaf
Add 1 tablespoon lemon zest to the dough and finish with a lemon-garlic butter glaze post-bake.
Final Thoughts
That loaf resting on the counter, still crackling as it cools, feels like a quiet win. Not loud or showy—just good. It came together slowly, while the house carried on: music in the background, someone asking what smells so good, a lazy stretch of time between steps. Rosemary and garlic did the heavy lifting, and the rest just… happened. No rushing, no overthinking.
It’s not about baking the perfect loaf. It’s about letting something simple turn your space into something warm and alive. The kind of bread that fits into your day like it’s always belonged there.

Rustic No-Knead Rosemary Garlic Bread
Ingredients
- 3 cups all-purpose flour
- 3 cloves garlic minced
- 1 tablespoon fresh rosemary finely chopped
- 1¼ teaspoons kosher salt
- ¾ teaspoon black pepper freshly ground
- ½ teaspoon instant yeast
- Optional Add-ins:
- 1–2 tablespoons olive oil for a softer, richer loaf
- Grated Parmesan sprinkled before baking for a cheesy crust
Instructions
- In a large bowl, whisk together flour, salt, pepper, and instant yeast. Stir in the garlic and rosemary until well combined.
- Pour in 1½ cups of lukewarm water. Stir with a wooden spoon until a shaggy, sticky dough forms. Cover with plastic wrap or a damp towel and let it rest for 5 minutes.
- Leave the dough at room temperature for 12–18 hours. It should become puffy, bubbly, and slightly sticky with air pockets on the surface.
- Lightly flour a surface and turn the dough out. Dust the top with a little flour. Gently fold it a few times and shape into a round or oval loaf without overworking.
- Place the dough on parchment paper or in a floured proofing basket. Cover and let rise for 2–3 hours, until doubled. Preheat the oven to 450°F (230°C) during the last hour. If using a Dutch oven, preheat that too.
- Carefully transfer the dough (with parchment) into the hot Dutch oven. Score the top with a sharp knife. Bake for 30–35 minutes until the crust is deep golden and sounds hollow when tapped.
- Move the loaf to a wire rack and let it cool completely before slicing. This keeps the crumb from turning gummy.


