Last Friday evening, the weather turned chilly just as I was driving home from work. The streets were glowing orange with pumpkins on porches, and I couldn’t resist the thought of baking something fun for the kids. When I got home, my husband was helping our daughter carve a goofy pumpkin while our son pretended to be a ghost under an old sheet. That’s when I decided to surprise them with these Mini Halloween Pies.
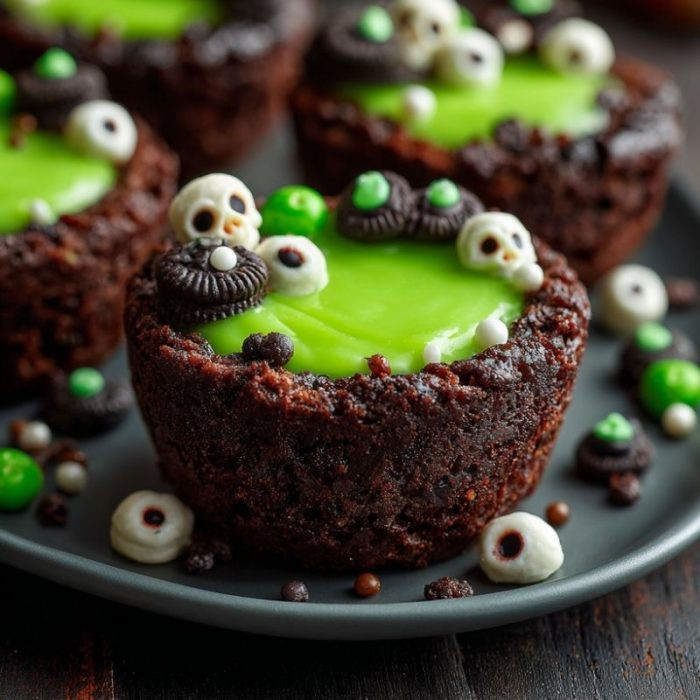
I’m the kind of cook who loves recipes that don’t demand perfection—especially after a full day at the office. These pies checked all the boxes: simple steps, minimal cleanup, and ingredients I already had in the fridge. The most delightful part was cutting spooky faces into the pie tops. My daughter insisted on making a bat with jagged wings, and my son went for a wobbly-eyed monster.
The kitchen smelled incredible as they baked—warm butter and bubbling apple filling mingling with that comforting aroma of pie crust turning golden. We couldn’t wait for them to cool before sneaking a bite, and they were as good as they looked. Slightly crisp edges, a soft, warm center, and a touch of sweetness that felt perfect for the season.
These pies have become our new October tradition, and they’re surprisingly practical. They’re easy enough for a weeknight, portable for school lunches, and charming enough to impress at a Halloween party. I’m sharing the recipe today because it’s the kind of treat that brings everyone together around the table—even the teenagers forget their phones for a few minutes.
Short Description
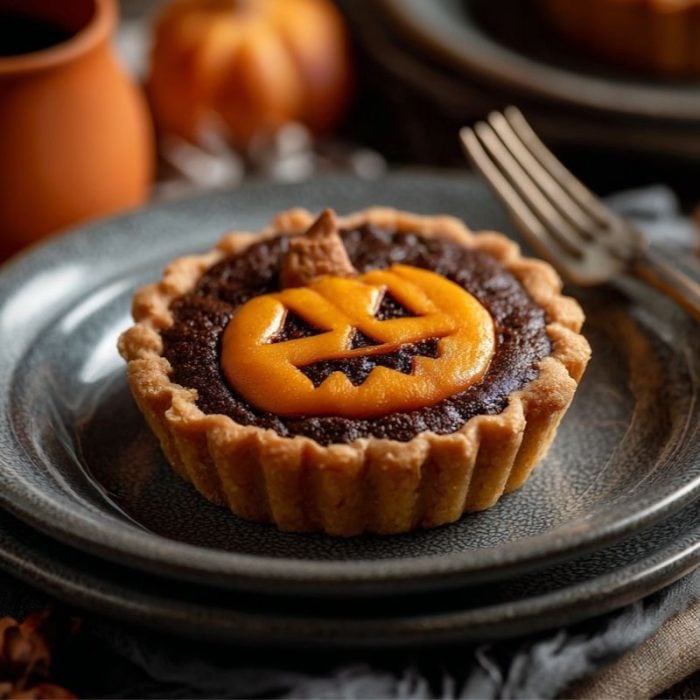
Mini Halloween Pies are adorable single-serve treats made with flaky pie crusts and your choice of sweet or savory filling. They’re baked in Mason jar lids for perfect shape and can be decorated with spooky cutouts—fun, festive, and ready in under an hour.
Key Ingredients
- 4 pie crusts (store-bought or homemade)
- Pie filling of your choice (apple, pumpkin, berry, or savory)
- Melted butter, for brushing
Tools Needed
- Mason jar lids (8 wide-mouth lids)
- Rolling pin
- Small sharp knife or Halloween-themed cookie cutters
- Parchment-lined cookie sheet
- Pastry brush
Cooking Instructions
Step 1: Preheat the Oven
Preheat your oven to 375°F (190°C) and line a cookie sheet with parchment paper.
Step 2: Prepare the Dough
Roll out the pie dough and cut 8 circles from each crust using a Mason jar lid or round cutter. You’ll need 8 circles for the bases and 8 for the tops.
Step 3: Create Spooky Faces
Set aside 8 circles for the tops. Cut out fun Halloween shapes—like pumpkins, ghosts, or monster eyes—using a small knife or cookie cutters.
Step 4: Prepare the Lids
Flip the Mason jar lids so the rubber side faces down. Press a dough circle into each lid, pressing it evenly across the bottom and up the sides.
Step 5: Fill the Pies
Spoon your chosen filling into the dough-lined lids, filling just below the rim so it doesn’t bubble over.
Step 6: Add the Tops
Place the spooky-faced dough circles on top, lining up the edges with the base. Gently fold the edges under to seal.
Step 7: Crimp and Brush
Crimp the edges with your fingers or a fork to seal the pies. Brush the tops with melted butter for a golden finish.
Step 8: Bake
Place the pies on the prepared cookie sheet and bake for 25 minutes, or until the tops are golden and crisp.
Step 9: Cool and Serve
Let the pies cool for 5–10 minutes. Gently push from the bottom of each Mason jar lid to release the pies. Serve warm or at room temperature.
Why You’ll Love This Recipe
Kid-Friendly Fun: Cutting out spooky faces keeps the kids entertained and makes them proud of their creations.
Quick and Easy: Using store-bought crust saves time without sacrificing taste.
Versatile: Sweet or savory fillings make this a crowd-pleaser for any occasion.
Portable Treat: Perfect for lunchboxes, parties, or even as edible Halloween favors.
Festive and Charming: These pies double as decoration for your dessert table.
Mistakes to Avoid & Solutions
Overfilling the pies: Too much filling will bubble over and make a mess. Stick to filling just below the rim.
Not sealing edges properly: If the tops aren’t sealed, the filling may leak. Use your fingers or a fork to crimp the edges tightly.
Skipping the parchment paper: Pies may stick to the sheet and break when you try to remove them. Always use parchment for easy cleanup.
Forgetting the butter brushing: This step gives the pies their irresistible golden finish.
Cutting shapes too thin: Thin cutouts can tear while baking; keep your designs simple and sturdy.
Serving and Pairing Suggestions
Serve warm with a scoop of vanilla ice cream for sweet pies or a dollop of whipped cream for pumpkin filling.
Pair savory pies with a light garden salad for a complete lunch.
Arrange them on a platter at your Halloween buffet—guests love grabbing their own little pie.
Offer warm cider or hot chocolate alongside for a cozy seasonal pairing.
Storage and Reheating Tips
Store cooled pies in an airtight container at room temperature for up to 2 days or in the fridge for up to 5 days.
To reheat, place pies on a baking sheet and warm in a 325°F (160°C) oven for 8–10 minutes to keep the crust crisp.
Avoid microwaving if possible, it tends to make the crust soggy.
FAQs
1. Can I make these pies ahead of time?
Yes! Assemble them the night before and refrigerate until ready to bake.
2. What fillings work best?
Apple, pumpkin, and mixed berry are favorites, but savory options like chicken pot pie filling work just as well.
3. Do I need Mason jar lids?
No. Muffin tins or tart pans also work, but Mason jar lids make for perfect rustic shapes.
4. How do I prevent soggy bottoms?
Make sure the filling isn’t too watery, and don’t skip preheating the oven to ensure the crust sets quickly.
5. Can I freeze these pies?
Absolutely. Freeze unbaked pies on a tray, then transfer to a freezer bag. Bake straight from frozen, adding 5 extra minutes to the baking time.
Tips & Tricks
Chill your dough for 10 minutes before cutting shapes for cleaner edges.
Use an egg wash instead of butter for a shinier finish.
Add a sprinkle of cinnamon sugar on sweet pies before baking for extra flavor.
Test one pie first to gauge the baking time for your oven.
Recipe Variations
Apple-Cinnamon Pies: Fill with cooked diced apples, cinnamon, and a little sugar for a classic fall treat.
Savory Chicken Pies: Use shredded cooked chicken, mixed veggies, and a little gravy for a hearty lunch option.
Chocolate Pumpkin Pies: Stir melted chocolate into the pumpkin filling for a rich, decadent twist.
Spiced Berry Pies: Mix frozen berries with a touch of honey and ground ginger for a tart yet warm flavor profile.
Final Thoughts
Halloween baking always brings out my playful side. These Mini Halloween Pies are more than just treats, they’re tiny edible crafts that spark laughter and creativity in the kitchen. I love how the kids get excited to design their own pie faces while my husband claims he’s “taste-testing” for quality assurance. The pies disappear fast, and I always wish I’d made a second batch.
The simple act of rolling out dough and brushing melted butter feels therapeutic in a way. These pies have earned their spot in our family’s autumn traditions, and I hope they’ll become part of yours too. If you’re looking for a recipe that’s festive, practical, and guaranteed to win smiles, give these a try.

Mini Halloween Pies
Ingredients
- 4 pie crusts store-bought or homemade
- Pie filling of your choice apple, pumpkin, berry, or savory
- Melted butter for brushing
Instructions
- Preheat the oven to 375°F (190°C) and line a cookie sheet with parchment paper.
- Roll out the pie dough and cut 8 circles from each crust using a Mason jar lid or round cutter—8 for bases and 8 for tops.
- Set aside the tops and cut out fun Halloween shapes like pumpkins, ghosts, or monster eyes with a small knife or cookie cutters.
- Flip the Mason jar lids rubber side down and press a dough circle into each, spreading it evenly across the bottom and up the sides.
- Spoon filling into each dough-lined lid, stopping just below the rim.
- Cover with the spooky-faced tops, folding edges under to seal.
- Crimp edges with fingers or a fork and brush tops with melted butter for a golden finish.
- Bake for 25 minutes until golden and crisp.
- Cool for 5–10 minutes, then gently push from the bottom of each lid to release the pies. Serve warm or at room temperature.