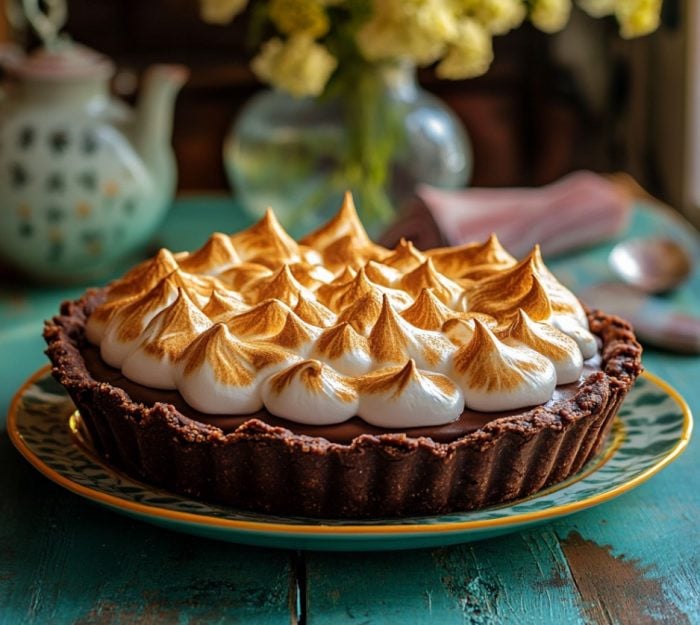
Some afternoons just beg for a kitchen session, and last weekend, I gave in. I had a cozy playlist on, the windows open, and my youngest dancing in socks across the tile floor. I wasn’t trying to impress anyone—I just wanted something classic. Comforting. Something my grandma might’ve served with a knowing smile and a second slice already plated. That’s how I landed on this Old-Fashioned Chocolate Pie with Golden Meringue.
I’ve made chocolate pies before, but this one? This one feels like a memory baked into a crust. The kind of pie that hushes a noisy table after the first bite. That rich, velvety filling with the nostalgic scent of cocoa and vanilla curling through the kitchen… and that golden, glossy meringue puffed high like a toasted cloud on top? It’s almost too pretty to cut into—almost.
Honestly, this recipe feels like passing along something sacred. My husband even paused the TV to ask for another slice—that says something. And when my teen asked, “Is this pie always gonna be around now?”—I took it as the highest compliment. I don’t make fussy desserts. I make food for real life. And this pie? It’s earned its place in our family rotation.
Let me show you how I make it happen, step by step.
Short Description
This Old-Fashioned Chocolate Pie with Golden Meringue is a rich, silky dessert layered in a buttery pie crust and topped with a lightly toasted, fluffy meringue. It’s a nostalgic, homemade favorite perfect for holidays, Sundays, or any time chocolate is calling.
Key Ingredients
For the chocolate filling:
- 1 pre-baked 9-inch pie crust
- 1½ cups granulated sugar
- ¼ cup unsweetened cocoa powder
- ¼ cup cornstarch
- ¼ teaspoon salt
- 3 cups whole milk
- 4 large egg yolks
- 2 tablespoons unsalted butter
- 1 teaspoon vanilla extract
For the meringue:
- 4 large egg whites
- ¼ teaspoon cream of tartar
- ½ cup granulated sugar
- ½ teaspoon vanilla extract
Tools Needed
- Medium saucepan
- Whisk
- Mixing bowls
- Electric mixer or stand mixer
- Rubber spatula
- Pie dish
- Oven with broiler setting
Cooking Instructions
Step 1: Make the Chocolate Filling
In a medium saucepan, whisk together the sugar, cocoa powder, cornstarch, and salt until fully blended. Gradually pour in the milk, whisking to avoid any lumps.
Set the pan over medium heat and stir constantly. The mixture will thicken in about 7–10 minutes—look for a pudding-like texture with gentle bubbling.
Step 2: Temper the Eggs
In a separate bowl, lightly beat the egg yolks. Slowly add about 1 cup of the hot chocolate mixture into the yolks while whisking—this keeps them from scrambling.
Then pour that tempered yolk mixture back into the saucepan, stirring constantly. Cook for another 2 minutes at a low boil.
Step 3: Finish and Fill
Remove the pan from heat. Stir in the butter and vanilla until smooth and glossy. Immediately pour the hot filling into the pre-baked crust and smooth out the top with a spatula.
Step 4: Make the Meringue
In a clean bowl, beat the egg whites and cream of tartar on medium-high speed until soft peaks form. Slowly add sugar, one tablespoon at a time, beating until stiff, glossy peaks appear. Beat in vanilla.
Step 5: Top and Bake
Spoon the meringue over the hot chocolate filling, spreading all the way to the crust edge to seal. Use the back of a spoon to create swoops and peaks. Place the pie under the broiler for 1–2 minutes, watching closely, until the meringue turns golden brown.
Step 6: Cool and Serve
Let the pie cool at room temperature for 1–2 hours. Chill in the fridge for at least 3 hours before slicing to allow the filling to set properly.
Why You’ll Love This Recipe
– Classic, old-fashioned flavor
– Velvety chocolate filling that’s not overly sweet
– Toasty, golden meringue topping adds visual wow
– Crowd-pleaser for holidays, potlucks, or Sunday dinners
– No fancy ingredients or tools required
– Budget-friendly with pantry staples
Mistakes to Avoid & Solutions
Mistake 1: Not tempering the yolks
If you add hot filling directly to the yolks, they’ll scramble.
Solution: Always whisk in a little at a time to gently warm the yolks first.
Mistake 2: Not cooking the filling long enough
Your pie won’t set right if the filling is too runny.
Solution: Wait for it to thicken and bubble—then cook an extra 2 minutes on low.
Mistake 3: Meringue pulling away from crust
If the meringue isn’t sealed at the edges, it may shrink or weep.
Solution: Spread the meringue right to the crust to form a seal.
Mistake 4: Over-broiling the meringue
It can go from golden to burned in seconds.
Solution: Watch like a hawk—never leave it under the broiler unattended.
Mistake 5: Cutting too soon
A warm pie won’t slice cleanly.
Solution: Let it cool completely and chill before slicing.
Serving and Pairing Suggestions
Serve chilled or lightly room temp—perfect as a show-stopping dessert after a roast dinner or holiday meal.
Pairs beautifully with:
– A cup of coffee or espresso
– Fresh strawberries or raspberries on the side
– Whipped cream (if you’re feeling extra)
Ideal for:
– Family-style dinners
– Brunch dessert tables
– Holiday dessert buffets
Storage and Reheating Tips
Refrigerator: Cover loosely with foil or plastic wrap. Store for up to 3 days.
Freezing: Not recommended—the meringue doesn’t hold up well to freezing.
Reheating: If you’d like to enjoy a warm slice, microwave individual pieces for about 10 seconds. Avoid over-heating or the meringue will deflate.
FAQs
1. Can I use 2% milk instead of whole milk?
Yes, but whole milk gives a richer texture. If using 2%, you might need to cook slightly longer to achieve the same thickness.
2. My filling didn’t set. What went wrong?
It likely wasn’t cooked long enough. Make sure it thickens in the pan and cooks for the full 2 minutes after adding yolks.
3. Can I use a store-bought crust?
Absolutely. A pre-baked store-bought crust works great if you’re short on time.
4. Why is my meringue weeping?
Meringue can weep if not sealed properly or overbaked. Make sure you spread it to the crust edge and don’t over-broil.
5. Is there a dairy-free version?
You can try plant-based milk, though the consistency may differ. Full-fat oat milk tends to work best.
Tips & Tricks
Always use room-temperature egg whites for better meringue volume.
Press plastic wrap directly onto the filling (before adding meringue) if storing before topping—it prevents a skin from forming.
Use a metal or glass bowl for beating egg whites—plastic bowls can retain grease and ruin your meringue.
Slice with a knife dipped in hot water for cleaner servings.
Recipe Variations
Mocha Twist:
Add 1 tsp of instant espresso powder to the chocolate mixture with the cocoa. It deepens the chocolate flavor with a subtle coffee note.
Chocolate Coconut Pie:
Add ½ cup shredded sweetened coconut to the filling after it’s cooked. Toast extra coconut and sprinkle it on top of the meringue.
Nutty Chocolate Pie:
Stir in ½ cup finely chopped pecans or walnuts into the filling. Adds crunch and a nutty backdrop.
Spiced Mexican Chocolate Pie:
Add ½ tsp cinnamon and a pinch of cayenne to the cocoa mixture. It adds warmth and a hint of spice.
Crust Swap:
Use a graham cracker crust instead of traditional pie dough for a sweeter base. No need to pre-bake—just chill before filling.
Final Thoughts
This chocolate pie isn’t just dessert—it’s a slice of comfort that brings people to the table and makes them linger. I’ve made this more times than I can count, and every single one gets the same reaction: wide eyes, happy sighs, and empty plates.
If you try it, let me know how it went—I’m always curious how a good chocolate pie finds its way into someone else’s family favorites.
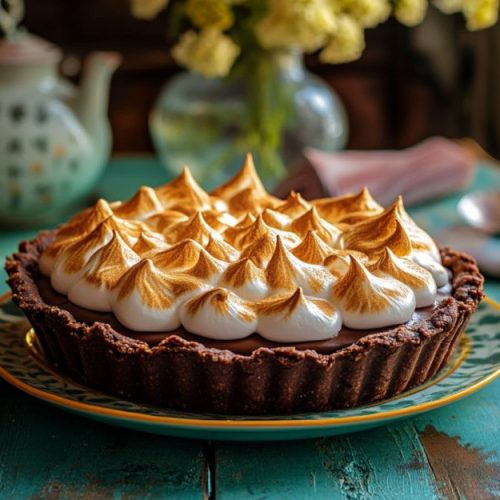
Old-Fashioned Chocolate Pie With Golden Meringue
Ingredients
For the chocolate filling:
- 1 pre-baked 9-inch pie crust
- 1½ cups granulated sugar
- ¼ cup unsweetened cocoa powder
- ¼ cup cornstarch
- ¼ teaspoon salt
- 3 cups whole milk
- 4 large egg yolks
- 2 tablespoons unsalted butter
- 1 teaspoon vanilla extract
For the meringue:
- 4 large egg whites
- ¼ teaspoon cream of tartar
- ½ cup granulated sugar
- ½ teaspoon vanilla extract
Instructions
- Whisk sugar, cocoa, cornstarch, and salt in a saucepan. Gradually add milk, whisking smooth. Cook over medium heat, stirring constantly, until thick and bubbling (about 7–10 minutes).
- Lightly beat yolks in a bowl. Slowly whisk in 1 cup of the hot mixture. Pour it back into the pan and cook for 2 more minutes, stirring constantly.
- Remove from heat. Stir in butter and vanilla until smooth. Pour filling into pre-baked crust and smooth the top.
- Beat egg whites with cream of tartar until soft peaks form. Gradually add sugar, beating to stiff, glossy peaks. Mix in vanilla.
- Spread meringue over hot filling, sealing to the crust. Create peaks with a spoon. Broil 1–2 minutes until golden—watch closely.
- Cool at room temp for 1–2 hours. Chill at least 3 hours before slicing for a clean cut.