This Butterfinger Pie recipe was born on a chaotic Wednesday. You know, one of those evenings where I had groceries to unpack, homework help to give, and a half-defrosted chicken that just wasn’t going to make it to the table.
So I ditched dinner plans entirely and made dessert first. I had a stash of Butterfinger bars leftover from a birthday piñata, a tub of Cool Whip hiding behind the frozen peas, and a box of graham crackers waiting to be useful. And just like that, Butterfinger Pie happened.
My family was skeptical at first. Dessert before dinner? But the moment that creamy filling hit their taste buds—sweet, peanut-buttery, crunchy—it was all smiles. My husband went for seconds before he’d even finished his first slice. It was light, it was rich, it was all the things. Since then, it’s become our no-bake, last-minute, mood-lifting go-to dessert, especially when I want to feel like a baking hero without breaking a sweat.
I’ve now made this for potlucks, block parties, even a neighbor’s retirement celebration. And every time, someone asks for the recipe. It’s that kind of pie—the kind you share, pass around, and keep coming back to. Plus, it uses simple pantry staples, which I always appreciate.
Short Description
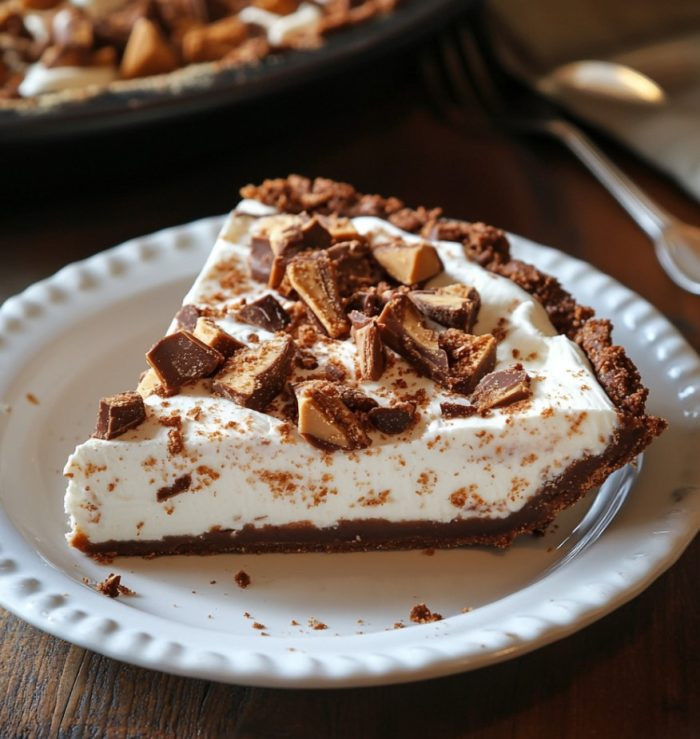
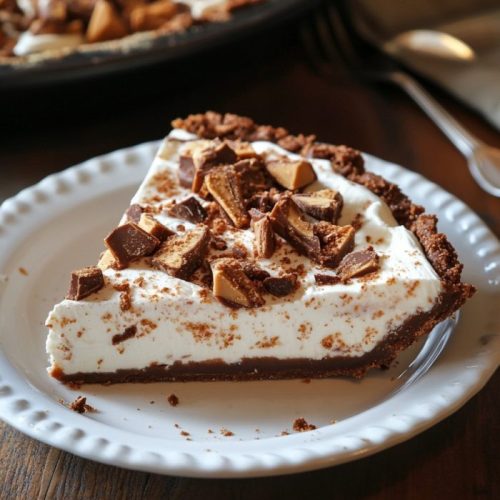
Butterfinger Pie is a no-bake dessert with a graham cracker crust, a creamy filling swirled with crushed Butterfingers, and a fluffy whipped topping. It’s easy, crowd-pleasing, and perfect for any occasion.
Key Ingredients
For the Crust:
- 1 ½ cups graham cracker crumbs
- 6 tablespoons unsalted butter, melted
- 2 tablespoons granulated sugar
For the Filling:
- 1 (8 oz) package cream cheese, softened
- 1 (14 oz) can sweetened condensed milk
- 1 (8 oz) tub whipped topping (like Cool Whip), thawed
- 1 cup crushed Butterfinger candy bars (about 3 full-size bars)
For the Topping:
- 1 ½ cups whipped topping
- ½ cup crushed Butterfinger candy bars
- Optional: whole or chopped Butterfinger pieces for garnish
Tools Needed
- 9-inch pie dish
- Mixing bowls (medium and large)
- Electric mixer or handheld beater
- Rubber spatula
- Measuring cups and spoons
- Spoon or flat-bottomed glass (for pressing crust)
Cooking Instructions
Step 1: Prep the Crust
In a medium bowl, combine graham cracker crumbs, melted butter, and sugar. Stir until the mixture looks like wet sand. Press it firmly into the bottom and up the sides of a 9-inch pie dish.
Use a flat-bottomed glass to get it smooth and compact. Chill it in the fridge while you work on the filling—at least 10–15 minutes.
Step 2: Make the Filling
In a large mixing bowl, beat the softened cream cheese until it’s completely smooth—no lumps. Add the sweetened condensed milk and continue mixing until you get a silky, uniform mixture.
Step 3: Fold in Butterfinger and Whipped Topping
Gently fold in the thawed whipped topping and the crushed Butterfinger candy bars. Stir with a spatula until everything is evenly distributed, being careful not to deflate the whipped topping too much.
Step 4: Assemble the Pie
Spoon the filling into the prepared crust. Smooth the top with a spatula until even.
Step 5: Add the Topping
Spread the remaining whipped topping across the top of the pie. Sprinkle the ½ cup of crushed Butterfinger candy over the surface. For extra flair, press a few larger chunks or pieces around the edge.
Step 6: Chill to Set
Refrigerate the pie for at least 4 hours, or overnight if you can wait. This helps it firm up and lets the flavors meld together beautifully.
Troubleshooting Tips:
If your crust feels too loose, add another tablespoon of melted butter.
If the filling seems too soft after chilling, give it a bit more time. Four hours is the minimum, but overnight yields the best results.
Why You’ll Love This Recipe
– No baking required
– Just 20 minutes of prep
– Budget-friendly and uses pantry staples
– Light, creamy texture with a sweet-salty crunch
– Kid-approved and potluck-perfect
– Customizable with other candy bars
Mistakes to Avoid & Solutions
Mistake 1: Overmixing the filling
Solution: Mix until smooth, but once you add whipped topping, fold gently to maintain fluffiness.
Mistake 2: Using warm ingredients
Solution: Make sure cream cheese is softened but not warm. Cold ingredients will lead to a lumpy texture.
Mistake 3: Skipping the chilling step
Solution: Refrigerating is crucial. If you skip it, the pie won’t set properly and will fall apart when sliced.
Mistake 4: Crust falling apart
Solution: Press the crust firmly into the dish and chill before adding the filling. If it’s too crumbly, add more melted butter.
Mistake 5: Using fresh whipped cream in place of tub topping without stabilizing it
Solution: If you’re using homemade whipped cream, stabilize it with powdered sugar or gelatin so it holds up.
Serving and Pairing Suggestions
Serve chilled with a drizzle of chocolate or caramel sauce
Pair with hot coffee or iced latte for balance
Serve family-style at cookouts or holidays
Works well as a sweet ending for taco nights or game-day spreads
Great on a dessert bar with brownies and fruit cups
Storage and Reheating Tips
Refrigerate: Store tightly covered in the fridge for up to 4 days
Freeze: Wrap the entire pie or individual slices in plastic wrap and freeze for up to 1 month.
Thaw: Let it sit in the fridge for a few hours before serving.
Do not microwave: It’s a chilled dessert—microwaving will melt the structure.
FAQs
1. Can I make Butterfinger Pie ahead of time?
Yes! It’s perfect for making a day in advance. Just cover and chill overnight.
2. Can I use a store-bought crust?
Absolutely. A premade graham cracker crust saves time and works just as well.
3. Can I swap out the Butterfingers?
Sure! Try chopped Reese’s, Snickers, or Heath bars for a different twist.
4. Is there a low-sugar version of this pie?
You can use low-fat cream cheese, sugar-free condensed milk, and a light whipped topping. The taste is still rich and satisfying.
5. Can I use homemade whipped cream instead of Cool Whip?
Yes, but make sure it’s stabilized with a bit of powdered sugar so it holds up.
Tips & Tricks
Use a food processor to crush Butterfingers quickly and cleanly.
If the candy bars are sticky, pop them in the freezer for 5 minutes before crushing.
Chill the mixing bowl and beaters before whipping the filling for a fluffier texture.
Want perfect slices? Run a sharp knife under hot water before cutting.
Double the recipe and make it in a 9×13 pan for a party-size version.
Recipe Variations
Chocolate Crust Version
Swap the graham cracker crumbs with chocolate cookie crumbs for a richer base. The rest of the steps stay the same, but it adds a deeper cocoa note that pairs beautifully with the Butterfinger filling.
Peanut Butter Swirl Version
After pouring the filling into the crust, swirl ¼ cup of melted peanut butter across the top before adding whipped topping. Chill as directed. It adds a salty kick and extra depth.
Mini Pies Version
Use a muffin tin lined with cupcake wrappers to make individual pies. Press about 1½ tablespoons of crust into each cup, fill, top, and chill as usual. Perfect for parties or lunchbox treats.
Gluten-Free Version
Use gluten-free graham crackers or cookies for the crust. Make sure your whipped topping and candy bars are labeled gluten-free.
Holiday Twist
Crush peppermint candies along with Butterfingers for a festive flair. A chocolate crust works well here too.
Final Thoughts
Butterfinger Pie is more than just a dessert—it’s a lifesaver for those “what do I make?” moments. It’s the kind of recipe that delivers without asking much in return. Just a few pantry staples, a bit of mixing, and a chill in the fridge, and you’ve got something that looks and tastes like you spent way more time on it than you did.
It’s playful and nostalgic, yet sophisticated enough to bring to a dinner party. I’ve shared this with friends who bake from scratch and those who never touch a rolling pin—and both have raved. The ease of it makes it foolproof. The flavor makes it unforgettable.
There’s joy in recipes like this. No stress, no oven, just creamy, crispy, candy-filled goodness that speaks straight to your soul. Whether you’re making it for your kids, your coworkers, or just a Tuesday night treat, this pie will always deliver that little bit of magic we all need.
Butterfinger Pie
Ingredients
For the Crust:
- 1 ½ cups graham cracker crumbs
- 6 tablespoons unsalted butter melted
- 2 tablespoons granulated sugar
For the Filling:
- 1 8 oz package cream cheese, softened
- 1 14 oz can sweetened condensed milk
- 1 8 oz tub whipped topping (like Cool Whip), thawed
- 1 cup crushed Butterfinger candy bars about 3 full-size bars
For the Topping:
- 1 ½ cups whipped topping
- ½ cup crushed Butterfinger candy bars
- Optional: whole or chopped Butterfinger pieces for garnish
Instructions
- Mix graham cracker crumbs, melted butter, and sugar in a bowl until it resembles wet sand. Press firmly into a 9-inch pie dish using a flat-bottomed glass. Chill for 10–15 minutes.
- Beat softened cream cheese until smooth. Add sweetened condensed milk and mix until silky and uniform.
- Gently fold in thawed whipped topping and crushed Butterfinger. Mix evenly without over-stirring.
- Pour filling into the chilled crust and smooth the top.
- Spread remaining whipped topping over the pie. Sprinkle with crushed Butterfinger and add a few larger chunks for garnish.
- Refrigerate for at least 4 hours (or overnight) to firm up and let flavors blend.