One day, I brought a pan of these No-Bake Cheesecake Rice Krispy Treats to a community fundraiser at my kids’ elementary school. I wasn’t even on dessert duty—but after chatting with a volunteer mom near the snack table, I decided to bring something sweet just in case.
She’d mentioned how every bake sale ends up with either dry brownies or broken cookies. That stuck with me. So, I went home and put together something different—cheesecake meets cereal bar, no oven required.
The pan disappeared within minutes. One of the teachers later pulled me aside asking for the recipe, and a third grader told me it “tasted like birthday cake and marshmallows had a baby.” Since then, this recipe has become a go-to for birthday parties, school events, and sleepovers. My husband calls it “cheesecake on vacation”—sweet, chill, no stress.
It comes together in under 30 minutes and sets while you go about your day. You don’t even need to touch the oven, which makes it perfect for hot days or last-minute events. Plus, it’s endlessly customizable and surprisingly light, with a creamy cheesecake layer nestled on top of a gooey Rice Krispy base. I’ve learned to keep the ingredients on hand—because once you make this once, the requests never stop.
Short Description
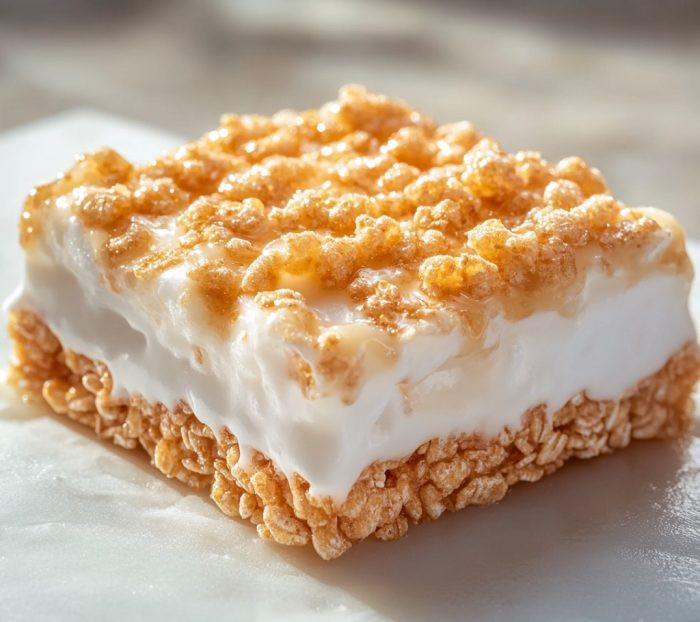
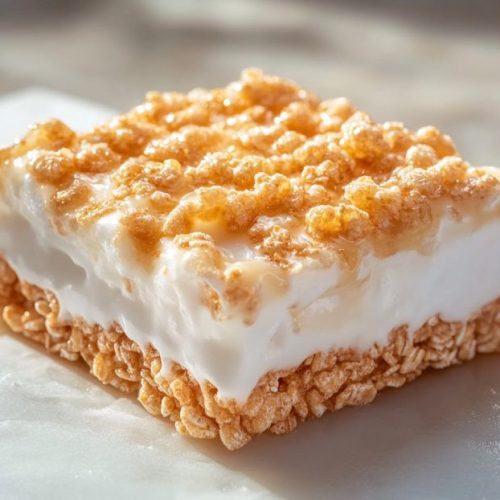
No-Bake Cheesecake Rice Krispy Treats combine gooey marshmallow cereal bars with a smooth, fluffy cheesecake topping—an easy, crowd-pleasing dessert that chills instead of bakes.
Key Ingredients
For the Cereal Base:
- 6 cups Rice Krispies cereal
- 1/4 cup unsalted butter
- 1 (10 oz) package mini marshmallows (about 40–45 marshmallows)
For the Cheesecake Layer:
- 8 oz cream cheese, softened
- 1/2 cup powdered sugar
- 1 teaspoon vanilla extract
- 1/2 cup whipped topping (like Cool Whip, thawed)
Optional Toppings:
- Graham cracker crumbs
- Fresh berries
- Chocolate drizzle
- Sprinkles
Tools Needed
- Microwave-safe bowl
- 9×9-inch square pan
- Parchment paper
- Hand mixer
- Rubber spatula
- Mixing bowl
Cooking Instructions
Step 1: Make the Cereal Base
In a large microwave-safe bowl, melt the butter for 30–45 seconds. Stir in the mini marshmallows and microwave in 15-second intervals until completely melted and smooth.
Quickly stir in the Rice Krispies until evenly coated. Press the mixture firmly into a parchment-lined 9×9-inch pan using greased hands or a spatula. Let it cool for 5–10 minutes.
Step 2: Prepare the Cheesecake Layer
In a mixing bowl, beat the softened cream cheese until smooth. Add powdered sugar and vanilla extract, then continue beating until well blended. Fold in the whipped topping gently to keep it light and fluffy.
Step 3: Assemble the Treats
Spread the cheesecake layer evenly over the cooled cereal base. Use a spatula to smooth the top. Sprinkle graham cracker crumbs for texture and flavor. Add berries, a chocolate drizzle, or sprinkles if desired.
Step 4: Chill
Refrigerate the bars for at least 1–2 hours. The cheesecake layer should be set and slightly firm to the touch.
Step 5: Cut and Serve
Lift the treats from the pan using parchment paper and slice into squares. Serve chilled or let them sit out for 5–10 minutes before serving for a softer bite.
Why You’ll Love This Recipe
– No baking required—just melt, mix, and chill
– Light, fluffy cheesecake layer with classic marshmallow crunch
– Ready in about 30 minutes (plus chill time)
– Easy to customize with toppings
– Budget-friendly ingredients
– Kid-approved and adult-adored
Mistakes to Avoid & Solutions
Using warm cereal base for cheesecake layer
If the base is too warm, the cheesecake layer melts and slides. Always let the base cool completely before layering.
Overmixing whipped topping into cream cheese
This flattens the fluffiness. Fold gently to keep the texture airy.
Spreading cheesecake layer on loose cereal
Press the base firmly into the pan so it holds its shape during slicing.
Not lining the pan
Skipping parchment makes removal tricky. Always line the pan for easy lifting.
Undermixing marshmallows
Clumps of unmelted marshmallows ruin the base. Stir well and microwave in intervals.
Serving and Pairing Suggestions
Serve as a chilled dessert at cookouts or birthdays
Pair with a glass of cold milk, vanilla iced coffee, or lemonade
Set on a dessert table next to fruit skewers and brownies
Cut into small bites and serve as party finger food
Wrap individually for lunchboxes or picnic packs
Storage and Reheating Tips
Store in an airtight container in the fridge for up to 5 days
For longer storage, freeze up to 2 months; layer with parchment between squares
Thaw overnight in the fridge before serving
No reheating needed—serve straight from the fridge or let sit 10 minutes at room temp
FAQs
1. Can I use homemade whipped cream instead of Cool Whip?
Yes, use about 1/2 cup of freshly whipped cream, but stabilize it with a bit of powdered sugar to hold its shape.
2. Can I make these ahead of time?
Absolutely. Prepare a day ahead and chill overnight—they set even better with time.
3. What if I only have large marshmallows?
Use 40–45 mini marshmallows or about 10 large ones, chopped for easier melting.
4. Can I double the recipe?
Yes, use a 9×13 pan for double portions. Add 5 more minutes to chilling time.
5. Are these treats gluten-free?
Use gluten-free Rice Krispies and ensure all toppings are certified gluten-free.
Tips & Tricks
Grease your hands lightly with butter or oil when pressing the base—no sticking!
Use a bench scraper for clean, even cuts
Chill the cheesecake mixture for 10 minutes before spreading if it feels too loose
Try layering thin sliced strawberries between base and cheesecake for a fruity surprise
Want extra crunch? Add crushed pretzels to the cereal mix
Recipe Variations
Chocolate Chip Version
Add 1/4 cup mini chocolate chips to the cheesecake layer before spreading. Keep chilled so chips don’t melt.
Berry Swirl Cheesecake
Gently swirl 2 tbsp strawberry or raspberry jam into the cheesecake layer before chilling. Adds tart sweetness and color.
Nutty Crunch
Fold 1/4 cup crushed peanuts or almonds into the cereal base for extra crunch and salty contrast.
Mocha Cheesecake
Add 1 tsp espresso powder to the cream cheese layer and drizzle with melted chocolate before serving.
S’mores Inspired
Replace graham cracker topping with mini marshmallows and torch lightly. Add chocolate chunks between layers for a melty surprise.
Final Thoughts
When I handed out slices of these treats at my niece’s sleepover, the girls quietly went from squealing to complete silence, heads down, fully focused on dessert. That’s the kind of feedback no review can match. Watching everyone—kids and adults—go back for seconds with that “just one more” look is what makes all the prep worth it.
This isn’t just a no-bake dessert. It’s a back-pocket win for anyone who juggles busy days but still wants to show up with something thoughtful and fun. The layers are simple but satisfying, and they hold their own on any dessert table. Every now and then, you find a sweet spot between nostalgic and new—this is one of those.
No-Bake Cheesecake Rice Krispy Treats
Ingredients
For the Cereal Base:
- 6 cups Rice Krispies cereal
- ¼ cup unsalted butter
- 1 10 oz package mini marshmallows (about 40–45 marshmallows)
For the Cheesecake Layer:
- 8 oz cream cheese softened
- ½ cup powdered sugar
- 1 teaspoon vanilla extract
- ½ cup whipped topping like Cool Whip, thawed
Optional Toppings:
- Graham cracker crumbs
- Fresh berries
- Chocolate drizzle
- Sprinkles
Instructions
- Melt butter in a large microwave-safe bowl (30–45 seconds). Add marshmallows and microwave in 15-second bursts, stirring until smooth. Stir in Rice Krispies until coated, then press into a parchment-lined 9×9-inch pan. Let cool 5–10 minutes.
- Beat cream cheese until smooth. Mix in powdered sugar and vanilla. Fold in whipped topping gently until fluffy.
- Spread cheesecake mixture over the cooled base. Smooth the top, then add graham crumbs. Optional: top with berries, chocolate drizzle, or sprinkles.
- Refrigerate 1–2 hours until the cheesecake layer sets.
- Lift from pan using parchment. Slice into squares. Serve chilled or slightly softened after resting 5–10 minutes.