Last year, my cousin, who’d just returned from a semester abroad, brought along a batch of tiny cherry pies nestled in a wooden crate. They weren’t fancy—no lattice tops or glossy bakery shine—but one bite and I knew they’d become a staple in my own kitchen.
A few weeks later, I found myself trying to replicate that experience at home. Not the exact recipe, of course—she was notoriously secretive about her measurements—but the feeling it gave me: a cool, creamy center wrapped in a buttery shell and topped with bright, juicy cherries. It was simple, nostalgic, and quietly indulgent.
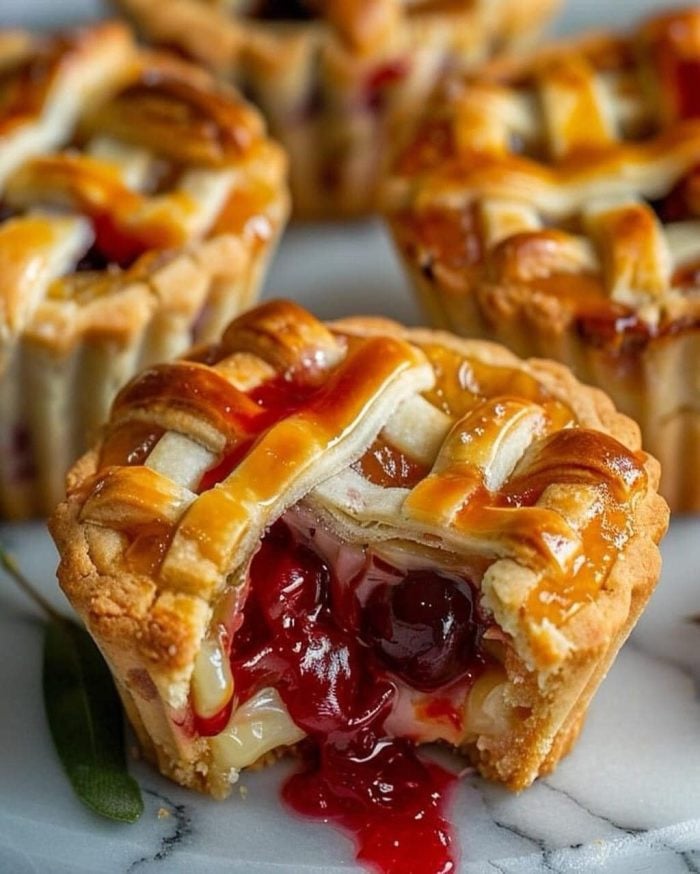
What I came up with turned out to be something of its own—a mini cherry cream cheese pie that bakes in a muffin tin, holds its shape like a dream, and delivers big flavor in a compact, crave-worthy package. Every step feels just fussy enough to satisfy, without veering into exhausting territory.
If you like make-ahead desserts, single-serving treats, or anything involving cherries and cream, this one’s worth keeping close.
Short Description
These irresistible mini cherry cream cheese pies combine a buttery pie crust base, velvety vanilla cream cheese filling, and a juicy cherry topping. Baked in a muffin tin for easy portioning, they’re perfect for gatherings, holidays, or a simple weeknight dessert.
Key Ingredients
For the Pies:
- 1 package refrigerated pie crusts (2 crusts per package)
- 1 cup cream cheese, softened
- 1/2 cup granulated sugar
- 1 teaspoon vanilla extract
- 2 cups fresh or canned cherries, chopped (reserve juice if using canned)
- 1 tablespoon cornstarch (optional, for thickening cherry topping)
- 1 tablespoon water (optional, for thickening cherry topping)
For Garnish (Optional):
- Powdered sugar, for dusting
- Whipped cream, for serving
Tools Needed
- Standard 12-cup muffin tin
- Rolling pin
- Mixing bowl
- Hand mixer or stand mixer
- Round cookie cutter or glass (about 3.5–4 inches diameter)
- Fork
- Saucepan (if thickening cherries)
- Wire rack for cooling
Cooking Instructions
Step 1: Preheat the Oven
Preheat your oven to 375°F (190°C). Lightly grease a 12-cup muffin tin or line each cup with paper liners for easy removal.
Step 2: Prepare the Pie Crusts
Roll out the pie crusts on a lightly floured surface. Use a round cutter or glass to cut out 12 circles, each slightly larger than the muffin tin cups. Gently press each crust into the tin, shaping it to fit the bottom and sides. Prick the bottoms with a fork to prevent puffing.
Step 3: Make the Cream Cheese Filling
In a mixing bowl, beat the softened cream cheese, sugar, and vanilla extract until smooth and creamy—this takes about 2–3 minutes on medium speed. Divide the mixture evenly among the prepared crusts, smoothing the tops.
Step 4: Prepare the Cherry Topping
Chop your cherries into small pieces. If using canned cherries, drain and reserve a few tablespoons of the juice. For a thicker topping, combine cherries, 2–3 tablespoons of juice or water, and the cornstarch in a small saucepan. Cook over medium heat, stirring constantly, until slightly thickened (2–3 minutes). Let cool for a few minutes before using.
Step 5: Assemble the Pies
Spoon the cherry topping gently over the cream cheese layer in each crust. Don’t overfill—just enough to cover the surface.
Step 6: Bake
Bake in the preheated oven for 15–18 minutes, or until the crusts are golden brown and the filling is set. The tops may puff slightly but will settle as they cool.
Step 7: Serve
Let the pies cool in the tin for about 5 minutes before transferring them to a wire rack. Once fully cooled, dust with powdered sugar and top with whipped cream if desired.
Why You’ll Love This Recipe
Portion-perfect: No slicing, no mess—just grab-and-go.
Light but indulgent: Cream cheese and cherries keep it rich yet refreshing.
Crowd-friendly: Easy to make in batches for parties or potlucks.
Seasonal or canned: Works beautifully with either fresh or canned cherries.
Make-ahead option: Can be chilled and served cold or at room temperature.
Mistakes to Avoid & Solutions
1. Overworking the Pie Crusts
Tough or shrunken crusts
Handle the crusts gently and avoid rerolling too many times. Let them rest for a few minutes after cutting to relax the gluten.
2. Overfilling the Cups
Cherry juice overflows and burns
Fill just to the top of the cream cheese layer. A little cherry goes a long way here.
3. Lumpy Cream Cheese Filling
Texture isn’t smooth
Let cream cheese soften at room temp for at least 30 minutes and beat until completely smooth before adding sugar and vanilla.
4. Underbaking
Crusts remain pale or soft
Bake until edges are golden brown. If needed, give it an extra minute or two, watching closely.
5. Removing While Too Hot
Crusts break or stick
Let pies rest in the tin for 5 minutes before gently lifting them out.
Serving and Pairing Suggestions
These pies shine on a dessert tray or brunch table.
Serve them:
– With whipped cream or vanilla bean ice cream
– Alongside hot coffee or chilled sparkling rosé
– As a plated dessert with a drizzle of melted dark chocolate
– On a buffet at baby showers, tea parties, or family gatherings
– In a picnic basket with fresh fruit and lemonade
Storage and Reheating Tips
Refrigeration: Store cooled pies in an airtight container in the fridge for up to 4 days.
Freezing: Freeze fully cooled pies in a single layer until solid, then transfer to a freezer-safe bag. Best if used within 1 month.
Reheating: Thaw frozen pies in the fridge overnight. Warm in a 300°F oven for 5–7 minutes to revive the crust texture.
Serving cold: These also taste amazing chilled straight from the fridge—like mini cheesecakes with a flaky crust.
FAQs
1. Can I use frozen cherries instead of fresh or canned?
Yes! Just thaw and drain them well before chopping. If they’re extra juicy, consider using the optional thickening step.
2. Can I make these in a mini muffin tin for bite-sized versions?
Absolutely. Reduce the baking time to 10–12 minutes and use a smaller cutter for the crusts.
3. Can I use a graham cracker crust instead of pie crust?
You can! Press graham cracker crumbs mixed with melted butter into the muffin tin and bake for 5 minutes before filling.
4. How do I prevent the crust from getting soggy?
Make sure your cherry topping isn’t too watery, and don’t overfill. Also, bake until the crust is golden brown for a firmer texture.
5. Can I make this recipe ahead of time?
Yes! You can make them a day in advance and store in the fridge. Add toppings like whipped cream just before serving.
Tips & Tricks
– Chill the pie crust circles before baking for extra flaky texture.
– For added depth, add a pinch of almond extract to the cherry mixture.
– Use a non-stick muffin tin or liners for easy removal.
– Let the cherry topping cool slightly before spooning it on to prevent melting the cream cheese.
– Dust with powdered sugar after the pies have cooled completely or it’ll melt right in.
Recipe Variations
1. Chocolate Cherry Version
Swap 1/4 cup of the cream cheese with ¼ cup melted dark chocolate. Add chocolate chips to the cherry topping. Result: A rich, black forest-inspired pie.
2. Lemon-Blueberry Swap
Use blueberries in place of cherries and add 1 teaspoon lemon zest to the cream cheese mix. Flavor profile: Bright, tangy, and summery.
3. No-Bake Shortcut
Use pre-baked tart shells or graham cracker crusts. Fill with the cream cheese mixture and chilled canned cherries on top. Chill for 2 hours before serving.
4. Spiced Cherry Pie
Add a pinch of cinnamon and nutmeg to the cherry topping for a warm, fall-friendly version.
5. Vegan Option
Use vegan pie crusts and dairy-free cream cheese (like cashew or almond-based). Sweeten with maple syrup instead of granulated sugar.
Final Thoughts
These mini cherry cream cheese pies may look dainty, but they carry some serious flavor. They’re the kind of dessert that sneaks its way into every gathering—quietly at first, and then suddenly, everyone’s asking for the recipe. What I love most is how unfussy they are, yet every element feels intentional: the flaky crust, the silky center, the vibrant fruit.
If you’re craving a dessert that bridges elegance and comfort without any complicated steps, these little pies just might be your new go-to.
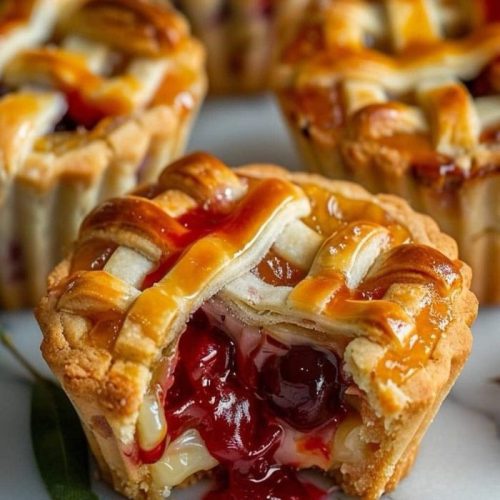
Irresistible Mini Cherry Cream Cheese Pies
Ingredients
For the Pies:
- 1 package refrigerated pie crusts 2 crusts per package
- 1 cup cream cheese softened
- ¼ cup granulated sugar
- 1 teaspoon vanilla extract
- 2 cups fresh or canned cherries chopped (reserve juice if using canned)
- 1 tablespoon cornstarch optional, for thickening cherry topping
- 1 tablespoon water optional, for thickening cherry topping
For Garnish (Optional):
- Powdered sugar for dusting
- Whipped cream for serving
Instructions
- Preheat to 375°F (190°C) and grease or line a 12-cup muffin tin.
- Roll out the crusts, cut 12 circles, press into muffin cups, and prick the bottoms with a fork.
- Beat cream cheese, sugar, and vanilla until smooth. Fill each crust evenly.
- Chop cherries. If thickening, cook with juice/water and cornstarch until slightly thickened, then cool.
- Spoon cherry topping over the cream cheese layer.
- Bake for 15–18 minutes until crusts are golden and filling is set.
- Cool slightly in the tin, transfer to a rack, and top with powdered sugar or whipped cream if desired.