A few weeks ago, I had the chance to visit an orphanage with a few colleagues from my company. We wanted to bring some joy to the kids, but we ended up walking away with far more than we gave. The energy and enthusiasm they brought to a simple game of tag were enough to remind me how much the little things matter—things we might take for granted.
As we sat down to have lunch together, it was clear how much they appreciated the meal, not because of the food itself, but because of the act of sharing it. It felt like such a simple connection, but one that stuck with me long after I left.
It reminded me of the little comforts we often overlook. Food, after all, isn’t just about nourishing our bodies—it’s about community, connection, and creating moments that matter.
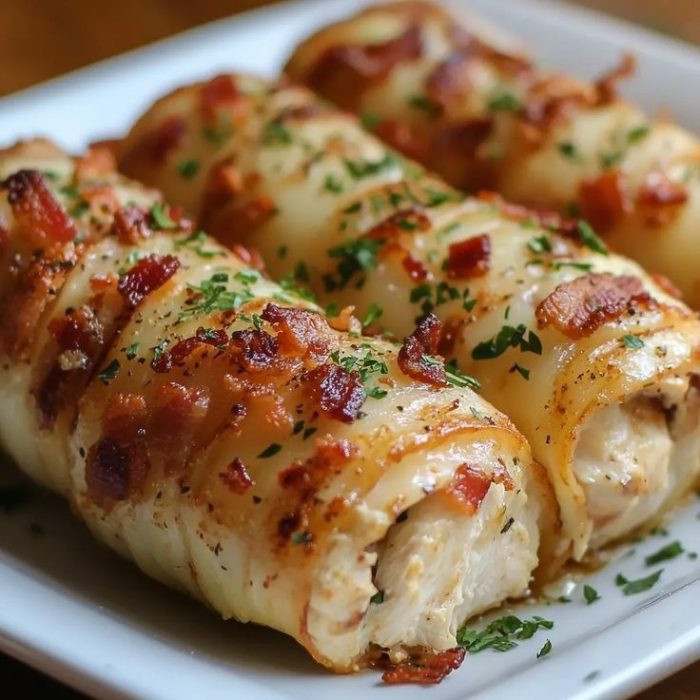
That’s when I thought about how something as simple as Chicken Bacon Ranch Roll-Ups could transform a quiet meal into a shared experience, one where flavor brings people together. This dish is perfect for making the moment feel special without requiring hours in the kitchen.
Short Description
These low-carb Chicken Bacon Ranch Roll-Ups are cheesy, crispy, and packed with flavor. Made with simple ingredients and no dough, they’re quick to bake and perfect for a snack, lunch, or appetizer.
Key Ingredients
- 6 slices of mozzarella cheese
- 1 ½ cups cooked shredded or grilled chicken
- ¼ cup cooked bacon (about 2–3 slices), crumbled
- 1 tablespoon low-carb ranch dressing
- 1 teaspoon finely sliced green onions
Tools Needed
- Large baking sheet
- Silicone baking mat
- Mixing bowl
- Spoon or spatula
- Oven
Cooking Instructions
Step 1: Make the Filling
In a mixing bowl, combine shredded chicken, crumbled bacon, ranch dressing, and green onions. Stir until evenly mixed, then set the bowl aside while you prepare the cheese.
Step 2: Preheat the Oven
Preheat your oven to 350°F. Line a large baking sheet with a silicone baking mat. Avoid parchment paper, as the cheese can stick or burn easily on it.
Step 3: Bake the Cheese Slices
Arrange the mozzarella slices in rows on the silicone mat, leaving space between each. Bake for 5–7 minutes, until the cheese is bubbling and the edges are turning golden brown. Keep an eye on them after 5 minutes—they can go from golden to overly crisp fast.
Step 4: Let the Cheese Cool Slightly
Remove the baking sheet from the oven. Let the cheese slices sit for about 1 minute—they should still be soft enough to roll but not too hot to touch. If they firm up too quickly, pop them back into the oven for 30 seconds to loosen again.
Step 5: Fill and Roll
Spoon the chicken bacon mixture along one edge of each cheese slice. Working quickly, roll each one tightly and place seam-side down.
Why You’ll Love This Recipe
– Low-carb and keto-friendly
– Crispy, cheesy exterior with creamy, savory filling
– Quick to make—ready in under 30 minutes
– No special dough or flours needed
– Naturally gluten-free
Mistakes to Avoid & Solutions
1. Overbaking the cheese
Problem: The cheese becomes brittle and cracks when rolling.
Solution: Bake just until bubbling with golden edges—usually 5–7 minutes. Watch closely.
2. Not using a silicone mat
Problem: Cheese sticks and tears on parchment or foil.
Solution: Always use a silicone baking mat to allow easy release and rolling.
3. Letting the cheese cool too long
Problem: Cheese becomes too stiff to roll.
Solution: Let it rest just 1 minute. If it hardens, reheat briefly to soften.
4. Too much filling
Problem: Filling spills out or prevents rolling.
Solution: Use a modest amount—about 2 tablespoons per slice.
5. Using cold filling
Problem: Cheese cools too quickly during rolling.
Solution: Let the filling come to room temperature before assembling.
Serving and Pairing Suggestions
These roll-ups shine as a high-protein snack or light lunch. Serve them fresh and warm with:
– A side of fresh-cut veggies like cucumber sticks or cherry tomatoes
– A small bowl of extra ranch or spicy mayo for dipping
– As a finger food on a game-day snack tray
– With a crisp green salad tossed in balsamic vinaigrette
– A side of coleslaw or cauliflower mash for a full meal
They’re also great for family-style serving or as part of a potluck spread—just stack them on a platter and watch them disappear.
Storage and Reheating Tips
Storage:
Let leftovers cool completely, then store in an airtight container in the fridge for up to 3 days.
Use parchment paper between layers to prevent sticking.
Reheating:
Reheat in a 300°F oven or toaster oven for 5–7 minutes until warm and edges are crisp again.
Avoid microwaving—they’ll soften too much and lose their crunch.
FAQs
1. Can I use a different cheese besides mozzarella?
Yes, but stick with cheeses that melt well and hold their shape, like provolone or Monterey Jack. Avoid soft cheeses that don’t form a crisp edge.
2. Is there a way to make this spicier?
Absolutely! Add a dash of hot sauce to the filling or sprinkle crushed red pepper flakes over the cheese before baking.
3. Can I make these ahead of time?
Yes. Prep the filling in advance and store it in the fridge. Bake the cheese and roll them just before serving for the best texture.
4. What’s the best chicken to use?
Leftover grilled or rotisserie chicken works great. Just make sure it’s shredded or chopped finely so it blends evenly.
5. Can I make this vegetarian?
Sure! Swap the chicken and bacon with chopped roasted veggies like bell peppers and mushrooms, and use a ranch-style Greek yogurt dressing.
Tips & Tricks
– Let the cheese slices cool just long enough to handle—too hot and they’re too soft, too cool and they won’t roll.
– Lightly press the roll seam-side down for a few seconds to seal it shut.
– Want extra crunch? Bake the rolled-up snacks for 2 extra minutes after assembling.
– Mix up the herbs! Try chives, parsley, or dill with the green onions for variety.
– Don’t overcrowd the pan—cheese needs space to bubble and brown evenly.
Recipe Variations
1. Spicy Southwest Roll-Ups
Swap ranch with chipotle mayo.
Add 1 tbsp diced jalapeños and a sprinkle of chili powder to the filling.
Use pepper jack cheese instead of mozzarella for a zesty twist.
2. BBQ Chicken Roll-Ups
Replace ranch with sugar-free BBQ sauce.
Add thinly sliced red onions to the mix.
Sprinkle a bit of cheddar inside for a smoky, cheesy finish.
3. Buffalo Style Roll-Ups
Use buffalo sauce instead of ranch.
Mix in crumbled blue cheese with the chicken.
Serve with celery sticks and a side of ranch for dipping.
4. Caprese Roll-Ups (Vegetarian)
Replace chicken and bacon with chopped tomatoes, basil, and a drizzle of balsamic glaze.
Use provolone or fresh mozzarella slices.
Serve with a sprinkle of sea salt and black pepper.
Final Thoughts
Chicken Bacon Ranch Roll-Ups offer comfort in each bite, with the combination of savory chicken, crispy bacon, and creamy ranch that everyone loves. Beyond that, they represent what food can do—it brings people together.
Whether you’re looking for a weeknight meal or a dish to impress at a gathering, this recipe ticks all the boxes. It’s quick, easy, and full of flavor. Try them out next time you’re craving something comforting yet effortless!

Chicken Bacon Ranch Roll-Ups
Ingredients
- 6 slices of mozzarella cheese
- 1½ cups cooked shredded or grilled chicken
- ¼ cup cooked bacon about 2–3 slices, crumbled
- 1 tablespoon low-carb ranch dressing
- 1 teaspoon finely sliced green onions
Instructions
- In a bowl, mix shredded chicken, crumbled bacon, ranch dressing, and green onions until well combined. Set aside.
- Preheat your oven to 350°F. Line a baking sheet with a silicone mat.
- Arrange mozzarella slices on the silicone mat, leaving space between them. Bake for 5-7 minutes, until bubbly and golden brown. Watch closely after 5 minutes to prevent burning.
- Remove the cheese from the oven and let it cool for 1 minute. It should be soft enough to roll but not too hot to handle. If needed, return to the oven for 30 seconds to soften.
- Spoon the chicken bacon mixture along one edge of each cheese slice. Roll tightly and place seam-side down.