A peaceful Saturday afternoon gave me the perfect excuse to spend a few uninterrupted hours in the kitchen. I wasn’t planning anything extravagant—just craving something rich, cozy, and nostalgic.
As I scrolled through my pantry shelves, my eyes landed on a familiar can of Hershey’s Cocoa tucked between the baking powder and cinnamon. In that moment, I knew exactly what I wanted to make: a deeply chocolaty cake with a twist—silky cream cheese nestled between the layers.
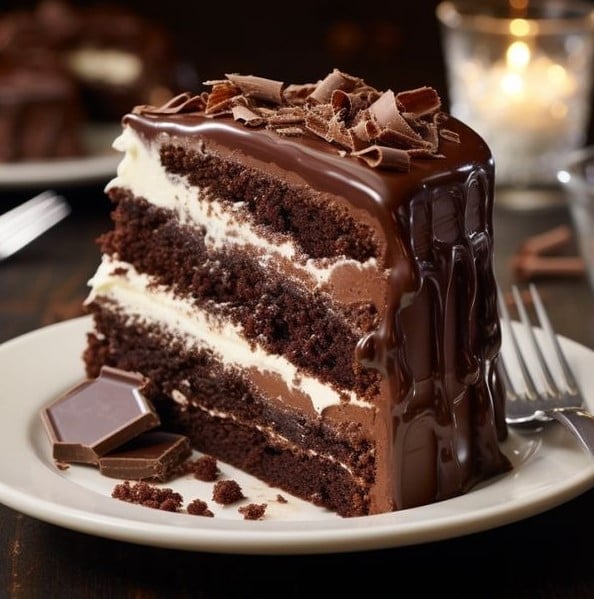
What followed felt less like baking and more like building something indulgent, one spoonful of cocoa and swirl of filling at a time. The scent of cocoa rising from the oven was enough to draw curious noses into the kitchen, and I couldn’t help but sneak a spoonful of the cream cheese filling before it made its way into the cake. The end result? A moist, melt-in-your-mouth chocolate cake layered with tangy sweetness and wrapped in a cloud of chocolate cream cheese frosting.
This cake doesn’t shout for attention. It whispers, slowly pulling you in with every rich bite. It’s the kind of dessert that turns a simple weekend into a sweet memory. If you’ve got a mixer, a little time, and a craving for something special, let me show you how this one comes together.
Short Description
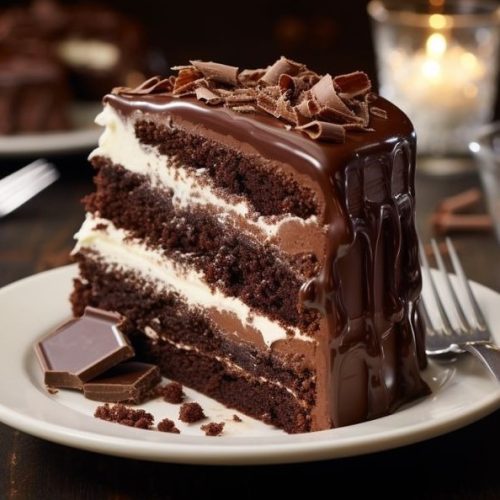
This Hershey’s Chocolate Cake with Cream Cheese Filling is a moist, cocoa-rich treat layered with a tangy-sweet cream cheese center and covered in a luscious chocolate buttercream. It’s comforting, crowd-pleasing, and irresistible from the first bite to the last crumb.
Key Ingredients
For the Cake:
- 2 cups sugar
- 1¾ cups all-purpose flour
- ¾ cup Hershey’s Cocoa
- 1½ teaspoons baking powder
- 1½ teaspoons baking soda
- 1 teaspoon salt
- 2 eggs
- 1 cup milk
- ½ cup vegetable oil
- 2 teaspoons vanilla extract
- 1 cup boiling water
For the Cream Cheese Filling:
- 1 cup cream cheese, softened
- ½ cup powdered sugar
- 1 teaspoon vanilla extract
For the Chocolate Cream Cheese Buttercream:
- ½ cup butter, softened
- ¾ cup Hershey’s Cocoa
- 4 cups powdered sugar
- 2 teaspoons vanilla extract
- 2–4 tablespoons milk (as needed)
- 1 cup cream cheese, softened
Tools Needed
- Two 9-inch round baking pans
- Mixing bowls (at least 3)
- Hand or stand mixer
- Rubber spatula
- Wire cooling racks
- Serrated knife (for slicing layers)
- Offset spatula (optional, for frosting)
Cooking Instructions
Step 1: Preheat and Prep the Pans
Preheat your oven to 350°F (175°C). Grease and flour two 9-inch round cake pans. Set them aside while you prep the batter.
Step 2: Mix the Dry Ingredients
In a large mixing bowl, whisk together the sugar, flour, Hershey’s Cocoa, baking powder, baking soda, and salt.
Step 3: Add the Wet Ingredients
Add eggs, milk, vegetable oil, and vanilla extract to the dry ingredients. Beat on medium speed for about 2 minutes until the batter becomes smooth and glossy.
Step 4: Stir in the Boiling Water
Carefully stir in the boiling water. The batter will look very thin—don’t worry, this is what makes the cake incredibly moist.
Step 5: Bake the Cake
Divide the batter evenly between the two prepared pans. Bake for 30–35 minutes, or until a toothpick inserted in the center comes out clean.
Let the cakes cool in the pans for 10 minutes, then remove them onto wire racks to cool completely.
Step 6: Make the Cream Cheese Filling
In a clean bowl, beat together softened cream cheese, powdered sugar, and vanilla extract until smooth and creamy.
Step 7: Prepare the Chocolate Buttercream
In another bowl, beat the softened butter and cream cheese until light and fluffy. Gradually add the cocoa powder and powdered sugar, mixing well after each addition.
Stir in vanilla and add milk one tablespoon at a time until you reach your desired spreadable consistency.
Step 8: Assemble the Cake
Once the cake layers are completely cool, use a serrated knife to slice each in half horizontally. Place the first layer on a serving plate and spread one-third of the cream cheese filling over the top.
Repeat with the next two layers. Place the final layer on top, then frost the entire cake with your rich chocolate cream cheese buttercream.
Why You’ll Love This Recipe
– A tangy-sweet cream cheese filling that balances the richness
– Ultra-creamy frosting that’s not too sweet, with deep cocoa flavor
– Easy to make with pantry staples
– Great for birthdays, holidays, or weekend baking therapy
– Can be made ahead and still tastes amazing the next day
– Works for casual gatherings or elegant dinners alike
Mistakes to Avoid & Solutions
1. Overmixing the batter
Why it’s a problem: Overmixing can lead to a dense cake.
Solution: Mix just until combined. Once the wet meets the dry, beat only for the recommended 2 minutes.
2. Not cooling the layers properly before filling
Why it’s a problem: Warm cake will melt the filling and make it runny.
Solution: Allow cakes to cool fully on wire racks before slicing and layering.
3. Skipping the boiling water
Why it’s a problem: It activates the cocoa and creates a rich texture.
Solution: Don’t skip this—it’s key to the cake’s softness and chocolate depth.
4. Using cold cream cheese
Why it’s a problem: Cold cream cheese will leave lumps.
Solution: Let it soften at room temperature before mixing.
5. Frosting too soon
Why it’s a problem: Warm layers will cause frosting to slide off.
Solution: Ensure the entire cake is cool before frosting.
Serving and Pairing Suggestions
Serve chilled or at room temperature, sliced into thick wedges.
Pair it with:
– A hot cup of coffee or a glass of cold milk
– Fresh raspberries or strawberries on the side
– A scoop of vanilla ice cream for extra indulgence
– Whipped cream and chocolate shavings for a more decorative touch
– Elegant plated dessert for dinner parties, or serve family-style for gatherings
Storage and Reheating Tips
Refrigerator: Store in an airtight container for up to 5 days. The filling and frosting hold up well when chilled.
Freezer: Wrap slices tightly in plastic wrap and foil. Freeze for up to 2 months.
Reheating: Let refrigerated slices sit at room temp for 20–30 minutes before serving. For a warm slice, microwave for 10–15 seconds—but note the filling may soften.
FAQs
1. How do I keep my cake from sticking to the pans?
Grease and flour the pans thoroughly, or use parchment rounds on the bottom.
2. Can I make the cake ahead of time?
Yes! Bake the layers a day in advance and wrap them tightly in plastic until ready to assemble.
3. Is there a gluten-free version of this recipe?
Swap the all-purpose flour with a 1:1 gluten-free baking mix for a similar texture.
4. Can I use Dutch-processed cocoa instead of natural Hershey’s?
It’s best to stick with natural cocoa here, as the recipe’s leavening is balanced for it.
5. My frosting is too thick—what do I do?
Add 1 tablespoon of milk at a time and beat until smooth and spreadable.
Tips & Tricks
– Level the cake layers before stacking for even, stable slices.
– Chill the layers for 15 minutes before slicing them horizontally—it helps reduce crumbling.
– Use an offset spatula for smooth, professional-looking frosting.
– Add a pinch of espresso powder to the batter to intensify the chocolate flavor.
– For cleaner slices, run your knife under hot water and wipe it between cuts.
Recipe Variations
1. Mocha Cream Cheese Filling
Add 1 teaspoon of instant espresso powder to the cream cheese filling. It adds a bold coffee note that pairs beautifully with the cocoa layers.
2. Raspberry Chocolate Cake
Spread a thin layer of raspberry jam over each cake layer before adding the cream cheese filling. The tartness cuts through the sweetness and adds a fruity dimension.
3. Dark Chocolate Lovers’ Version
Use Hershey’s Special Dark Cocoa instead of regular cocoa in both the cake and the frosting. Expect a deeper, slightly bitter chocolate flavor.
Final Thoughts
This Hershey’s Chocolate Cake with Cream Cheese Filling became an instant favorite in my kitchen—not because it’s the fanciest or flashiest, but because it’s that rare combination of rich, simple, and satisfying. Each layer brings something different: the soft sponge, the creamy tang, the decadent frosting. It’s comfort wrapped in chocolate, perfect for sharing or sneaking into the fridge for one more bite.
Baking it felt like a small act of joy, one that reminded me of how satisfying homemade desserts can be when made with love (and plenty of cocoa). If you’ve never made a layer cake before, this is a great place to start. And if you’re already a pro, this one’s still worth making again.
Your fork won’t want to stop at one bite—and neither will your guests.
Hershey's Chocolate Cake With Cream Cheese Filling
Ingredients
For the Cake:
- 2 cups sugar
- 1¾ cups all-purpose flour
- ¾ cup Hershey’s Cocoa
- 1½ teaspoons baking powder
- 1½ teaspoons baking soda
- 1 teaspoon salt
- 2 eggs
- 1 cup milk
- ½ cup vegetable oil
- 2 teaspoons vanilla extract
- 1 cup boiling water
For the Cream Cheese Filling:
- 1 cup cream cheese softened
- ½ cup powdered sugar
- 1 teaspoon vanilla extract
For the Chocolate Cream Cheese Buttercream:
- ½ cup butter softened
- ¾ cup Hershey’s Cocoa
- 4 cups powdered sugar
- 2 teaspoons vanilla extract
- 2 –4 tablespoons milk as needed
- 1 cup cream cheese
Instructions
- Set your oven to 350°F (175°C). Grease and flour two 9-inch round cake pans and set them aside.
- In a large bowl, whisk together sugar, flour, Hershey’s Cocoa, baking powder, baking soda, and salt.
- Add eggs, milk, vegetable oil, and vanilla extract to the bowl. Beat on medium speed for 2 minutes until the batter is smooth.
- Slowly stir in the boiling water. The batter will be thin—this helps keep the cake moist.
- Divide the batter evenly between the two pans. Bake for 30–35 minutes, or until a toothpick inserted in the center comes out clean. Cool in pans for 10 minutes, then transfer to wire racks to cool completely.
- In a separate bowl, beat softened cream cheese, powdered sugar, and vanilla extract until smooth and creamy.
- Beat softened butter and cream cheese until fluffy. Slowly mix in cocoa powder and powdered sugar. Stir in vanilla, then add milk 1 tablespoon at a time until the frosting is smooth and spreadable.
- Slice each cake in half horizontally. Place one layer on a serving plate and spread one-third of the cream cheese filling on top. Repeat with the next two layers. Add the final cake layer and frost the entire cake with the chocolate buttercream.