The kitchen wasn’t supposed to turn into a science lab that afternoon. I had a bowl of cornstarch in one hand and white glue in the other, both meant for a totally different recipe. But a little curiosity, a few spilled food coloring drops, and a bored rainy day changed everything. What started as cleaning out the pantry ended with six vibrant balls bouncing across my countertop—and I didn’t even mind the mess.
These rainbow bouncy balls were an unexpected delight. The colors were bright, the texture was satisfyingly rubbery, and the simple reaction between borax and glue felt like magic. The moment I rolled them in my palms, I was hooked. I wasn’t making a dessert this time—I was making memories.
You don’t need special equipment, and the ingredients are already sitting in most cupboards. Each step is easy enough for kids to help, but engaging enough that even adults will find themselves grinning while swirling the colors together. And when those balls finally spring up from the counter? It’s like a mini celebration.
So, if you’ve got a few spare minutes and want to mix creativity with fun, this recipe is for you. It’s more than a craft or kitchen experiment—it’s a joyful little break from routine.
Short Description
These homemade rainbow bouncy balls are a fun, hands-on project that blends basic ingredients and simple science into a colorful, rubbery toy you can actually bounce. Great for kids and creative adults alike!
Key Ingredients
- 1 tablespoon white glue
- 1/2 teaspoon borax powder
- 1 tablespoon cornstarch
- 1 tablespoon warm water
- Food coloring (red, orange, yellow, green, blue, purple)
- 1/4 cup warm water
Tools Needed
- 6 small bowls or cups
- 2 medium mixing bowls
- Measuring spoons
- Spoon or craft stick for stirring
- Parchment paper or a clean plate for drying
- Gloves (optional, to avoid staining from food coloring)
Step-by-Step Instructions
Step 1: Prepare the Borax Solution
In a small bowl, dissolve 1/2 teaspoon of borax powder into 1/4 cup of warm water. Stir until the borax is fully dissolved.
Step 2: Mix the Glue Solution
In a separate bowl, combine 1 tablespoon of white glue, 1 tablespoon of cornstarch, and 1 tablespoon of warm water.
Stir until smooth. Add a few drops of food coloring for your first color and mix thoroughly.
Step 3: Divide and Color Your Mixture
Separate the glue mixture into six small bowls or cups. Add a few drops of food coloring to each to create red, orange, yellow, green, blue, and purple batches. Mix well until the colors are vibrant and even.
Step 4: Combine the Borax and Glue Mixtures
Working with one color at a time, slowly pour a small amount of the borax solution into the glue mixture while stirring. Keep stirring until it forms a rubbery lump that pulls away from the sides of the bowl.
Step 5: Create the Rainbow Layers
Take a small piece from each colored batch. Stack them in rainbow order—red, orange, yellow, green, blue, and purple—in the palm of your hand. Gently press the layers together without smearing the colors too much.
Step 6: Shape the Bouncy Ball
Roll the stacked dough between your palms to shape a smooth ball. Continue rolling until the surface becomes firm and even. The more you roll, the better the bounce.
Step 7: Let It Dry
Place the finished ball on parchment paper or a clean plate. Let it sit uncovered for 10–15 minutes to dry and fully set before bouncing.
Why You’ll Love This Recipe
– No cooking or baking required
– Uses basic pantry ingredients
– Great hands-on activity for all ages
– Creative, colorful, and customizable
– Doubles as an educational science experiment
– Quick results—ready to bounce in minutes
– Low-cost and mess-friendly with minimal cleanup
Mistakes to Avoid & Solutions
Too sticky to handle? Add a pinch more cornstarch and continue kneading.
Too hard or crumbly? You may have added too much borax—try using less in the next batch.
Colors mixing into brown? Lightly press the colors instead of over-mixing to keep the layers clean.
Not bouncing well? Keep rolling—it smooths and tightens the texture for better bounce.
Glue won’t thicken? Make sure your borax is fully dissolved and the water is warm, not cold.
Serving and Pairing Suggestions
This project pairs well with… fun!
– Perfect for rainy days, birthday parties, or a screen-free afternoon
– Serve alongside a homemade lemonade or fruit popsicle for a crafty kid’s day
– Makes a great gift—wrap it in cellophane with a rainbow ribbon
– Can be part of a larger STEM craft or science party for little learners
Storage and Reheating Tips
Storage:
Store the bouncy balls in a sealed ziplock bag or airtight container.
Keep them in a cool, dry place—away from direct sunlight.
Longevity Tips:
They’re best used within a week.
If they start to flatten, re-roll them to bring back the bounce.
Avoid:
Don’t refrigerate or freeze.
Don’t leave them in damp areas—they can absorb moisture and lose firmness.
FAQs
1. How long do the bouncy balls last?
They usually stay bouncy for 5–7 days if stored properly in a sealed bag.
2. Can I skip the borax?
Borax is essential for creating the chemical reaction that gives the balls their bounce. Without it, the mixture won’t solidify properly.
3. Will the food coloring stain hands?
It can. Using gloves helps, or wash your hands with warm soapy water immediately after handling the colored mixture.
4. Can I make these without cornstarch?
Cornstarch helps with the consistency and firmness. You can try substituting with baking soda, but the texture may be softer.
5. Are these safe for toddlers?
Yes, but only under supervision. The ingredients are non-toxic but not meant to be eaten.
Tips & Tricks
– Use gel food coloring for the most vibrant shades.
– Add glitter to each layer for sparkly bouncy balls.
– Try scented glue or a drop of essential oil for sensory fun.
– For a smoother surface, knead the ball for a few extra minutes after forming.
– Let the balls dry on a wire rack for an even, all-around finish.
Recipe Variations
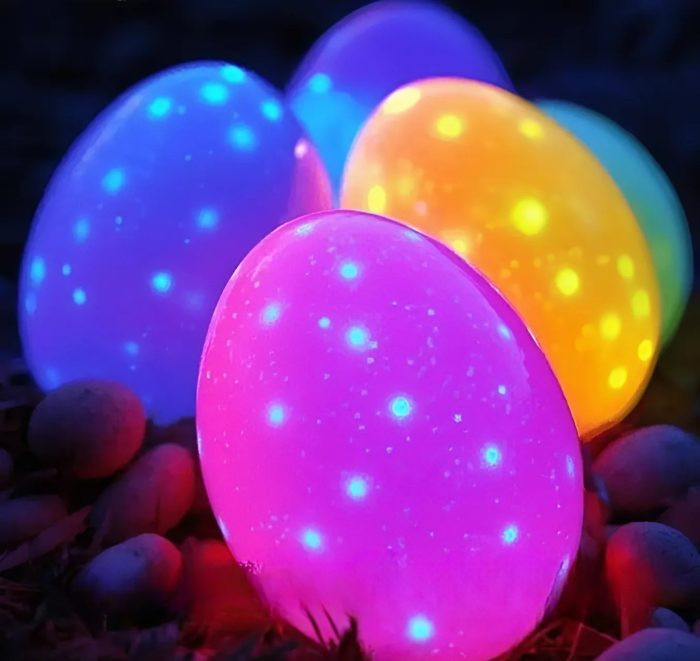
1. Glow-in-the-Dark Balls
Swap in glow-in-the-dark paint for part of the glue mixture. Follow the same steps, then “charge” the ball under light before bouncing in the dark.
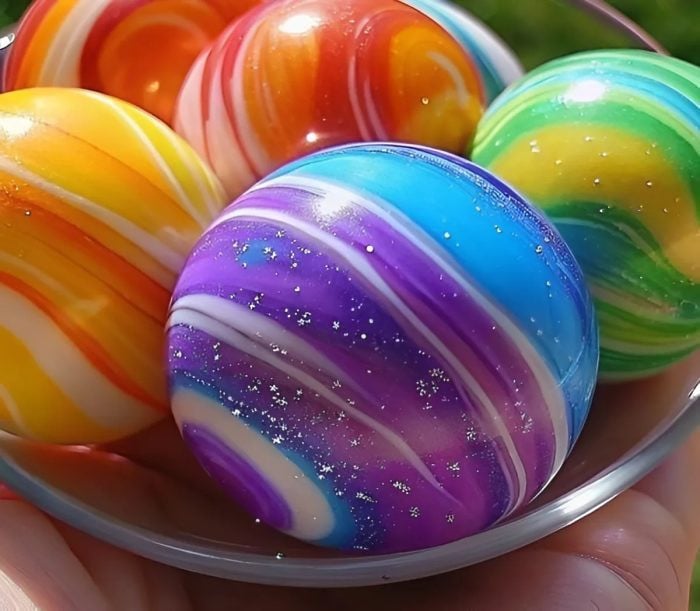
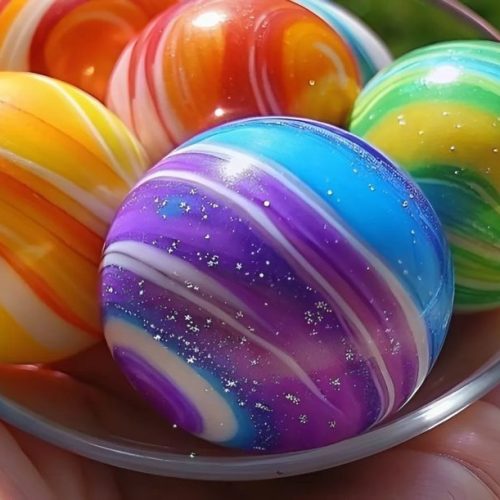
2. Galaxy Swirl Balls
Mix black, dark blue, and purple colors with a sprinkle of edible glitter. Lightly twist the layers before rolling for a marbled, galaxy look.
3. Mini Bounce Balls
Use half the ingredients and roll smaller amounts of each color. Great for goodie bags or party favors!
4. Pastel Spring Balls
Use pastel gel coloring and add a bit of white glue to lighten the shades. Perfect for Easter baskets or baby showers.
Final Thoughts
By the time the last streak of color rolled into a ball, the kitchen looked like a rainbow had exploded—but in the best way. It wasn’t neat or quiet, and it certainly wasn’t part of the original plan, but that’s what made it fun.
These little bouncy spheres brought a kind of cheerful chaos I didn’t realize I needed. They reminded me that not all joy has to come from a perfect recipe or a polished result—sometimes, it’s the unexpected swirl of glue and color that brightens the day.
Homemade Rainbow Bouncy Balls
Ingredients
- 1 tbsp white glue
- ½ tsp borax powder
- 1 tbsp cornstarch
- 1 tbsp warm water
- Food coloring (red, orange, yellow, green, blue, purple)
- ¼ cup warm water (for the borax solution)
Instructions
- In a small bowl, stir ½ teaspoon borax into ¼ cup warm water until fully dissolved.
- In another bowl, combine 1 tablespoon white glue, 1 tablespoon cornstarch, and 1 tablespoon warm water. Stir until smooth. Add a few drops of food coloring for your first color and mix well.
- Split the glue mixture into six bowls. Add food coloring to each to make red, orange, yellow, green, blue, and purple. Mix until vibrant.
- For each color, slowly add a little borax solution to the glue mixture while stirring. Keep stirring until it thickens into a rubbery dough.
- Take a small piece of each color and stack them in rainbow order—red to purple. Gently press the layers together.
- Roll the layered dough between your palms until smooth, firm, and round. Keep rolling for better bounce.
- Place on parchment or a plate and let sit for 10–15 minutes to firm up before playing.