As a child, peanut butter and chocolate were my ultimate weakness. Whether it was sneaking peanut butter cups from the candy jar or drizzling melted chocolate over a spoonful of peanut butter, that rich, nutty, and creamy combo was pure bliss.
Now, as an adult, I love finding new ways to enjoy those nostalgic flavors—especially in dessert form. That’s how these Chocolate Peanut Butter Dream Bars were born.
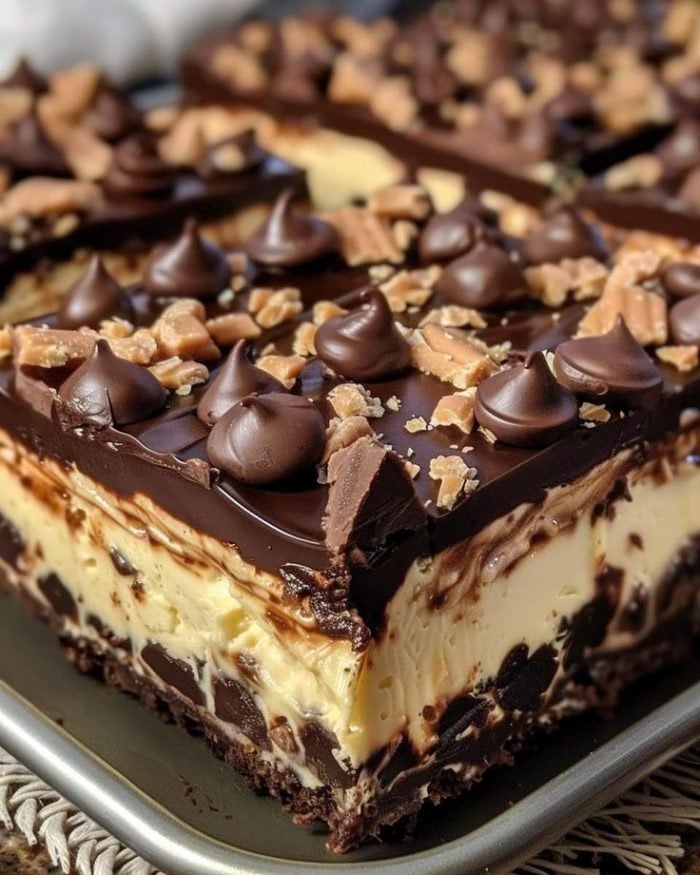
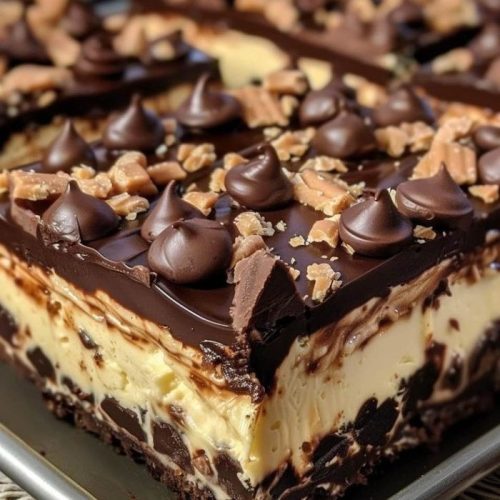
These bars are everything I love about peanut butter and chocolate but taken to a whole new level. They start with a buttery peanut butter cookie crust, followed by a luscious peanut butter filling that’s just the right amount of sweet and creamy. Then, a silky layer of chocolate ganache seals the deal, topped with crunchy chopped nuts for the perfect finishing touch.
They’re no-bake, incredibly easy to put together, and dangerously addictive. I made a batch for a family gathering, and before I could grab a second piece, they were gone. That’s when I knew I had to share this recipe! If you’re a peanut butter and chocolate lover like me, you’re in for a treat.

Short Description
These Chocolate Peanut Butter Dream Bars are a no-bake dessert with a crunchy peanut butter cookie crust, a creamy peanut butter filling, and a rich chocolate topping. They’re easy to make, indulgently delicious, and perfect for any occasion!
Key Ingredients
- 1 package (12 oz) peanut butter sandwich cookies
- 1/2 cup unsalted butter, melted
- 1 cup creamy peanut butter
- 1 cup powdered sugar
- 1 cup heavy cream
- 1 tsp vanilla extract
- 1 cup semi-sweet chocolate chips
- 1/2 cup chopped nuts (such as peanuts or almonds)
- Additional chocolate for drizzling (optional)
Tools Needed
- Food processor or rolling pin (to crush cookies)
- 8×8-inch baking dish
- Mixing bowls
- Electric mixer or whisk
- Spatula
- Small saucepan
- Sharp knife (for slicing bars)
Cooking Instructions
Step 1: Prepare the Crust
Crush the peanut butter sandwich cookies into fine crumbs using a food processor. If you don’t have one, place them in a zip-top bag and crush them with a rolling pin. Transfer the crumbs to a bowl and mix in the melted butter until the mixture resembles wet sand.
Press the mixture firmly into the bottom of an 8×8-inch baking dish, making sure it’s even. Place in the fridge to set while you prepare the filling.
Step 2: Make the Peanut Butter Filling
In a mixing bowl, combine the creamy peanut butter, powdered sugar, and vanilla extract. Using an electric mixer or a whisk, beat until smooth.
In a separate bowl, whip the heavy cream until soft peaks form, then gently fold it into the peanut butter mixture. Spread the filling evenly over the chilled crust and return to the fridge.
Step 3: Prepare the Chocolate Topping
In a small saucepan over low heat, melt the chocolate chips with 1/4 cup of the heavy cream, stirring until smooth and glossy. Pour the melted chocolate over the peanut butter layer, spreading it evenly with a spatula. Sprinkle chopped nuts on top for extra crunch.
Step 4: Serve
Refrigerate the bars for at least 2 hours, or until the chocolate is fully set. Once firm, use a sharp knife to cut into squares. For an extra indulgent touch, drizzle with additional melted chocolate before serving.
Why You’ll Love This Recipe
No-Bake & Easy – Perfect for when you don’t want to turn on the oven!
Rich & Creamy – The peanut butter filling is silky smooth, while the chocolate topping adds decadence.
Perfect Balance – Sweet, salty, crunchy, and creamy in every bite.
Crowd-Pleaser – Great for parties, potlucks, or simply satisfying a sweet tooth.
Mistakes to Avoid & Solutions
1. Not Pressing the Crust Firmly Enough
If the crust isn’t packed tightly, it may crumble when slicing. Use the back of a spoon or the bottom of a measuring cup to press it down firmly.
2. Overheating the Chocolate
Chocolate can seize if overheated. Melt it slowly over low heat or in the microwave in 15-second intervals, stirring between each.
3. Not Whipping the Cream Properly
Under-whipped cream can make the filling too soft. Beat until soft peaks form, meaning the cream holds its shape but still has a slight curl at the tip.
Serving and Pairing Suggestions
Best Served Chilled – These bars taste best straight from the fridge, where the layers hold their shape perfectly.
Pair with Coffee – The richness of the bars pairs beautifully with a hot cup of coffee or espresso.
Dress It Up – Serve with a scoop of vanilla ice cream for an extra indulgent dessert.
Storage and Reheating Tips
Refrigeration – Store in an airtight container in the fridge for up to 5 days.
Freezing – Freeze bars in a single layer, then transfer to a sealed container for up to 3 months. Let them thaw in the fridge before serving.
Reheating? Not Needed! – These bars are best enjoyed cold, straight from the fridge or freezer.
FAQs
1. Can I use crunchy peanut butter instead of creamy?
Yes! It will add a bit of texture to the filling, making it slightly firmer.
2. What’s the best way to slice these bars neatly?
Use a sharp knife and wipe it clean with a warm, damp cloth between cuts for cleaner slices.
3. Can I make these bars dairy-free?
Absolutely! Swap the butter for melted coconut oil, use dairy-free chocolate, and replace the heavy cream with coconut cream.
4. Can I double the recipe for a larger crowd?
Yes! Simply use a 9×13-inch pan and double all the ingredients.
5. My chocolate layer cracked when slicing—what went wrong?
If the chocolate is too firm, let the bars sit at room temperature for 5 minutes before slicing to soften the top layer.
Tips & Tricks
For a Crunchier Base – Mix in 1/4 cup of crushed peanuts with the cookie crumbs for extra texture.
Make it Extra Indulgent – Swirl melted peanut butter into the chocolate topping before setting.
Add a Touch of Salt – A light sprinkle of flaky sea salt on top enhances the chocolate-peanut butter flavor.
Recipe Variations
Chocolate Lover’s Dream – Swap the peanut butter sandwich cookies for chocolate cookies and use dark chocolate for the topping.
Salted Caramel Peanut Butter Bars – Drizzle caramel sauce over the peanut butter layer before adding the chocolate topping.
Nut-Free Version – Use crushed graham crackers for the crust and sunflower butter instead of peanut butter.
Final Thoughts
These Chocolate Peanut Butter Dream Bars are everything you want in a dessert—rich, creamy, and bursting with peanut butter and chocolate flavor. They come together in minutes and require no baking, making them the perfect treat for any occasion.
Whether you’re sharing them with family, serving them at a party, or sneaking one as a late-night indulgence, they’re guaranteed to satisfy.
Give them a try, and don’t be surprised if they disappear faster than you expected! Happy baking!

Chocolate Peanut Butter Dream Bars
Ingredients
- 1 package peanut butter sandwich cookies
- ½ cup butter
- 1 cup creamy peanut butter
- 1 cup powdered sugar
- 1 cup heavy cream
- 1 tsp vanilla extract
- 1 cup semi-sweet chocolate chips
- ½ cup chopped nuts (such as peanuts or almonds)
- Additional chocolate for drizzling
Instructions
- Make the crust: Crush the peanut butter sandwich cookies into fine crumbs using a food processor or a rolling pin. Mix with melted butter until it resembles wet sand. Press firmly into an 8x8-inch baking dish and chill in the fridge.
- Make the peanut butter filling: Beat peanut butter, powdered sugar, and vanilla extract until smooth. In a separate bowl, whip the heavy cream to soft peaks, then fold it into the peanut butter mixture. Spread evenly over the crust and chill again.
- Add the chocolate topping: Melt chocolate chips with 1/4 cup heavy cream over low heat, stirring until smooth. Pour over the peanut butter layer and spread evenly. Sprinkle chopped nuts on top.
- Chill and serve: Refrigerate for at least 2 hours until firm. Slice into squares and drizzle with extra melted chocolate if desired.


